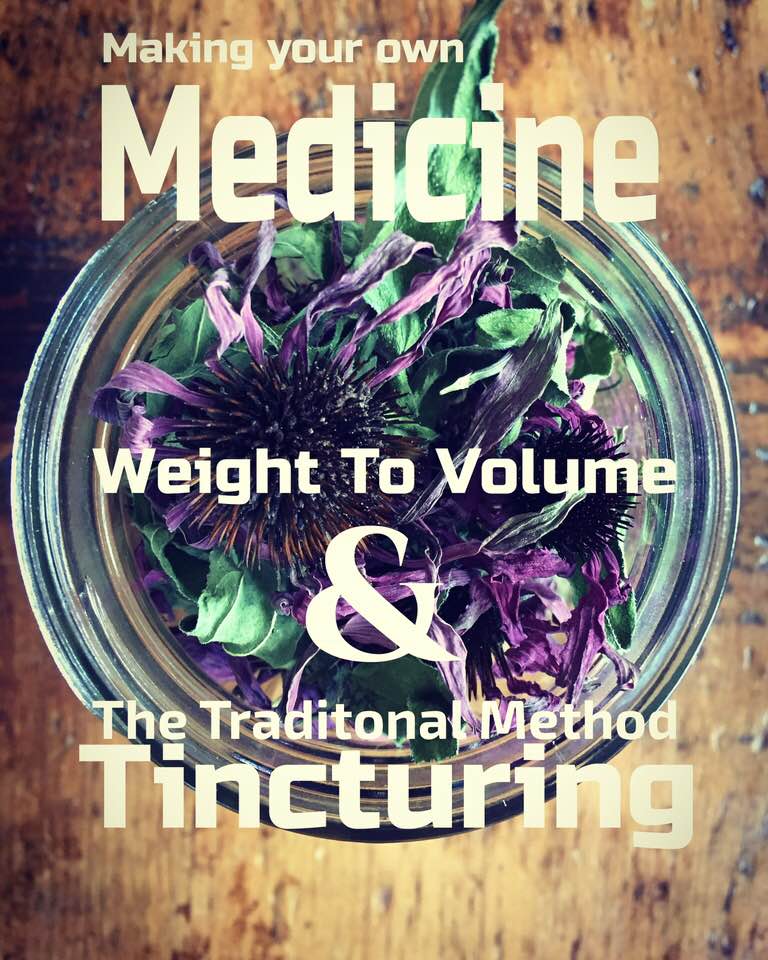
 Making Your Own MedicineWith millions of articles and books on how to tincture and all the different nuances of this form of medicine making, I completely overlooked actually adding my two cents to this well covered topic. Seems fitting to have a post and an herbal council this month dedicated to keeping this kind of medicine making in the home apothecaries I so want to see all of you have at your fingertips. Thank you for venturing in for a bit to take in some medicine tending. So, the oldest and best way in my experience to make medicine from plants is to add them to water. Yup. So gorgeously simple! And you already know some or all of this I bet. These would be called teas (steep 5-10 minutes), infusions (steeped 1-8 hours), and decoctions (simmered 20 minutes or more). Cooking the plants in water is my first and favorite way of medicine making and links me up to my ancestral path for we all have a great auntie or grandparent who knew the plants for medicine and were most likely a well known healer in their time. The smell and taste takes me there. There are times, however, when a later form of medicine, called a tincture, or plant extract, really shines. These are concentrated plants extracts taken by the drop using a menstruum (vinegar, glycerin, or alcohol) to extract the medicine and sometimes some of the nutrients too, depending on the menstruum chosen. Here's why tincture making skills jumped into the healer's medicine bag as we traveled through time: 1- Longevity and Stability: An herb, once tinctured, will retain its medicinal qualities far longer than in most other preparations. Alcohol tinctures will last for many years. I do make smaller batches and use them up, and make new. Plus they're heavy to move and we moved twice with a ridiculous number of jars! I suggest making small batches for home apothecary tending. This way you can increase your variety of plants at your finger tips. 2- Easy to Administer and Travel With: Once prepared in tincture form, the herb is ready to administer with no further preparation. The tinctures are dispensed directly under the tongue or mixed with warm water, tea, or juice and can be tucked into travel bags easy. Just be sure you know the rules for flying with liquids or they'll confiscate your precious medicines. 3- Ease of Preparation: Anyone is capable of making high quality tinctures. All one needs is good quality herbs, a high quality solvent or menstruum (your solvents are alcohol, vinegar, or glycerin), a measuring cup, jar, labels, a dark place to store them, and a little time with lots of love for the process. You're making medicine. It's truly amazing when you step back and look at it all. 4- Storage: Easy if you contain your excitement and make small batches! Tinctures store compactly and conveniently in a small space, always ready to use. They're excellent for first aid kits too. 5- Cost Effective: Tinctures are becoming extremely expensive to purchase today making it prohibitive for people to afford their medicine. This is “the people's medicine" – our original medicine and is a birthright to have access to it. So I teach how. Period. It's not hard and so much better to make yourself if you can. What you're paying for is more about the person’s time to make it for you. If this may be what you need, I make for people too. But know you can do it too anytime you want to. 6- Personalized Formulas: As you learn to work with various herbs, you'll develop favorite ones that just call to you. Your needs will change over time and making your own gives you the creative freedom to design tincture combinations and formulas from your home apothecary. 7- Selecting the Herbs: Almost all herbs tincture well with the correct solvent. Herbs can be tinctured as a ready-made formula or tinctured as single herbs and combined later into formulas. Most herbalists prefer to tincture herbs as single extracts. This gives them greater control of the water/alcohol ratio for individual herbs and their constituents. It also allows greater flexibility and creativity when crafting formulas. I do make formulas this way professionally but for my family I make smaller jars of the herbs mixed together fresh and they tincture all together. It’s easier and keeps me humbly rooted in tending to my loved ones. I love, love, love the way they turn out. You get to decide what works for you. 8- Selecting the Menstruum: The menstruum is the solvent used to extract the biochemical constituents (yes, fancy lingo for the medicine and nutrients) of the plant, and to preserve the resulting solution. There are basically three menstruums used in tincture preparations: alcohol, vinegar, and glycerin. Like anything, there are pros and cons to each (more below on this); and like anything, everyone has their personal favorite and considers it the best. There are some intricate things to consider for each. Alcohol sensitivity (means vinegar and glycerin options only), after the nutritional properties (these extract better in vinegar and glycerin), when to utilize heat for better extraction (I warm glycerites), longest shelf life and extraction stronger compounds without heat (alcohol shines here), and dosing considerations (I increase doses with vinegar and glycerin tinctures). 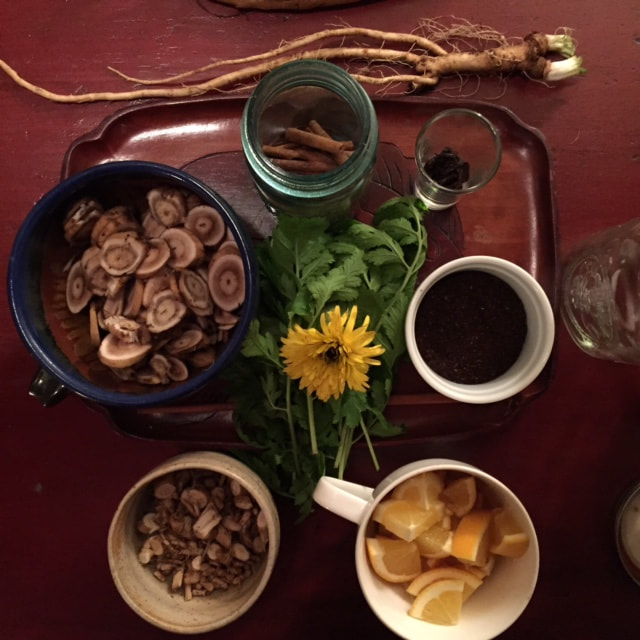 Formulation components can be tinctured separately or together. You get to decide. Steps to Tincturing the Traditional Folk Medicine Way
 Menstruum (Solvent) Choices(Here's a little excerpt from "Birthing an Herbalist in 13 Moons" at ElderMoon School of Herbs on-line herbalist training journey with the medicine plants.) The following is a list of the solvents (mentsruums) commonly utilized in making herbal tinctures and some guidelines for what plant constituents they most effectively dissolve: 1. ALCOHOL Alcohol has both prolonged keeping power and serves as a powerful solvent or extractor. It has the ability to break down, absorb, and preserve much of the plant material. There are many varieties of alcohol used, though every herbalist has their favorite: brandy, rum, vodka, gin, Everclear, and 190 proof grain or potato. Alcohol that has a natural water constituent (such as those listed above) is called 'Aqueous Ethanol' and generally has a water to alcohol ratio of 40-95% alcohol. Aqueous Ethanol dissolves: alkaloids (limited), organic salts, organic acids, most glucosides, sugars, vitamins, minerals, enzymes, tannins, bitter compounds. Absolute Alcohol, or Pure Grain Alcohol, is more effective for dissolving resinous and waxy material. It is used to dissolve: wax, resin, fat, balsam, oleoresin, glycosides, some alkaloids, sugars, vitamins, volatile oils. Easy Starting Point: Begin tincturing with 100 proof potato vodka. (50% alcohol and 50% water). 2. GLYCERIN Glycerine is a chemical constituent of all the fatty oils from both animals and vegetables. An excellent nutritive solvent, glycerin does not have quite the versatility of either water or alcohol, but its advantages are that it tastes good because it’s sweet, is safe and effective for children, and is in and of itself very nourishing and soothing. It dissolves: sugars, enzymes (dilute), glucosides, bitter compounds, saponins (dilute), tannins, minerals, vitamins. Glycerine also has excellent preservative qualities. It’s great for children’s preparations and for those refraining from alcohol where the use of alcohol in tinctures would be prohibitive. Be sure to request Vegetable Glycerin when buying; it is of a much higher quality. Vegetable Glycerin is available at many natural food stores and herb stores. These tinctures require a period of warming and a slight dilution with water in making them. Quick note for the curious: we dilute 4:1 with distilled (mineral hungry) water, chop herbs small using the same proportions given above, and warm the closed jar in a water bath for a few days at the start and again at the finish (we use a crock pot on lowest setting) with a total of 6-8 weeks of sitting and shaking occasionally. These are also light sensitive so tend well to preserve the medicine. 3. VINEGAR I used to teach a FOUR hour class on vinegar and herbs! Water is the first and made by the Divine which is why it's the best solvent to start with as a budding herbalist. Vinegar, especially apple cider vinegar, is one of the oldest solvents used. However, it's not highly regarded today by many herbalists or medicine making companies and is considered secondary to alcohol as a solvent due to the greater strength of and shelf life of alcohol. Though not as strong as alcohol, it has other definite advantages and should not be ignored. Apple Cider Vinegar contains minute quantities of trace minerals our bodies crave and has a mild acidity that balances and aids digestion. The acetic acid and potassium content help to activate the friendly bacteria in the digestive track. I highly recommend Vinegar as a solvent for tonifying/nutritious herbs and for preparations that are taken over a long period of time for health maintenance, such as in high vitamin mineral formulas and tonic formulas. Vinegar is an excellent solvent for children’s formulas and for alcohol sensitive folks too. Vinegar tinctures are excellent for extracting some plant alkaloids (such as lobeline from Lobelia), but are not as good for extracting the more acidic biochemical ingredients and so doses are usually doubled as a general rule for making sure one gets the proper amount of the more medicinal compounds. A commonly taught thing about Vinegar Tinctures is that they “will not last very long”. Most say 6 months. I disagree and have not had one spoil yet and many herbalists I know agree. What I teach is make enough to get to the next harvest (plus a little extra is my practice). When a vinegar tincture goes bad (and you WILL know) it's usually the quality of the vinegar and it will smell sour and have fermentation bubbles forming around the edges. Non-pasteurized live vinegar will sometimes form a mother and this is fine. It means it's alive, not spoiled, and you just have to remove “the mother” at the surface – which can be used to make more vinegar. Using the rule of one season to the next keeps your stock moving and freshness then remains at the top of your practice too. Happy Tincturing and Apothecary TendingThis month we are deepening our tincturing skills at ElderMoon School in our Monthly Herbal Councils. We'll cover weight-to-volume tincturing as another step beyond this traditional way. While the traditional folk way is absolutely enough, some want to deepen their practice with medicine making. We'll cover the climate within the herbal circles as they attempt to justify and legitimize their existence by standardizing. There is a place for this as herbalism evolves. In the end we all usually come back around to water based preparations made from plants we tended and stored in our own apothecary (smile) but it's so good to travel the road anyway and come back to that and be in community too all along the way, eh? We'll speak to all of this in council. Do check out the recorded and archived herbal councils each month (BTW free if you're already a student in other courses here at ElderMoon School). It's so worth the low commitment simple hour a month to plug in and enjoy 'talking plant' in community. Much Love, Jen 
0 Comments
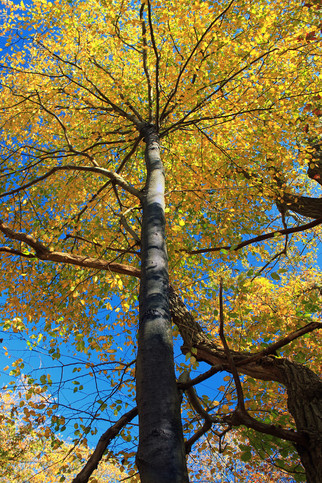
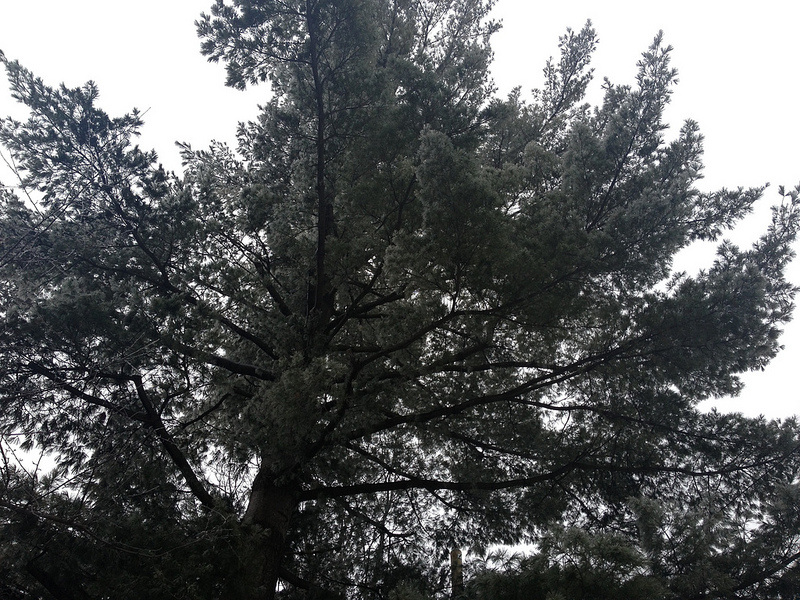 White Pine - Pinus strobus What trees teach me about honoring the medicine in their bark...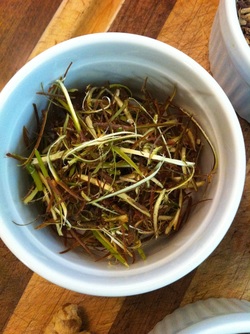 Whittled Black Birch Bark for Root Beer Syrup Whittled Black Birch Bark for Root Beer Syrup Trees are sanctuaries. They hold the map of the past through their whole body, as unique as a fingerprint, but reach upward and outward toward a future we sometimes struggle to see. As a small child my closest relationship to any tree was White Pine. When I close my eyes, I can still feel the sway of the sixty foot White Pine I climbed to the top of regularly to my favorite spot where I could wedge my little six year body into a nook and safely drift about on the wind with the branches. The floating feeling in the belly holds moments akin to flying. I would bring bread and seeds as offerings to the mama birds nesting up there and sometimes nap softly to the rocking of such a great mother dancing with the wind. I climbed up there for years until we moved away at fourteen but never has my connection to White Pine been changed by geography. Fall is traditionally the season for bark harvest and it may be one of my most satisfying medicine making tasks. It requires I lean into my relationship with a tree and these relationships are different than with smaller herbaceous plants. Yes, we can have different relationships with and honor the plants, trees, animals, insects, people, and even the elements, landscapes, and microbial world. The task of whittling bark with my sons over the years has always been enthusiastically received here. This was how a good knife and the care of such tools was first introduced to them. When whittling, the mind also enters that hypnotic, trance-like state of being, much the way gazing at a fire captivates us to higher thinking. The therapeutic medicine is already working just by being available to such a connected, receptive state. Rushing about, task oriented, with a connection to time that is stressed and manic will never produce a medicine nearly as potent as one made with the process honored. Seeking connection to the trees is the beginning. Knowing how to find, tend, intuit, harvest, and make good medicine that can live near you, in your home apothecary, is what I speak to here. 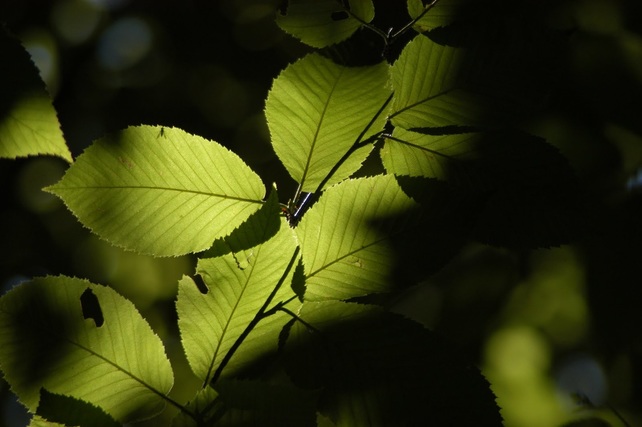 Black Birch - Betula lenta Let's Talk BarkWhat is bark to you? Some describe is as being like our skin and this is in some ways true. Bark is constantly growing and changing based on the needs of the tree and the influence of its surroundings in the local environment. We can see this within the rings of the tree and how widely spaced or close together they are and scientists study this fingerprint of the weather the tree endured within its life. Elevation changes how trees grow as well and they are smaller and smaller with higher elevations in some regions. Interacting with the world around them determines what strong chemical constituents a tree will make. We make medicine from the plants, or in this case the trees, that make chemical compounds to ward off insects, disease, sun damage, and other elemental and environmental exposures. Their protective medicine made for their health is what we take in and stimulate within our bodies. It's so simple but still full of such magic for me in that we can literally be this connected to the plants and trees. Many forget. But many are remembering too. Trees are part of a network system within a forest and so they’re very design includes interacting within community as a way to thrive and protect themselves and make strong compounds along the way. Bark contains the growing cells of the tree, as well as the cells required to transport water and sugar for photosynthesis on a cellular level. Bark is always interacting with the rest of the tree, the surrounding trees, the mycorrhizae in the soil, and is constantly reading and responding to any changes in its surroundings. Demystifying plant magic with the science surfacing today that proves these connections to be true does not remove the magic for me. I hope this is true for you. It is still truly amazing how trees, plants, people and all living things create form from water, sun, air and earth. So just under the thick outer bark is the layer we seek for medicine making. The outer bark is not the place to harvest for this is a hardened protective coat. We are seeking the cambium layer that is the alive and actively responding part of the tree. It can be white, green, yellow, even pink, and is generally smooth, moist, and clearly alive as a thin layer of active cells that surrounds the entire tree just under the tougher outer bark.  White Willow - Salix alba What is Ethical Wildcrafting? "Ethical Wildcrafting' was a term coined decades ago in the herbal medicine world and is the practice of harvesting plants and trees conscientiously, to avoid damaging the health of the population or the overall ecological system they thrive in. It’s especially important here because if you don’t harvest bark properly, you will literally kill the tree. The basic principles of harvesting are simple:
This issue is close to my heart, as I’ve watched plant populations decline as people violate the sanctity of the natural world in the name of fear and greed. Ignorance is no excuse either. Honoring the basic principles of land stewardship means simply being a human who acknowledges the interconnection of all things in the natural world. Every action we take on a piece of land requires the natural world to respond to it. So we would be kind and wise to ask ourselves how our choice affects the whole. Harvest intentionally and teach the people around you to do the same so our natural world stays abundant, potent, and thriving. Follow United Plant Savers as a great resource for staying aware of at risk and endangered plant and tree species. 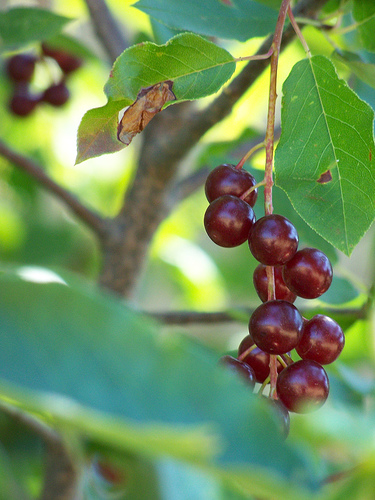 Wild Cherry Bark is a traditional lung remedy (Prunus virginiana) The Unintentional Death of a Tree Maybe you can imagine the impact of removing one tree because of poor or unintentional reasons. The most common way to kill a tree fast and efficiently is by ‘girdling the tree’, or removing a section of bark around the entire circumference of the trunk of the tree. Please do NOT remove bark all the way around the base of the tree like this. Girdling kills the tree because the leaves and roots can no longer connect and transport water, nutrients and sugar between the tree top and roots. This leaves the tree to starve to death. Girdling is one thing if you’re carving a homestead out of the wilderness for it’s a time-honored way of clearing forest, but it’s something entirely different if you’re just doing it because you don’t know any better or are filled with greed or have blatant disrespect. And all of this affects the medicine. We're being asked to think in terms of the ecology of restoration instead of consuming and taking. 'Having enough' is built into the restoration way of being. How to Harvest Bark Tools & Timing:
Harvest bark when the nights become cool, the days are warm and crisp, and the leaves are changing color and just starting to fall. You want the tree’s energy to be focused on shunting all of its activity down to the Earth for winter. This concentrates the medicine into the moving part of the bark we spoke of called the cambium layer. What Tree is Calling You Common species that make great medicine include White Willow, Wild Cherry, Witch Hazel, White Oak, Sassafras, Black or Silver Birch, Black Haw, White Pine, Cedar, Juniper, Hemlocks, Spruce and more depending on the part of the world one lives in. It’s wise to also find the trees you are seeking medicine from in the early fall so you can positively identify them when they still have leaves. As you spend more and more time with the trees, you will know them from the bark which is always quite unique. Once your tree is located, simply return when the time for harvesting arrives. Choose a smaller tree so you can reach the branches or get a pole pruner. These scouting trips are part of your connection, relationship, and honoring of the medicine within the bark of the tree that calls. Be aware to never harvest on state lands at all or other's property without permission. While scouting and finding your tree, do taste the tree. Cut or pinch off a little twig, after intuiting a sense of permission and affirming this is ‘the tree’ I seek. Chew on it until you get a good sense of the flavor. Then spit it out if need be. With a little experience, you’ll be able to tell how strong the medicine will be from this tree. Even if you’ve never tasted this medicine before, know that strongly medicinal barks will affect your mouth almost immediately. Willow and Witch Hazel suck up all the spit in your mouth (astringent), sassafras makes your mouth feel watery and slippery,(demulcent), black birch tastes like root beer or wintergreen for some (aromatic), Wild Cherry tastes a bit nasty but is identifiable as such, Pines taste just like the sap smells (aromatic) and these essential oils travel quickly up through your sinuses and down to your lungs. If you don’t notice anything, even if you don’t know what it should taste like, move on and be sure to only make medicine from a tree you absolutely know. If you’re not routinely tasting the plants you harvest, i suggest getting into the habit. This is one of the skills of an herbalist for testing quality, just as you would use all your senses to choose vegetables or fruits. The medicine person does the same for evaluating the medicine. Medicinal content changes throughout the season and from year to year, based on where each tree is in its growing and reproductive cycle, and what its life has been like this year. This is true for smaller herbaceous plants too. If a particular tree isn’t strong enough this year, come back next year and see what it says to you. 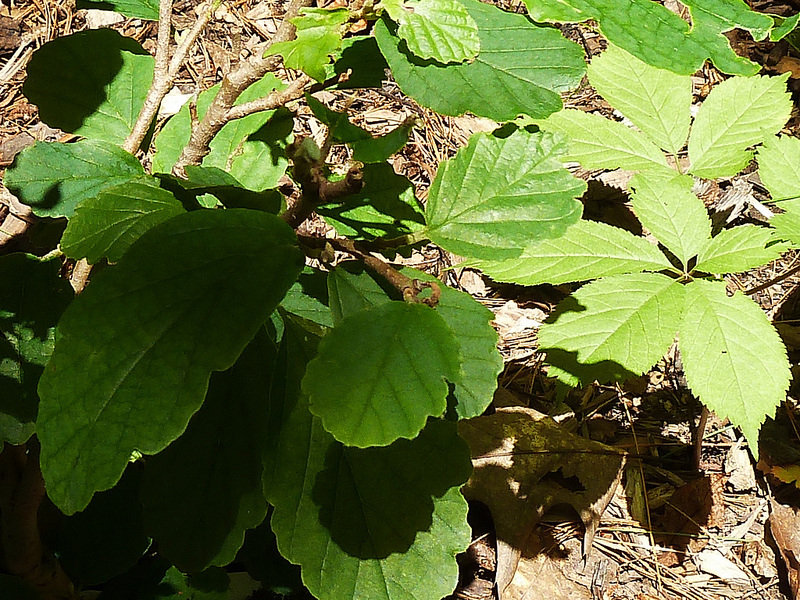 Witch Hazel - Hamamelis virginiana Time to HarvestSo now you’re sure you’ve got the right tree, and it tastes great (or terrible) so you know it’s got some magic and good medicine in it. Next I offer a gift to the tree. This a traditional way of working and you can decide what works for you. A moment of silence, a song, a prayer, some of your lunch or water, or a handmade something that honors the tree you are taking medicine from. The next step is to harvest the bark. Choose a small branch, maybe the size of your wrist or smaller. Find a place where the branch branches, then identify the collar, or the fatter part at the base of the branch. Use your pruners or saw to cut the branch just beyond the collar; if you cut into the collar itself, the tree won’t heal well and could rot from microbial invasions at the site. Make your cut parallel with the collar, so water won’t collect in the cut. Don’t let the wood split or crack, cut it cleanly so you don’t hurt the part of the branch you’re leaving behind; if necessary, cut part of the way through from the bottom up, then finish by cutting from the top down. Remember that the priority is to not hurt the tree: don’t take more than the tree can spare, don’t take more than you can use, and don’t make cuts that will hurt the tree long term. For smaller quantities needed because you know a large branch is too much, I cut thumb-sized branches and estimate how many to fulfill my needs. You get better at this estimating with time and practice. Time to Whittle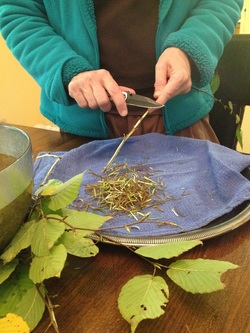 Whittling Black Birch Bark Whittling Black Birch Bark Bring the branches to your place in the sun, like me here, bring inside by the fire if it's too cold out for you. Look them over carefully and wipe off any dirt, lichen, insects etc. Use the pruners to remove tiny twigs and pile them up for they’re medicinal but you don’t need to save them unless you have a use for them. I often add pine needles to my bark preparations, just for the record. So now you can cut the branches into smaller pieces at this point to make them more manageable, 1-2 foot sections work well. When you’re ready to whittle the bark, sit with one end of a branch in your non-dominant hand, and the other over your lap in front of you. Use your knife to whittle down the length of the branch, always working the knife away from you so there are not accidents, removing long strips of bark. You want to make sure you get the cambium layer, the inner bark that contains all the good medicine, but not the wood. Remember, the cambium can be white, green, yellow, or pink, and is generally smooth, moist, and clearly alive. If you’re shaving off wood, make your cuts shallower; if you’re leaving the cambium on the wood, go back and shave it again. If you’re struggling to shave the bark, try switching knives because sometimes a different size, shape, or well sharpened blade does the trick. When you’re done, the branch should be all wood with no bark visible. Unneeded parts make good kindling for the fire. Making the Medicine To make bark medicine, you can tincture it fresh in alcohol or vinegar, infuse it in olive oil for topical uses, or dry it for later uses of bathing, teas and decoctions, or syrup making. Drying Bark: Spread the bark in a single layer on a drying rack in a cool, dark place, and stir regularly until dry, a few days to no more than a week. Even better is a dehydrator. Once it’s dry, store in jars, or bags away from light and well labeled. Dried bark is useful for teas and decoctions, ground into poultices. Fresh Bark Tincture or Vinegar: Bark, because it is so fibrous and dense, needs more liquid to extract all the medicine so fill your jar with the fresh whittled bark and don’t pack it too tight. Most barks prefer lower alcohol content, too, so use 40%-50% alcohol (vodka or brandy work well). Next fill the jar with the alcohol or vinegar and cap tight and shake. Label well with the common name, latin name and date. Shake a few times per week, store away from direct light and you can strain and use after two months. It will keep for more than 10 years. Dried Bark Tincture: I fill my jar 1/2 full with dried bark if you have or needed to buy it already harvested. Then fill with your vodka or brandy or warmed vinegar, cap and shake a few times per week for 2 months, labeled well. Strain, re-bottle and label for use. I hope you decide to give this a try! It’s so easy and satisfying, especially in the dead of winter when you clear up that cough with your own White Pine Bark vinegar or tincture, or help a brutal headache with White Willow Bark you made yourself with the tree right outside your window that you love deeply, or eased postpartum swelling or hemrroids with a Witch Hazel Bark sitz bath. I love hearing your successes and failures with medicine making as we all learn equally from both. Do let me know how it goes! My recipe for Root Beer Syrup is always better with fresh whittled Black Birch Bark. Enjoy. xo-Jen
Herbal Courses On-Line and LIVE at ElderMoon School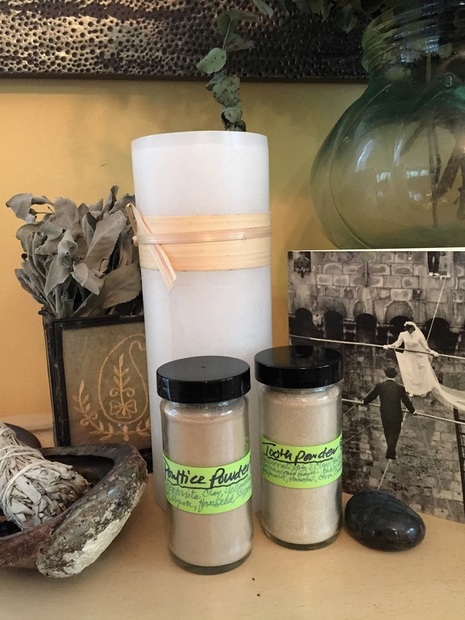 Good Mouth Care the Herbal WayUsing tooth powder is definitely not a new thing. Many today globally still use some form of clay to re-mineralize and clean their teeth daily with consistently good results. My husband lived in Germany for many years and that's what many use in Europe. It comes in a light weight cardboard box too. When I think about all the toothpaste tubes heading to the dump, I'm concerned. How will these ever breakdown? Even if recyclable, what about the toxic processes necessary to recycle certain plastics? Plus many the ingredients in commercial toothpastes are just not good for us. The mouth is full of blood vessels and mucosa designed to absorb significant amounts, quickly, straight into the bloodstream, including much of the unwanted chemicals, artificial sweeteners, and dyes that are known neurotoxins. The rest of it ends up in our water supply after spitting them out. There is another way, yes? The main ingredient in many tooth powders is Bentonite Clay. Not only does it bind to and draw out heavy metals and toxins but it is alkaline and full of minerals. There are many simple herbal tooth powder recipes that are so easy to follow. Just beginning is the hard part. Most health food stores will have all your ingredients or try Mountain Rose Herbs on-line. Basic Tooth Powder Recipe: Mix Equal parts of: Baking soda, Bentonite Clay powder, Myrrh powder, and Sea Salt powder (grind the salt in a clean coffee grinder for a minute to powder so it is less abrasive). I love adding Spearmint, Peppermint, or Fennel Essential Oil to up the flavor and the antimicrobial action. Add 30 drops per 1 cup of mixed powder. Sift the powders through a fine mesh sieve, including the essential oils to break them up because they form little beads of oil in the powders. Once combined well, spoon into a small glass jar, label, and you're ready. When you need to brush, pour a small amount in your hand, wet your toothbrush, and brush as usual. There are times when I add other powdered plants to this mix to up the re-mineralizing and healing properties of the blend. Homemade Herbal Mouth RinseThis is a strong and effective mouth rinse particularly for those with gingivitis and periodontal disease. Also helpful for toning gums, keeping them tight to the teeth, and for cold sores, sensitive gums and teeth. Those with festering infections up around the tooth roots that actually drain into the mouth will benefit from this used daily. These active situations as well as the low lying infections of periodontal disease, have been linked to bone and tooth loss, heart disease and stomach cancers. Gum flapping has many promises, is very invasive and traumatic, and I have seen dentists unable to tell what quadrant was done once healed. Sometimes we need surgery. But the point of invasive surgeries is to change the situation, yes? Laser treatments and antibiotic injection to the tooth roots are other options. Insurance companies won’t pay for the care needed either, unless we pay more, which completely disturbs me and makes me look honestly at our healthcare system. Treating our gums is far more cost effective than treating heart disease and cancer. Yes, we still have options for supporting tooth and gum health. I’ve made this herbal based mouth rinse and given the recipe out for more than 20 years with great reports of great results. You begin by making a full strength tincture. When done, it has a few additions to ease the alcohol content but keep it stable and improve taste and healing properties. Those with alcohol dependency issues cannot use this remedy and so I suggest salt water gargles daily for them, which work great too. We have to tend more to the openings in our body that are more susceptible to microbes from the outer world. Here is another one for tending to the mouth. Ingredients & Instructions:
Your yield for 1 batch of full strength tincture? I estimate you can make FIVE 17oz. bottles of finished mouth rinse! Maybe six depending on the dried versus fresh herbs you get. Yes, it's Earth and body friendly, effective, and very cost effective too. May you find simple, powerful healing among the medicine plants like so many have. The plants wait for us and are gifted medicine keepers we have evolved on. Each of us must come in our own time back to some of the simpler ways of tending to our health. Interested in learning more about medicine plants?This is part of one of our recent lessons for the new herbalists coming into the world this year through "Birthing an Herbalist in 13 Moons" , an on-line course I designed for training you to know how to make simple powerful medicines right from your own well-stocked apothecary designed by you, for you and your family. I walk with you through the whole course and it's a good, strong journey together deep into the plant world our ancestors knew well. A new group is starting in April and there's a discount until the end of March. See the full description for all the details in the following links. Questions Welcomed. ElderMoon School xo-Jen 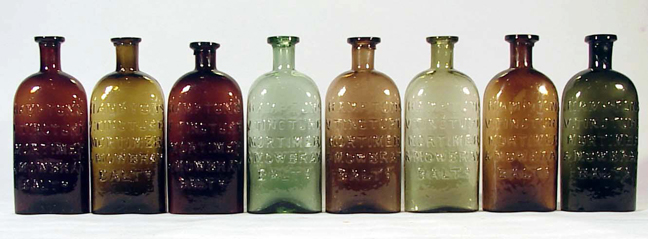 ~ Seasonal Digestive Tonics ~ |

 | Birthing an Herbalist in 13 Moons is starting again in March 2016 - This an interactive on-line course in herbal medicine that will provide you with a solid foundation for learning not only the skills and language of an herbalist, and the science of the body but also the way we approach Nature and the plants in order to learn directly from them. We cultivate ourselves along the way. The on-line course starts March 2016 and the in-person course begins May 2016. See our classes at: |
Jennifer Costa, Herbalist-RN, Teacher, Botanist BS, EM-CST, and Founder of ElderMoon School of Herbs & Earth Medicine
Categories
All
Classes
Decoctions
Food As Medicine
Healing Broths
Herbal Vinegars
Herbal-vinegars
Holidays And Festivals
Infusions
Medicine Making
Plant Profiles
SCIENCE!
Skin Care
Syrups
Teas
Tinctures
 RSS Feed
Archives
January 2023
September 2020
February 2020
September 2019
April 2019
January 2019
July 2018
June 2018
May 2018
April 2018
March 2018
February 2018
January 2018
December 2017
November 2017
August 2017
July 2017
April 2017
March 2017
January 2017
December 2016
November 2016
October 2016
September 2016
August 2016
July 2016
June 2016
April 2016
March 2016
January 2016
December 2015
November 2015
October 2015
August 2015
July 2015
May 2015
March 2015
January 2015
December 2014
November 2014
October 2014
September 2014