 This batch is thicker because I love it this way too. I add less water for this texture or more water for a more soupy traditional texture. This has carrots, broccoli and kale added for the vegetable additions. So good! Decisions are Beginnings.Self-observation and self-reflection are definitely forms of self care that I'm finding absolutely require we keep our humor about us. For one, it's not as painful as the self-judgments we toss around so easily. I often laugh more these days as I catch myself in any form of sabotage mode. Then I adopt a third person conversation which delivers quite the therapeutic effects of kind self-talk, even if stern, that has that element of humor. "Oh, look what you're doing now, Jen!", is my chat with a curious and inquisitive laugh. With Valentine's Day here and all the social media and commercialization that surfaces, it's easy to get lost or lulled to sleep in the lousy chocolate, mass produced over priced roses that die in days, moving blood diamonds around more, and yeah, some seriously bad cards with ridiculous prices. I walked away years ago from this. Sorry but it's true. Now visiting flowers and trees wherever they're alive, visiting sacred waters of the Earth and other landscapes that heal us, making handmade gifts, and sourcing cacao from kind stewards of the land, plus other ways that really feel true, well that's another story all together (smile). The truth is this time of year is triggering for many. Many struggle this month around the heart. What's heavy in the heart for you? Are tears trying to move in that self-cleansing way? Is there a struggle to find the space or language to actually feel into it all and therapeutically convey in some creative way what is happening on the inside? Addictions of all sorts are included in a mass of coping skills we've masterfully honed over the years as avoidance tactics and they rear their head often this time of year in place of embracing dropping deeper into the heart to do some dusting and cleaning. Growth hurts. But the truth is holding on takes far more energy than letting go of heart pain. As spring walks closer and stirs our subtler bodies, I know for me I feel this as either as a scattered way or a sluggish can't get focused way. Obsessive behaviors, irritation, anxiety, and poor timing crop up among my people too. Complaining and whining are at an all time high. So how do you clock this unique way in yourself and own that there's some simple good medicine for this? The number one medicine for this for me is to get outside, anyway, no matter what the weather is doing to re-calibrate with the natural forces. Bundling up for us cold weather dwellers means pulling out the hardy weather garb, again, but let's face it, 40 degrees feels like spring after this much winter and most of us don a thick sweater instead! "Go to the Water" is the mantra of my ancestors and I seek this inside and out with hikes to natural water places and also through more spiritual bathing in the tub, and sauna. I also sit with my drum and rattle more, journey and make sounds that carry what I cannot find words for. And I paint for visual release and inquiry. Of late I've turn to our food choices too for my body is giving subtle clues to lighten it up. Salads, raw foods, and fruit look more appealing now. Here's another way that I like to re-calibrate on the inside. Jay and I are starting a Kitchari Cleanse this week, Cyrus is not so game for this yet but he's watching as we prepare for a short 3-4 day one to start. We'll go longer if we want to at the end. This simple, soupy Ayurvedic cleansing dish is made primarily of rice, split mung beans, seasonal veggies and spices. Sometimes I have to start at the physical and walk step by step. This satisfies that in me. It changed my whole outlook on cleansing and transformed my relationship with food and my body. Instead of feeling deprived, it made me feel nourished. Instead of frazzled and delirious with a headache or nausea, I felt grounded, safe, and secure. Coming off it I feel clear and connected. The idea is to stimulate your natural cleansing processes in a slow, sub-radar like cleanse that doesn't stimulate chelation toxicity (releasing too much too fast for our elimination systems). This is hard for the body and a stress that is not good for us. Seasoned fasting lovers know that this is a muscle that must be exercised slowly or one pays dearly. The beauty of this dish and cleanse is that you can eat. You can eat Kitchari for a single meal to give your digestion a break or do a full cleanse of 3-7 days where you really begin to release stored toxins and accumulation for safe release from the body. It’s a great introductory or seasonal cleanse because you still get to eat something throughout the day but at the same time it's the most effective tool I've found for healing and soothing the digestive system, increasing digestive fire, reducing bloating, clearing the mind, healing attachments to food, sleeping deeper, and kick starting the body’s natural ability to heal itself. While weight lose is not the goal, that just might happen too. I follow this cleansing diet for days before the plant diet initiations I go to with my teacher where we sustain ourselves on a few ounces of a single plant elixir every four hours for three days and vision quest with one plant. Eating kitchari from one pot prepared each morning reduces our focus and energy demands on food. Think about how much time we spend on food alone from making the money to getting it or growing it, to planning meals, preparing, eating, and cleaning up. It's all good and communal supporting, yes, but a break to focus elsewhere is also so good for us. This eliminates much and frees up so much time. This is also a great diet for a day or two upon returning from questing or fasting of any kind to support integration and landing back in well. 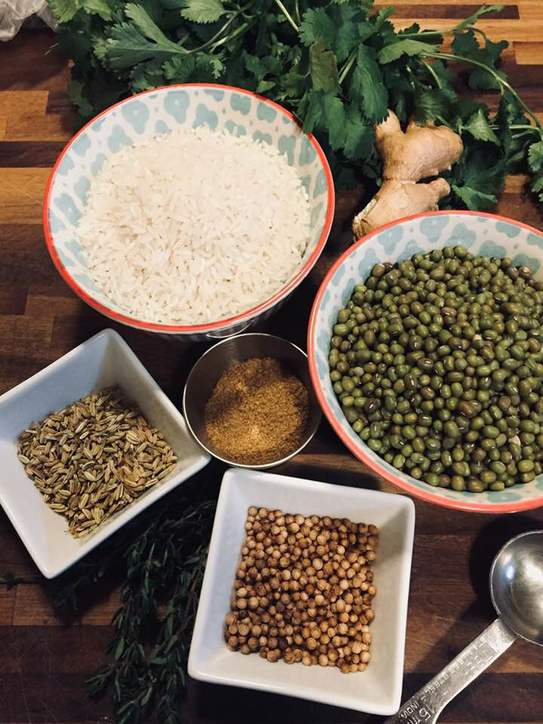 Creating Your Kitchari Cleanse - Keeping It Simple Is The MedicineDetermine the number of days you will cleanse for with 3-7 days being a good place to start. You can always go longer if you feel you want to. Trust yourself on this.
I love adding the ghee and salt later in the process because it makes the flavor jump up more for me. I do this with simple tomato sauce too by infusing olive oil with garlic, basil, salt and pepper, and pinch of rosemary and stir in just before serving. It's amazing how these late additions retain and pull forth the essential oils in the dish. This makes about 4-6 servings. Double it if there's more people in your home joining you or to eat throughout the week, though I do recommend making it daily if that's a possibility for you. To accommodate my work schedule I I make enough for 2 days at a time. 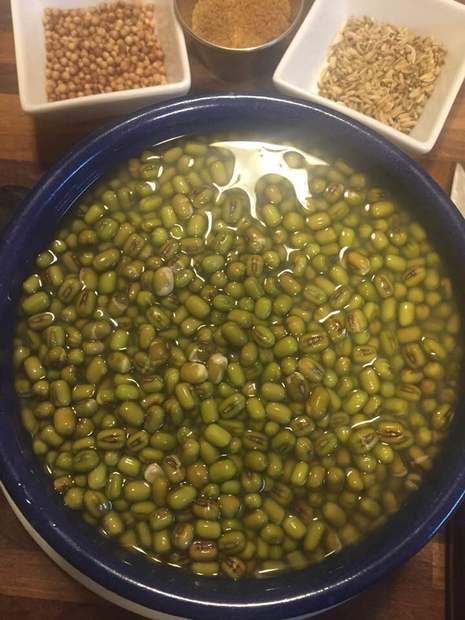 If you have trouble finding split mung beans then just soak your whole beans for a few hours to over night. These are 4 hours and look good for us to start cooking. My Favorite Kitchari RecipeINGREDIENTS
INSTRUCTIONS
Enjoy! Thank you for coming in for a read and may your day be blessed and your re-calibration plans be underway as Spring approaches. Much Love, Jen  Are you ready to gently infuse your heathcare with simple green plants for healing? It truly is easier than many think because we hold this knowing through our ancestral lines. Beginning anyway is a beautiful way. xo-Jen
2 Comments
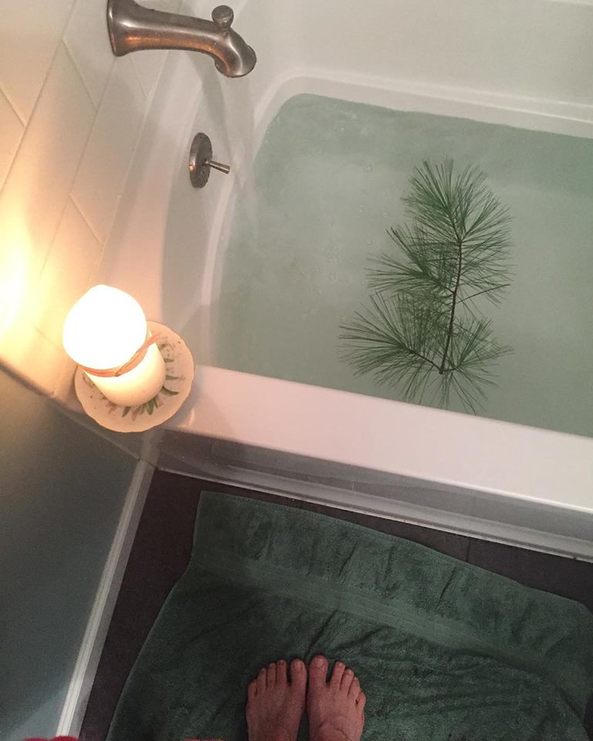 The power of simple. One White Pine sprig and clean, clear water drawn from deep within our Earth. Taking a bath to cleanse your spirit is different from taking a bath to clean away the everyday dirt from your physical body. Ritual water treatments and limpias have unbroken links to ancestral health care practices in many places in the world today. Near lost here in the states with a fascination for ultra-pasteurized ways, thankfully there is a resurrection and a carrying forth in practice among us as we remember and put it all into practice again. We'll begin with the bath. With this practice of the ritual bath, we are creating beauty and restoration space for gathering up our soul and spirit pieces that can hide from a hard day or experience. These parts of us know these practices as safe and healing and respond quickly to the healing forces we enlist on behalf of supporting wholeness. Spiritual bathing and the ritual bath are meant to cleanse and protect us spiritually as well as within the other subtle and more physical levels. To create the desired effects, there are a few things to consider. When taking a spiritual, ritual bath, you don’t use soaps, shampoos, or do any leg shaving and such. Once the bath is prepared, you are entering a sacred healing experience and space so you’ll want to really think about separating your regular bathing with your spiritual bathing. When we immerse ourselves in a spiritual, ritual bath, we engage an initiation process to open ourselves up to spirit, or that which we refer to as our Divine. Ritual bathing implies that water and prayer wash away any spiritual grime — cleansing, clearing, and purifying our body and energetic field. It suggests that we are willing to listen to our higher self and begin to trust something outside of our rational mind and allow the wise inner knowing to emerge. There's an affirmation within the act of planning and preparing that speaks of our openness to ask the universe to assist and transform what we believe needs to be shifted within. Although spiritual baths can sometimes help alleviate certain physical ailments, especially skin conditions and muscle soreness, they are meant for spiritual healing through release and restore processes. This ultimately affects our physical healing. If you have open wounds or have just had surgery, do not immerse the wounded area in the water for several days and if you choose to anyway, which is fine for surface wounds, it's wise to sprinkle a few cups of strong herbal infusions and a handful of epsom salt only. Consider Calendula flowers, Lavender flowers, White pine, Juniper, Oak leaf and bark, Witch Hazel Bark, Rosemary, Roses, Plantain leaf, or Yarrow leaf and flower as infusion choices for skin care to encourage closing wounds. Sea salt will sting any open skin areas with no harm other than it stings. Epsom salts does not. This with speed physical healing and gather the soul and spirit back after such a traumatic event. I suggest a spiritual foot or hand bath for the in-between situations where a full immersion bath must wait or you don't have a bath tub. 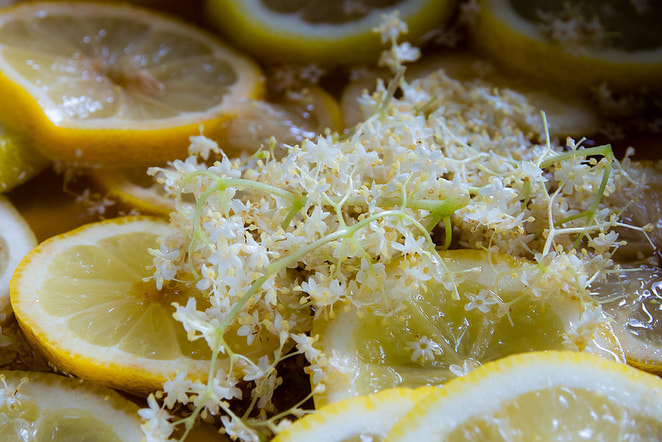 Elder Flower, Lemon, Honey, and Coconut Milk Bath soothes everything and guarantees a deep restorative sleep in the wake of anything disruptive. For some practical logistics, keep a fine mesh strainer handy for skimming the herbs out of the tub for composting later. Clogged drains definitely interrupt our sense of peace. Preparing For Spiritual Bathing
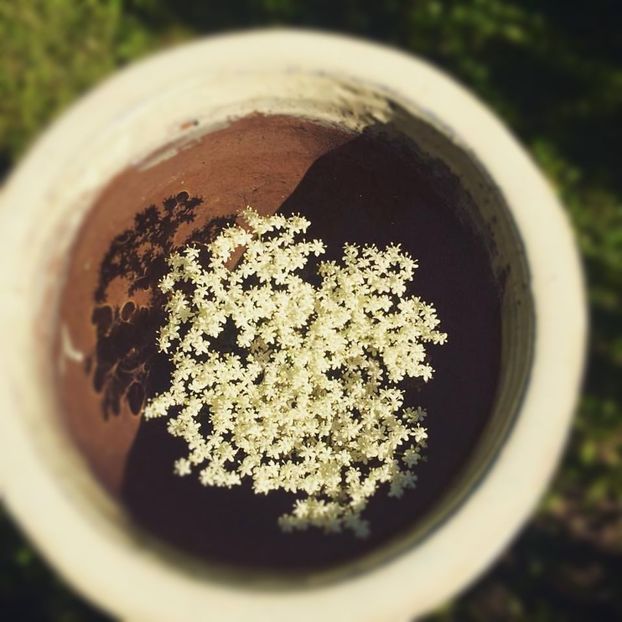 Elder flower sun-infusing in an earthenware pot sits waiting for us. I love to dip fresh bundled wild Mugwort into this sacred Elder infused water and give myself a limpia. Students have reported immediate relief of ailments they come to class with. Love the big "ah ha's" from beautiful simple care skills with deep roots. Limpias. So what is a Limpia?A limpia is a spiritual cleansing that is based in the philosophy and practice of many if not all traditional healing practices of indigenous intact, and lost, cultures of humanity. We all have memory within our bones given through our ancestry of each every bloodline to know these practices and feel deeply drawn to them even in some inexplicable but comforting way. To perform a limpia, the curandera or shamanic practitioner uses herbs, flowers, prayers and songs, and the sacred sound of drum or rattle to help purify a person's mind, body and spirit. Traditional healers work from a place of knowing that physical illnesses or 'conditions' are 99% rooted in the spiritual body. Fresh plant material is chosen and bundled together and swept over the body gently, and sometimes with a little more than gentle shaking and tapping (to whacking pretty good if needed) on the surface of the body from head to toe and front and back of the body. The herbs are regularly smudged through the process and prayers are softly spoken through the wafting, aromatic smudge smoke. Once completed, the energies are tapped into the Earth for composting and the spent herbs which can look quite black and dingy at times, are buried in a ceremonially reverent way. My teacher Rocio, a born and betrothed shamanic healer from Ecuador, has traveled extensively teaching the power of daily limpias as part of one’s care for their body, mind, soul, and spirit. For times when the gardens sleep, there are the aromatic pines and fresh culinary plants which carry profound support for daily limpias. Rosemary and Thyme are favorites of mine. Daily limpias are considered part of self care in many cultures and it's common to see limpia plants available in markets in other countries who retain this honoring of spiritual healing through profound, simple and sometimes daily practices. Another essential element of the limpia is the smoke of copal, palo santo, white sage, or other plant you consider deeply clearing and protective for this kind of work. Copal is a dried resinous tree sap, palo santo is an aromatic wood that is burned in many different Central and South American ceremonies, and white sage grows here in the states. Do consider tiny amounts for smudge as each of these plants are experiencing threatened existence due to over harvesting. A little goes a long way. 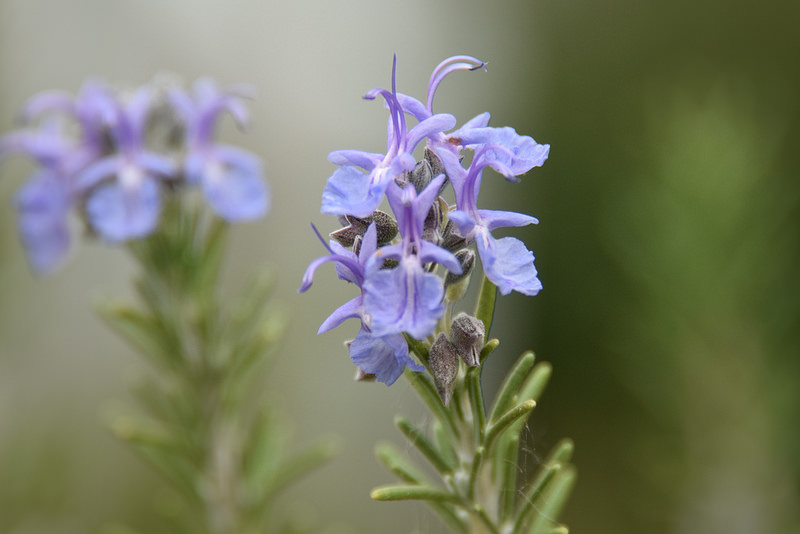 Rosemary and White Pine remain my favorites for my Winter Limpia practice and Spiritual Bathing. The Simple Acts of Self CareSo it's winter. How do we enjoy a plant limpia in winter? We can. There's always a way. So you have two components here: a bundle of fresh plants, and a bowl of infused water. The Water: We could Sun or Moon infuse fresh aromatics or any dried plant material that calls to us and place them in a beautiful bowl set in a window for as long as feels complete. With dried herbs, these can be slowly simmered for 10 minutes and stirred with spoken prayers before placing in the sun or moon light for cooling and infusing. Crystals, flower essences, essential oils, or drops of plant tincture can be added to the water. Do a little bit of research on crystals as there are some that are best left next to the bowl of water for infusing. Follow your intuitive knowing. My midwife gathered tiny bottles of ocean water from different places around the world. She added 1/4 of the bottle with vodka to preserve it, labeled them and had they lined up near here bathtub to as add to a ritual bath or certainly here for making your waters for a limpia. For the record, one can just do a limpia without the water as well. So you decide what's needed. The Limpia: Make a fresh plant wand for the limpia. It's simple. Bundle a handful of fresh plant material together, such as fresh soft needled pines, flowers that call, and aromatics such as any fresh spices or mint trimmings that you're growing or have purchased at a store. It's pretty easy to get organic Rosemary , mints, Oregano, Thyme and more these day. I also love parsley for my Yemaya ritual to honor the Ocean. Then simply work out your logistics of bringing your infused water and plant bundle with you. You can decide to have infused water as part of this or just sweep the fresh bundle through your smudge smoke or essential oil mist and work the fresh plant material over your body. Bring your fresh plant medicine bundle and bowl of infused water to:
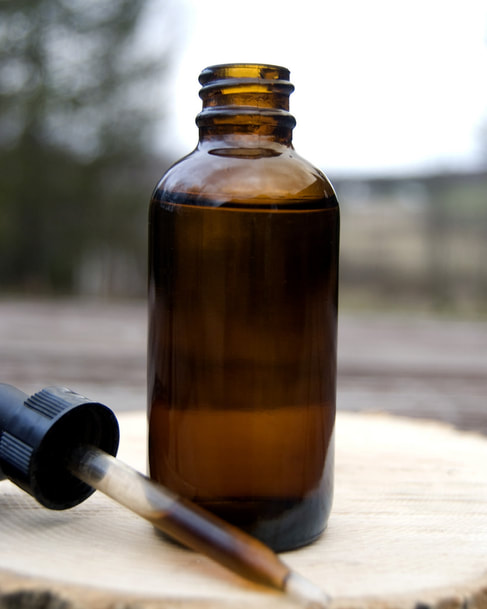
LOVE TestimonialsIf you've not experienced such things as this that may seem strange, know this practice is ancient and the knowing and memory of administering and receiving of such medicine is within each of us. Many are comforted and take to it quite easily. The aromatic plants release their oils for immediate relief and healing as they waft directly through our sinuses to assist the nervous system that is often atrophied or ramped-up and on edge. When participants studying the medicine plants come to class with me, we do this together each morning. Should intensity arise during sharing we may all move to the Mugwort patch and do another limpia on ourselves or pair up and help each other. There are many giggles among those new to this old medicine way but all take to this quickly and feel shifted near instantly. The plants can do this for us when we arrive in their presence open and receptive. I find my Plant Limpias alone or with Sacred Bathing take my self care just a little bit deeper than a smudge sometimes because sometimes life is that intense and demands a bit more from us to stay well. This is an excerpt from a lesson in "Birthing an Herbalist in 13 Moons" online herbal course. I hope you found this informative and helpful and do send along questions if you need clarification. The rules are rather simple. Follow your intuitive connection with the plants, trust and enjoy. Thank you for coming into my world for a bit today. Much Love, Jen 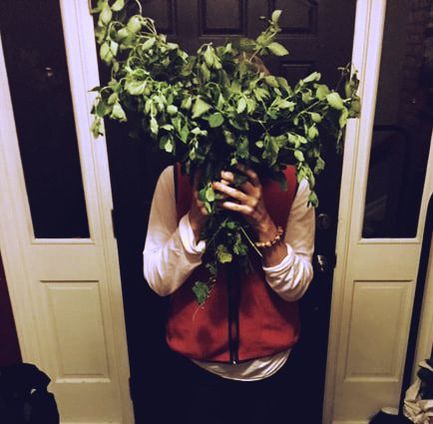 My spontaneous evening gathering one Autumn eve of Lemon Balm for preparing needed limpias. Offerings at ElderMoon School of Herbs & Earth MedicineThank you for visiting and may your journey be safe and we meet soon. Use Coupon Code: plantjourney10 for a 10% discount off you tuition for 'Birthing an Herbalist in 13 Moons" on-line course AND "Walking the Herbal Path The Earth Medicine Way' live course that begins each year in May. xo-Jen The ElderMoon Apothecary is slowly and steadily growing like a little carefully tended sapling here. Thank you for supporting creative small business herbalists you love and are drawn to. We are always around, out in the light, in the country and in the city (or hospital like me!), and off the beaten path where we're most comfortable and often sitting with our beloved plants.  Making Your Own MedicineWith millions of articles and books on how to tincture and all the different nuances of this form of medicine making, I completely overlooked actually adding my two cents to this well covered topic. Seems fitting to have a post and an herbal council this month dedicated to keeping this kind of medicine making in the home apothecaries I so want to see all of you have at your fingertips. Thank you for venturing in for a bit to take in some medicine tending. So, the oldest and best way in my experience to make medicine from plants is to add them to water. Yup. So gorgeously simple! And you already know some or all of this I bet. These would be called teas (steep 5-10 minutes), infusions (steeped 1-8 hours), and decoctions (simmered 20 minutes or more). Cooking the plants in water is my first and favorite way of medicine making and links me up to my ancestral path for we all have a great auntie or grandparent who knew the plants for medicine and were most likely a well known healer in their time. The smell and taste takes me there. There are times, however, when a later form of medicine, called a tincture, or plant extract, really shines. These are concentrated plants extracts taken by the drop using a menstruum (vinegar, glycerin, or alcohol) to extract the medicine and sometimes some of the nutrients too, depending on the menstruum chosen. Here's why tincture making skills jumped into the healer's medicine bag as we traveled through time: 1- Longevity and Stability: An herb, once tinctured, will retain its medicinal qualities far longer than in most other preparations. Alcohol tinctures will last for many years. I do make smaller batches and use them up, and make new. Plus they're heavy to move and we moved twice with a ridiculous number of jars! I suggest making small batches for home apothecary tending. This way you can increase your variety of plants at your finger tips. 2- Easy to Administer and Travel With: Once prepared in tincture form, the herb is ready to administer with no further preparation. The tinctures are dispensed directly under the tongue or mixed with warm water, tea, or juice and can be tucked into travel bags easy. Just be sure you know the rules for flying with liquids or they'll confiscate your precious medicines. 3- Ease of Preparation: Anyone is capable of making high quality tinctures. All one needs is good quality herbs, a high quality solvent or menstruum (your solvents are alcohol, vinegar, or glycerin), a measuring cup, jar, labels, a dark place to store them, and a little time with lots of love for the process. You're making medicine. It's truly amazing when you step back and look at it all. 4- Storage: Easy if you contain your excitement and make small batches! Tinctures store compactly and conveniently in a small space, always ready to use. They're excellent for first aid kits too. 5- Cost Effective: Tinctures are becoming extremely expensive to purchase today making it prohibitive for people to afford their medicine. This is “the people's medicine" – our original medicine and is a birthright to have access to it. So I teach how. Period. It's not hard and so much better to make yourself if you can. What you're paying for is more about the person’s time to make it for you. If this may be what you need, I make for people too. But know you can do it too anytime you want to. 6- Personalized Formulas: As you learn to work with various herbs, you'll develop favorite ones that just call to you. Your needs will change over time and making your own gives you the creative freedom to design tincture combinations and formulas from your home apothecary. 7- Selecting the Herbs: Almost all herbs tincture well with the correct solvent. Herbs can be tinctured as a ready-made formula or tinctured as single herbs and combined later into formulas. Most herbalists prefer to tincture herbs as single extracts. This gives them greater control of the water/alcohol ratio for individual herbs and their constituents. It also allows greater flexibility and creativity when crafting formulas. I do make formulas this way professionally but for my family I make smaller jars of the herbs mixed together fresh and they tincture all together. It’s easier and keeps me humbly rooted in tending to my loved ones. I love, love, love the way they turn out. You get to decide what works for you. 8- Selecting the Menstruum: The menstruum is the solvent used to extract the biochemical constituents (yes, fancy lingo for the medicine and nutrients) of the plant, and to preserve the resulting solution. There are basically three menstruums used in tincture preparations: alcohol, vinegar, and glycerin. Like anything, there are pros and cons to each (more below on this); and like anything, everyone has their personal favorite and considers it the best. There are some intricate things to consider for each. Alcohol sensitivity (means vinegar and glycerin options only), after the nutritional properties (these extract better in vinegar and glycerin), when to utilize heat for better extraction (I warm glycerites), longest shelf life and extraction stronger compounds without heat (alcohol shines here), and dosing considerations (I increase doses with vinegar and glycerin tinctures). 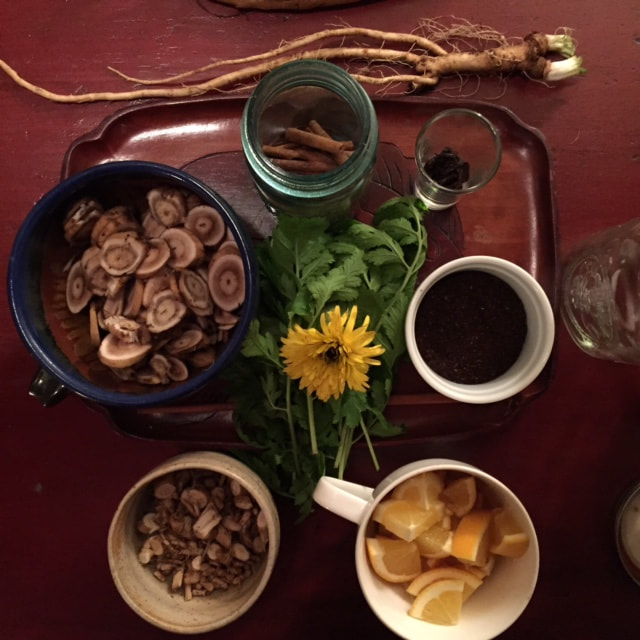 Formulation components can be tinctured separately or together. You get to decide. Steps to Tincturing the Traditional Folk Medicine Way
 Menstruum (Solvent) Choices(Here's a little excerpt from "Birthing an Herbalist in 13 Moons" at ElderMoon School of Herbs on-line herbalist training journey with the medicine plants.) The following is a list of the solvents (mentsruums) commonly utilized in making herbal tinctures and some guidelines for what plant constituents they most effectively dissolve: 1. ALCOHOL Alcohol has both prolonged keeping power and serves as a powerful solvent or extractor. It has the ability to break down, absorb, and preserve much of the plant material. There are many varieties of alcohol used, though every herbalist has their favorite: brandy, rum, vodka, gin, Everclear, and 190 proof grain or potato. Alcohol that has a natural water constituent (such as those listed above) is called 'Aqueous Ethanol' and generally has a water to alcohol ratio of 40-95% alcohol. Aqueous Ethanol dissolves: alkaloids (limited), organic salts, organic acids, most glucosides, sugars, vitamins, minerals, enzymes, tannins, bitter compounds. Absolute Alcohol, or Pure Grain Alcohol, is more effective for dissolving resinous and waxy material. It is used to dissolve: wax, resin, fat, balsam, oleoresin, glycosides, some alkaloids, sugars, vitamins, volatile oils. Easy Starting Point: Begin tincturing with 100 proof potato vodka. (50% alcohol and 50% water). 2. GLYCERIN Glycerine is a chemical constituent of all the fatty oils from both animals and vegetables. An excellent nutritive solvent, glycerin does not have quite the versatility of either water or alcohol, but its advantages are that it tastes good because it’s sweet, is safe and effective for children, and is in and of itself very nourishing and soothing. It dissolves: sugars, enzymes (dilute), glucosides, bitter compounds, saponins (dilute), tannins, minerals, vitamins. Glycerine also has excellent preservative qualities. It’s great for children’s preparations and for those refraining from alcohol where the use of alcohol in tinctures would be prohibitive. Be sure to request Vegetable Glycerin when buying; it is of a much higher quality. Vegetable Glycerin is available at many natural food stores and herb stores. These tinctures require a period of warming and a slight dilution with water in making them. Quick note for the curious: we dilute 4:1 with distilled (mineral hungry) water, chop herbs small using the same proportions given above, and warm the closed jar in a water bath for a few days at the start and again at the finish (we use a crock pot on lowest setting) with a total of 6-8 weeks of sitting and shaking occasionally. These are also light sensitive so tend well to preserve the medicine. 3. VINEGAR I used to teach a FOUR hour class on vinegar and herbs! Water is the first and made by the Divine which is why it's the best solvent to start with as a budding herbalist. Vinegar, especially apple cider vinegar, is one of the oldest solvents used. However, it's not highly regarded today by many herbalists or medicine making companies and is considered secondary to alcohol as a solvent due to the greater strength of and shelf life of alcohol. Though not as strong as alcohol, it has other definite advantages and should not be ignored. Apple Cider Vinegar contains minute quantities of trace minerals our bodies crave and has a mild acidity that balances and aids digestion. The acetic acid and potassium content help to activate the friendly bacteria in the digestive track. I highly recommend Vinegar as a solvent for tonifying/nutritious herbs and for preparations that are taken over a long period of time for health maintenance, such as in high vitamin mineral formulas and tonic formulas. Vinegar is an excellent solvent for children’s formulas and for alcohol sensitive folks too. Vinegar tinctures are excellent for extracting some plant alkaloids (such as lobeline from Lobelia), but are not as good for extracting the more acidic biochemical ingredients and so doses are usually doubled as a general rule for making sure one gets the proper amount of the more medicinal compounds. A commonly taught thing about Vinegar Tinctures is that they “will not last very long”. Most say 6 months. I disagree and have not had one spoil yet and many herbalists I know agree. What I teach is make enough to get to the next harvest (plus a little extra is my practice). When a vinegar tincture goes bad (and you WILL know) it's usually the quality of the vinegar and it will smell sour and have fermentation bubbles forming around the edges. Non-pasteurized live vinegar will sometimes form a mother and this is fine. It means it's alive, not spoiled, and you just have to remove “the mother” at the surface – which can be used to make more vinegar. Using the rule of one season to the next keeps your stock moving and freshness then remains at the top of your practice too. Happy Tincturing and Apothecary TendingThis month we are deepening our tincturing skills at ElderMoon School in our Monthly Herbal Councils. We'll cover weight-to-volume tincturing as another step beyond this traditional way. While the traditional folk way is absolutely enough, some want to deepen their practice with medicine making. We'll cover the climate within the herbal circles as they attempt to justify and legitimize their existence by standardizing. There is a place for this as herbalism evolves. In the end we all usually come back around to water based preparations made from plants we tended and stored in our own apothecary (smile) but it's so good to travel the road anyway and come back to that and be in community too all along the way, eh? We'll speak to all of this in council. Do check out the recorded and archived herbal councils each month (BTW free if you're already a student in other courses here at ElderMoon School). It's so worth the low commitment simple hour a month to plug in and enjoy 'talking plant' in community. Much Love, Jen 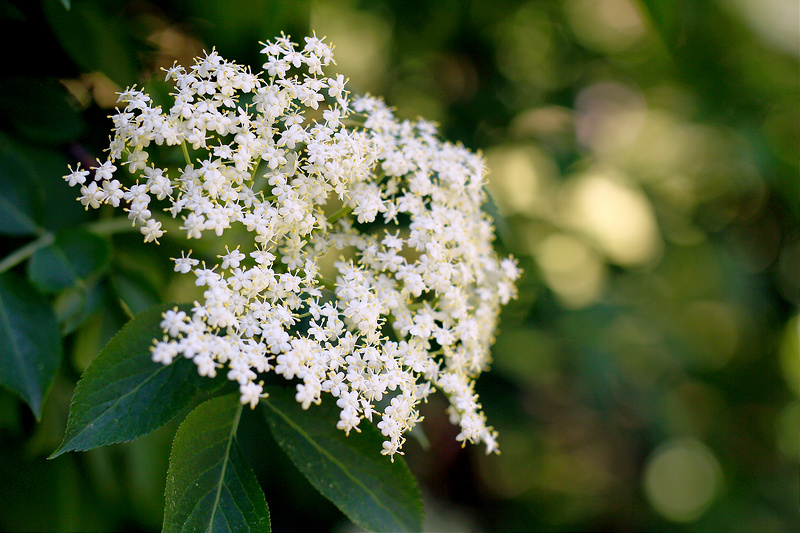 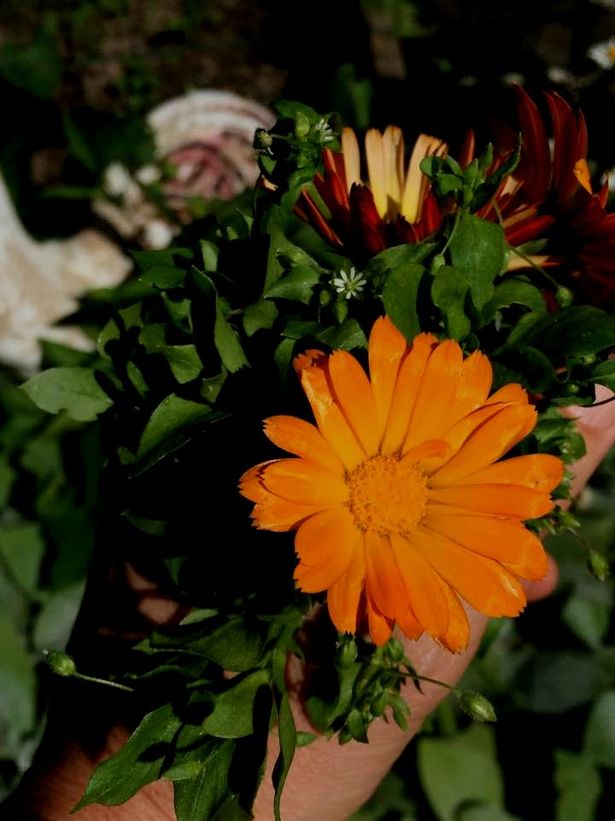 Chickweed & Calendula for the Eyes Could it be the blinding light of this high solar time of summer, or the winter shadow time of our opposite season that makes it hard to see? One can easily say it has nothing to do with it at all, but for decades now I see in my people that I'm called to tend to infected eyes the most at these polar opposite times of the year. Thinking in metaphors is an option but it does help the minds of healers who work close to the earth and what ails us among the living. There's less memorizing when thinking in cycles and metaphors. Recall is a process you can 'feel into', instead of it being a 'doing' action. And for me, my recall is so much sharper this way. The need for books or running to google falls away. This steamy beautiful summer brings eye ailments forward and I've been spurred to write on the heels of the surging eye infections common during summertime which also prompt us to prepare for winter too. While there are so many plants we can lean on here for infected eyes and affected vision on many levels, I speak to two that have not failed me in over two decades for getting right down into the physical of it all, such as with conjunctivitis (the catch-all term for you got something even though we don't know what it is') or pink eye of sorts. There is an easy bit of planning that happens now so one is prepared at all times. Depending on where you live, there may be other plants that fill the actions these two provide and I do encourage you to work with what grows close to you. Learn the technique here. Chickweed & Calendula Succus for the EyesThese two plants are abundantly present this time of year. Calendula (C. officinalis) basks in full sun. Chickweed (Stellaria media) likes the sun but prefers cooler weather and so travels under larger plants where the medicine can be made within the leaves and flowers but it's in the more shadowy places of the garden. Light and shadow working together to make the medicine needed, catch me here? I like to make a succus you can drip straight into the eyes. But what is a succus? 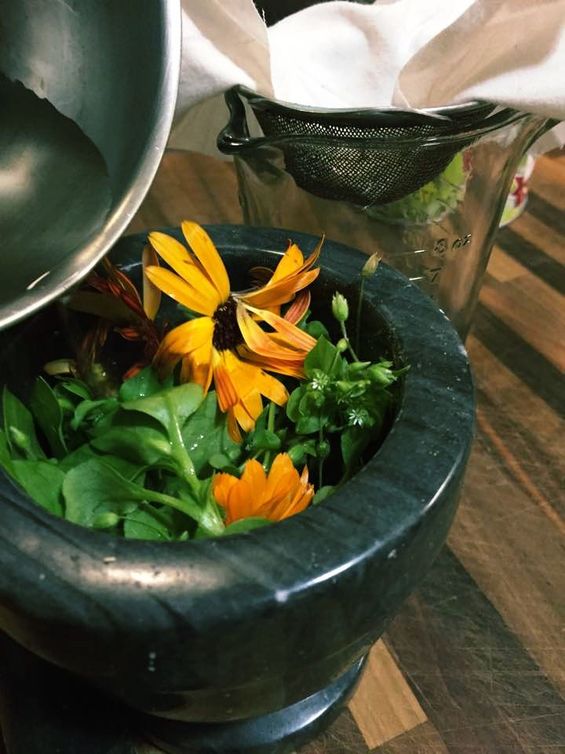 Place herbs in mortar and add 1 tablespoon of boiled water. Use pestle to mash to a green pulp, takes less than 5 minutes, before straining through a fine weave cloth or paper coffee filter. Official Definition: succussuccus suc·cus (sŭk'əs) n. pl. suc·ci (sŭk'ī, -sī) A fluid, such as gastric juice (ignore this part of the definition) or vegetable/plant juice (we're going for this one), contained in or secreted by living tissue. Yes, an old term not in technical use much anymore, though herbalists from time to time will toss the term on the table to honor the old ways we are discovering to be quite relevant today. Yes, good for any weepy eye infections, conjunctivitis, styes, or irritated redness. We often hear 'yes, good for eyes infections' but many need the walk from the garden to the actual drops in the eyes. Below are pics to walk you through how to actually make this succus. A beautiful side note, make larger amounts for oral infections and gum disease and swish twice a day for great results too. Things to Remember When Treating the Eyes- A small handful of fresh Chickweed leaf and flower and a few Calendula flowers makes about one ounce of succus, which could treat a small neighborhood! You only need 1-3 drops in each eye 2-3x/day or every 4 hours for intense situations. One can treat less frequently, such as morning and night, as things begin to shift well. - This is good for 1 week in the refrigerator. Then make fresh again, but rarely is a second batch ever needed. - Always treat both eyes even if only one looks like it's ailing. Chances are, being so close together, they will both get 'it'. - Cleanliness matters and is actually imperative so the one who is treating doesn't get infected. Hand wash before and after with a good castile soap. It's that easy. - The eyes are not a sterile environment. It is one reason why we make tears loaded with enzymes to keep them clean and flushed frequently. They are also not a place the immune system can get too easily which is why these infections can be persistent. Our eye ball is in a bony socket. Our tears wash this cave-like socket to keep it lubricated, wash dust and debris out, kill potential invaders, and of course cleanse the heart and soul. - Children usually hate this. Adults often do too. I treat my eyes in front of the child if toddler age and up, even have them help, so they can see what it's like. Lay flat and place a few drops at the inner corner of the closed eye. It pools perfectly there (called the inner canthus of the eye). Now simply take a deep breath and blink several times to allow it to wash into the eye. This is the easiest way always. Have tissue ready for tearing will be stimulated. This is a good wash out with medicine present. There can be initial stinging but only with some people who once acclimated to the process find it is quite minimal. Give the eyes a rest by remaining flat for a bit and warm compresses of Chamomile tea help immensely. - Nasty pink eye infections can be gone in 24-48 hours with the infection pooling and crusting at the corners of the eyes. Simply wipe with a most paper towel, tissue or gauze. Wipe from the center outward, one swipe along the eye, and throw paper away. Repeat as needed with clean gauze each time if needed. Do keep treating for several more days after symptoms are gone. Meticulous hand washing helps halt the spread so be diligent. -Yes, at first it stings a tiny bit. Anything in the eye will do this a little at first but within less than a minute it eases. -Think immune support for a few days to a week. Include herbs, a light nutritious diet, plenty of water, and more rest than you think. 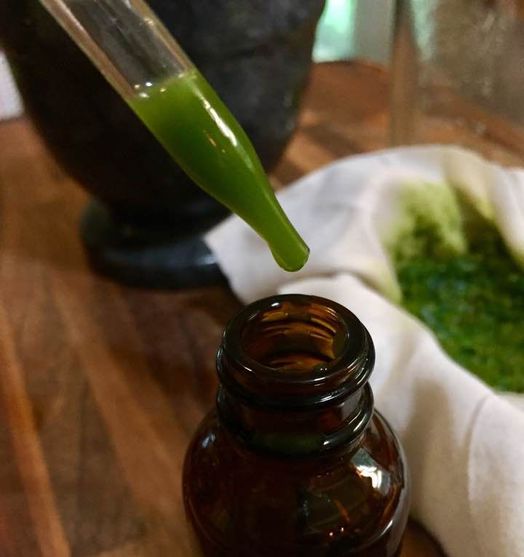 Chickweed & Calendula Succus - strain your macerated herbs through a fine mesh cloth or paper coffee filter before bottling, labeling and administering. We do this to finely filter out small plant pieces that could be further irritating to the eye. How to Make an Herbal Eye Succus for Tending Our Eyes
How to Prepare for Winter?Ah yes, this is also easy and I take apothecary tending quite serious because it can be frustrating to have a loved one in distress and you have the skills but no supplies. We avoid this by thinking ahead and seeing each condition that comes along as a teaching moment for how to prepare. During the summer, harvest for winter by placing fresh Chickweed (Stellaria media) and Calendula (C. officinalis) flowers in a freezer container, enough for 2-3 batches or more if you have a large household or are treating through a clinic setting. Other Options Exist: If you forget, no worries. Make a strong Chamomile (Matricaria chamomilla) infusion with 10 drops fresh Calendula tincture added to each 1 ounce batch will do the trick well too. I've also added 3 drops of Goldenseal root tincture (Hydratis canadensis) to this for particularly persistent infection. The berberine content of Goldenseal works well for resistant bacterial strains. And no, the alcohol in this 10-13 drops added to one ounce (30ml) of Chamomile tea is so small that it does not hurt the eye. These herbs actually reduce pain. -Consider investing in an eye cup. These are great for filling 1/2 full and cupping over the eye and blink it in for a good minute or two. Use fresh medicine for each eye. I love this for scratched corneas as Chickweed, Calendula, and Chamomile will all speed this healing. - Fresh Aloe - I once rubbed my eye while chopping hot peppers and the moment I did it I knew I was in for pain. It took about a minute to set in and WOW! My quick thinking husband Jay said 'aloe' as he went to our plant to harvest a leaf. The gel was scooped straight into my eye and the relief was instantaneous. so yes, aloe for the eyes has proved amazing again and again since then. -Mama's Breast Milk - Yes, this is an old, old remedy and babes where treated often in the first days with colostrum and mama's milk once in on day three. This may be... the. most. effective. care... for infected eyes. I've seen this work with 1-2 treatments. While is raises many feelings for some, I suggest we remember that we are mammals and nature provides in unique, efficient, and magical ways. - Why do I shy away from Eyebright (Euphrasia spp.)? Simple. It's on the 'at risk' list at United Plant Savers due to being over-harvested for medicine and more difficult to grow. Let's take the strain off of Eyebright and lean into more abundant and easy to grow wild and cultivated medicine plants. 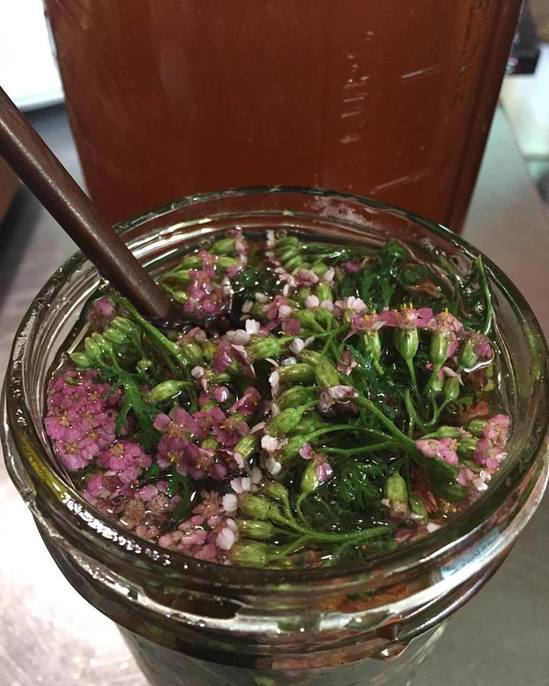 Pink (or White) Yarrow Infused Honey - or Chamomile Infused Honey - or plain good raw honey can be dilutred with equal parts of distilled water and dropped into the eyes to relieve intraocular pressure, dry irritated eyes, or infected eyes. Honey, yes HONEY!Yes, dilute with distilled water 1:1 (that's equal parts) and drip into eyes. You can re-purpose a saline eye dropper container by popping the tip off and washing well, or just get a 1oz amber glass dropper bottle (better) at the health food store. There are many who report after months of treatment twice a day that there is a reversal of advanced eye disease. Research is under way for glaucoma and cataracts. Do keep this in your bag of tricks for those middle of night 'I can't sleep because my eyes hurt.' complaints. Honey Compress is also an easy one for tired, exhausted, strained, or infected eyes - simply apply a fingertip full of good raw local honey or herb infused honey to both closed eyelids and massage the lids and into the eyelashes gently. Rest with a warm wash cloth compress for 15 minutes before rinsing with clean warm water. Thank you for coming into my world for a bit today. I do hope I planted a seed deep within you so this may help you one day. Do check out our Monthly Herbal Councils (completely beginner friendly) where we go even deeper into the world of eyes and clear vision and draw medicine from more than the plants. xo-Jen Ready to build an apothecary for yourself and loved ones? It's my primary health care system and gives so much support. Let's work together to get yours up and running. It's easier than you think and so much fun too. See course details:
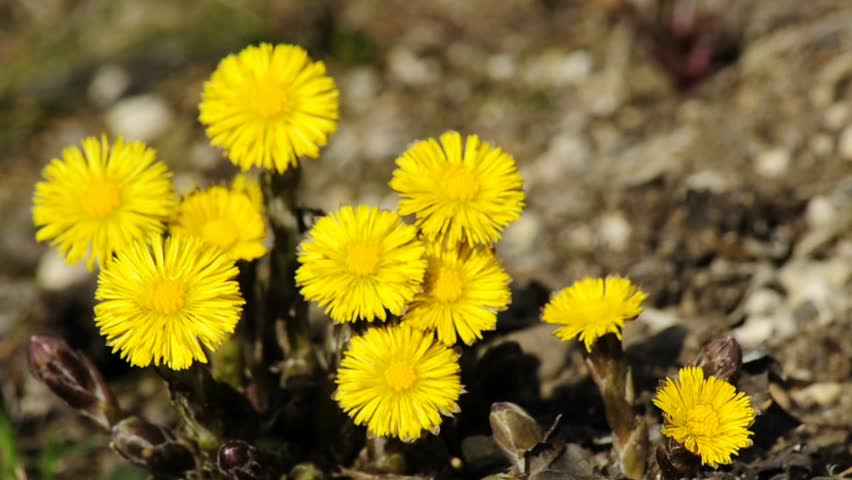 Coltsfoot - Tussilago farfaraColtsfoot has a bit of a different rhythm than most spring beauties around here and gives us some visual depth and relief from the varying shades of winter's predominant shades of grey. Love grey but so welcome other colors! It's a low-growing perennial with fleshy, woolly leaves and is a member of the Asteraceae (daisy) family, Coltsfoot produces a single golden-yellow flower head with no surrounding leaves. It's among some of first blooms in spring, before much greenery has jumped up. You'll find it among rocky moist places and rises only about 6-8 inches in height, though once the leaves emerge, it can get a bit taller. As the flowering stem dies, the hoof-shaped green leaves begin to appear. Yes, a different way than most plants. Yes, there's some good strong medicine here but did you know there's edible parts? Coltsfoot flowers can be eaten and tossed into salads to add a wonderful aromatic flavor and color. These nibbles help us get in rhythm with the season as we march forth to our busier time of year. Shy away from road side harvesting for all the obvious reasons of nasty runoff. While it grows roadside frequently, the best way to seek it is to consider rocky stream bed edges. When I lived in Phoenica, NY we had none on our side of the Esopus creek but you would find me wading across the stream, always cold and sometimes waist deep, with a basket held on top of my head to gather from a massive patch directly across the water. I couldn't resist their waving little faces in the sun, even with painful water temperatures! Definitely makes one hardy.  Breaking up the many shades of winter's grey. Medicinal Parts & Preparations
"Recovery from orthopedic injury, and to increase flexibility. Coltsfoot offers a road map for repair and recovery from any orthopedic injury or challenge as it holds much helpful information about our bones, muscles and the realm of movement in our physical bodies. It also helps us with flexibility in the physical body as well as in our attitude towards all change. Coltsfoot also helps us more easily revise and expand our definition of reality as new truths come to us." - Green Hope Farm Watch for 'Common Name' Confusion: The common name is Coltsfoot, latin name Tussilago farfara, and these pics will help you seek the right plant. There is also a 'Coltsfoot' known as Western Coltsfoot or Butterbur, latin name Petasites palmatus which looks very different and is a completely different plant. Just a heads up to clear any confusion if you're searching the web for information and live where both grow.  The woolly stem is a 'plant signature' and easy identifier for Coltsfoot. It looks like spun glass, much the way an x-ray of the lungs looks with pneumonia. Dosing is Everything When researching Coltsfoot you will see many warnings due to the (pyrrolizidine alkaloid) compounds that give this plant its healing edge when things are serious in the respiratory system. It's usually worded something like this, "Despite serious safety concerns, people take Coltsfoot for lung problems such as bronchitis, asthma, and whooping cough (pertussis). They also take it for upper respiratory tract complaints including sore mouth and throat, cough, and hoarseness." This compound is found in Comfrey leaf as well and you may be aware of all the concerns surrounding Comfrey? Ease your concerns and avoidance tactics with the stronger medicine plants and come learn the wise medicine ways. We need the stronger plants but we also need to know how to dose safely. Most of the bad media is from improper dosing. The same is true for improper dosing of acetaminophen, as you will go into an unstoppable liver failure with what many see as a safe medication when taken incorrectly. Here at ElderMoon School we covered Comfrey in depth to eliminate confusion and walk strong with our stronger medicines in our Monthly Herbalists Councils, open to all so do check them out, For now let's speak of wise ways with Coltsfoot. First thing to remember, Coltsfoot is not a tonic designed for long term dosing. We take this plant for acute health situation of the lungs, as mentioned and quoted correctly above. This means we take an infusion, tincture, or syrup/elixir for a couple of weeks to get through an acute situation with the respiratory system. You would not take this regularly for chronic lungs issues, such as COPD, asthma, sarcoidosis of the lungs, lung cancer, and emphysema, to name a few. So let's choose one to break this down a bit. Let's look at the epidemic we have around asthma. Listed above as a condition to take Coltsfoot, it would be wise to take for a few weeks for an acute flareup of the chronic condition. So think of it this way, such as with hyper-reactivity of the lungs (which looks like increased asthmatic episodes) in response to a flu. This happens for my son. I know when a virus has landed in his body because the asthma symptoms flare sometimes two days prior to any other symptoms and I start to treat for the flu preemptively. Should it come and settle deeper into his lungs then I treat directly with Coltsfoot a week or two. Make sense? Here's another example: If someone has sarcoidosis of the lungs (an inflammatory disease that affects multiple organs in the body, but mostly the lungs and lymph glands), then they would take Coltsfoot for a few weeks for an acute flareup or complication that started because they have an underlying chronic condition. Let's say they got pneumonia. The Coltsfoots is meant to address the acute situation of pneumonia with strong medicine for short term dosing. The person with the chronic lung condition can take other tonifying respiratory plants on a long term basis to address the underlying chronic condition and this tactic strengthens their resistance over all. Much of the lousy media around certain plants happens when people are desperate for a cure of a chronic condition, think "Hey, it's a plant so it has to be safe no matter what.", and then diagnose, dose and treat themselves incorrectly with a medicine plant that traditionally treats acute conditions. Does this makes sense? Do send questions so we can dispel the lousy media and walk with solid wise choices for when we are sick by knowing the strong medicine plants well, along with safe dosing. Dosing with Coltsfoot is Simple: For Adults take the Infusion 1 cup 3-4x/day; Tincture 1/4-1/2 teaspoon 3-4x/day; Honeys, Syrups, Elixirs, Vinegars, and Oxymels are taken by the tablespoonful every 2-4 hours or as needed. These doses can be taken for up to 2-3 weeks but most will many will barely need two weeks of treatment for lung ailments of the acute type like respiratory flu or cold, bronchitis, pneumonia, and chelation of something inhaled that is noxious leaving congestion and coughing. Whooping cough (pertussis) will need a full three weeks as it tends to be quite persistent. Then switch to others such as Mulein leaf and Elecampane root for longer treatment. Do not exceed three weeks with Coltsfoot on these doses. Always consider other therapies, lifestyle changes, and diet to support respiratory health. I have given Coltsfoot to all three of my children, as well as guided mothers and fathers in my community for decades now on when and how to take this plant so please ignore the exaggerated warnings - 'never give to children' that are made by people who do not know this plant well. Consider the child's weight and reduce the dose accordingly and give to children older than one that need respiratory help. It is safe for short term dosing as described. Children under one, I love to treat with Chamomile always. Bathe them in it and watch miracles happen! Coltsfoot is also found in many well made herbal cough drops so once a child is able to manage a cough drop they can have these too. 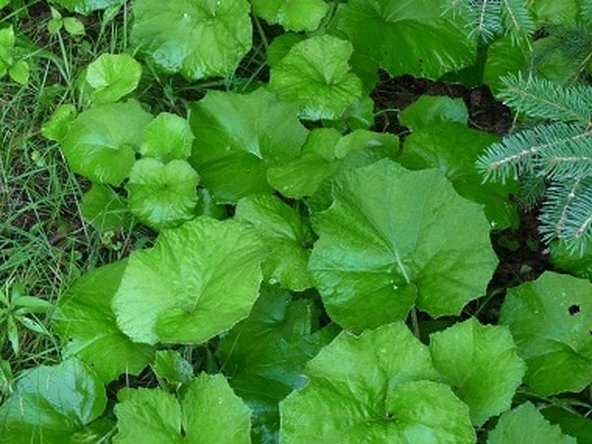 The leaves are dried for infusions and smoke blends and can be added to an already started flower tincture... since they show up later to the spring show. Coltsfoot Smoke BlendsInhaling burning plants is nothing new to humans, You will find some people who enjoy blends that have Coltsfoot added, and some people waft the smoke in a home where there are colds and flus to help settle the lungs much the way White Sage and Mullein leaf are burned. A small amount of gently wafted smoke near someone who is sick provides antimicrobial and antispasmodic properties quickly and efficiently to the lungs. Seems counter-intuitive, yes, if your thinking of it like a cigarette. Rolling and smoking when sick is not the best or intended way. Think gentle wafting of the smudge-like burned smoke for quick assistance. While this is not my favorite way to work with Coltsfoot, I do have the leaf in smudging blends for clearing the air, particularly when airborne microbes are attempting to survive in my home.  Making herbal syrups is a breeze with a little preparation and can be finished in less than 2 hours! Yes, I've made them while feeling sick so I have it to take that very day. Coltsfoot & Thyme Cough SyrupINGREDIENTS:
INSTRUCTIONS:
May your explorations of Coltsfoot be rich and beautiful as we lean into our wild plants for walking strong these days. xo- Jen 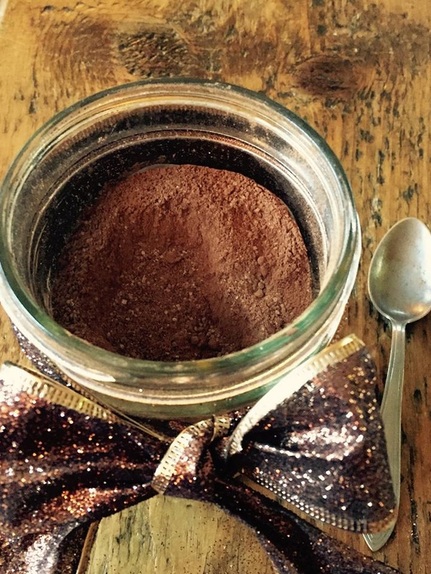 Honoring Cacao There's many reasons why this plant has circled the globe with us! Some plants will always walk close to people and this is definitely one of them. Let's talk ChocolateI have met only one person who did not like chocolate and one who was allergic in all of my travels. Have you ever pondered why this tropical plant's seeds are so popular and how places, like Switzerland who cannot grow Cacao, have become well known for their chocolate? Some plants have this ability to inspire humans to accomplish such feats. I've included a recipe for a powdered hot chocolate here that is becoming part of my gifting this year and just had to share the recipe because it's that good. Try it, I'm serious! A quick peak at some of the benefits include:
That's just a few. More to share in another article later. Promise! The darker the better is the caveat. Quality matters. Cultivate a taste for the more bitter, quality made chocolate and you will find that you only need a small piece to satisfy that urge. Poor quality or milk chocolate makes us crave more because the body is looking for the medicine and nutrients which are basically diluted (or adulterated) in these forms. Hence, you have to eat more and more, which increases sugar and caloric intake. This is so not necessary so stick to fair trade, dark, and organic too. Yes, the bars are more on the cost side but actually less expensive on the health maintenance side of the equation. Supporting the families that work hard in the tropics with these indigenous plants deserve to get our global honoring too through supportive purchases. That makes for good medicine all around. Cacao & Ishpingo Tree Replanting and Prayer Dedication Project I'm heading to Ecuador in February 2017 to see my teacher Rocio Alarcon who is from the rain forest. She has planned a reforestation project in an area devastated by clear cutting and oil drilling to satisfy our oil hungry country that is destroying many things, one of which is the WATER. This was no small feet either as the government first wanted to plant grass and foreign trees. Rocio presented an impeccably sound ecological management plan for the same area that would serve the area better and it was accepted! We will be reintroducing two native tree species and one is Ecuadorian Cacao (...squealing with toes wiggling... excited is an understatement!). Why is this as important as getting away from oil? The rain forests are needed to maintain our global ecosystem. With 20% destroyed and 20% not functioning well, we have a dilemma. Replanting must happen along with seeking alternative lifestyles that are more energy efficient. It starts one tree at a time. Should you wish to send prayers and dedicate a tree(s) to your family or any person, place, or cause... I'm carrying my small Ecuadorian handmade bag from the women of this area with these small, private, sacred, paper, prayer bundles tried with string or twine that you prepare and contain your intimate prayers between you and the Earth Mother. They will be ceremonially dedicated to a tree(s) in honor of who you decide needs such dedicated prayers. The trees are $11 and grown by native women in Ecuador. If your heart calls for this, email me for my address and details (see below). I'm truly honored and so excited to be a part of this. Your name or place or cause will hang on a small tag in the middle of the rain forest in honor of your prayers that will either be buried with your tree(s) or burned in ceremony to release the prayers. Join me in making small actions ripple out for real change to grow. 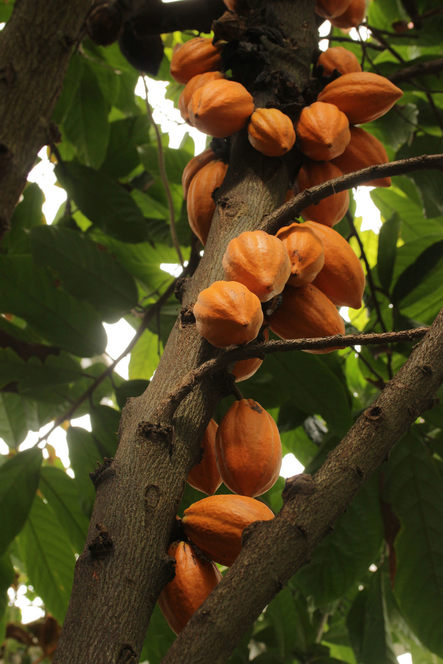 Cacao pods come off the trunks of these magical trees of the secondary rain forest ecosystem. Inside are the cacao beans we seek to take in as food and make medicine. In this recipe we use the cacoa beans ground to a powder, also called 'cocoa powder' OK Jen the recipe... Did I mention my favorite recipe for hot cocoa?This makes a powdered hot cocoa mix without milk. You can add 1-2 tablespoons to warming cow, goat or coconut (my favorite!) milk for the best hot cocoa. The trick here, get the best quality ingredients you can find! It makes all the difference. INGREDIENTS:
DIRECTIONS: -* You decide how sweet but even with 2 cups it is not very sweet. Start with one cup and taste test before adding more. I like it more bitter. Maple granules are great too. -Place all ingredients in the food processor and whirl until the chips are all finely ground. -Find great bottles or use mason jars and make a home-made label (with all your known and easy to pronounce ingredients!) - Add 1-2 tablespoons whisked into a mug-sized amount of warming milk of your choice until steaming hot. Pour and enjoy! Optional Additions: Cinnamon, Cayenne, and Cardamom are traditional additions but other spices can be added to your liking. I'm thinking about dripping some Sweet Orange Extract in my next batch! I also add to Lemon Verbena tea as I was taught by my teacher to drink at 6am on an empty stomach to get all the benefits of the cocoa. Yes, a more detailed article about Cacao and cultivating intimacy with a tree even though it may not grow near us is coming. Consider this as part of your initiation process ;) The beauty about the plant world is that not all medicine has to be bad tasting, harsh, or hurt in some way. So grateful for this. ENJOY!! Much Love, Jen 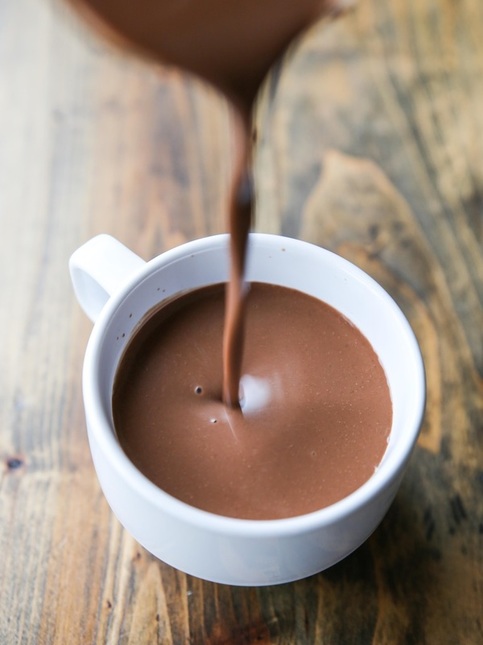 ElderMoon School of Herbs
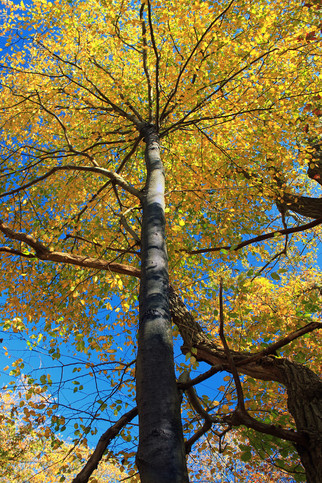
EMS has on-going Herbal Classes, on-line and in-person, to support the expanding desire among us to know the plants intimately as part of one's healthcare system for ourselves and loved ones. Deepening our relationship with the plants is where it all starts. 'Begin anyway' is our mantra. Have a look around and email if you feel called or have questions. Tree Donations and Prayer Bundles for Ecuador? Email me directly for my address and details at: [email protected] Thank you for supporting small businesses and grassroot projects world wide. Change does happen from our seemingly small efforts. It just may be the only way. xo-Jen 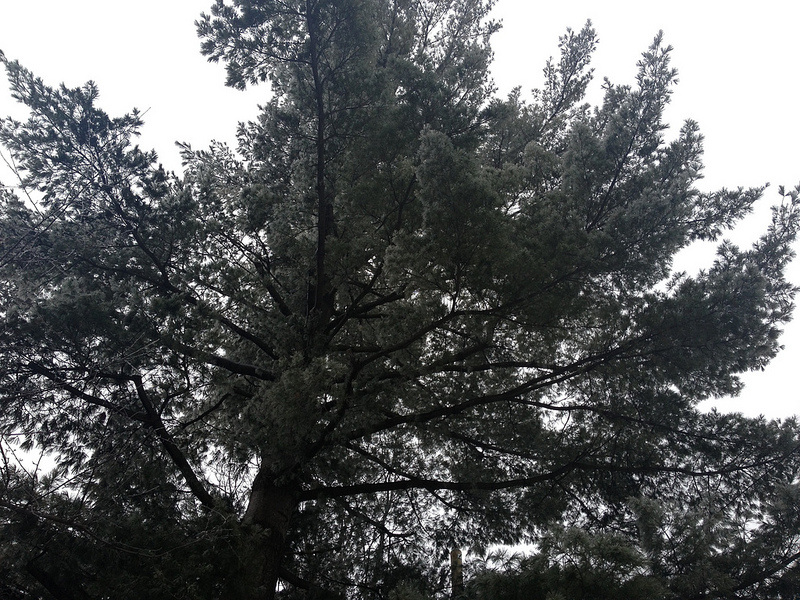 White Pine - Pinus strobus What trees teach me about honoring the medicine in their bark...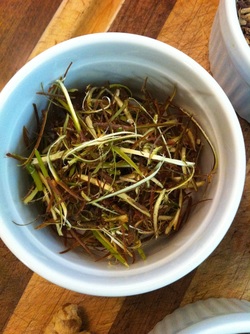 Whittled Black Birch Bark for Root Beer Syrup Whittled Black Birch Bark for Root Beer Syrup Trees are sanctuaries. They hold the map of the past through their whole body, as unique as a fingerprint, but reach upward and outward toward a future we sometimes struggle to see. As a small child my closest relationship to any tree was White Pine. When I close my eyes, I can still feel the sway of the sixty foot White Pine I climbed to the top of regularly to my favorite spot where I could wedge my little six year body into a nook and safely drift about on the wind with the branches. The floating feeling in the belly holds moments akin to flying. I would bring bread and seeds as offerings to the mama birds nesting up there and sometimes nap softly to the rocking of such a great mother dancing with the wind. I climbed up there for years until we moved away at fourteen but never has my connection to White Pine been changed by geography. Fall is traditionally the season for bark harvest and it may be one of my most satisfying medicine making tasks. It requires I lean into my relationship with a tree and these relationships are different than with smaller herbaceous plants. Yes, we can have different relationships with and honor the plants, trees, animals, insects, people, and even the elements, landscapes, and microbial world. The task of whittling bark with my sons over the years has always been enthusiastically received here. This was how a good knife and the care of such tools was first introduced to them. When whittling, the mind also enters that hypnotic, trance-like state of being, much the way gazing at a fire captivates us to higher thinking. The therapeutic medicine is already working just by being available to such a connected, receptive state. Rushing about, task oriented, with a connection to time that is stressed and manic will never produce a medicine nearly as potent as one made with the process honored. Seeking connection to the trees is the beginning. Knowing how to find, tend, intuit, harvest, and make good medicine that can live near you, in your home apothecary, is what I speak to here. 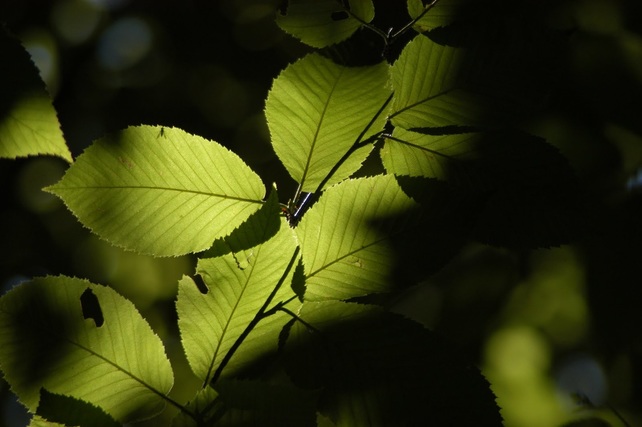 Black Birch - Betula lenta Let's Talk BarkWhat is bark to you? Some describe is as being like our skin and this is in some ways true. Bark is constantly growing and changing based on the needs of the tree and the influence of its surroundings in the local environment. We can see this within the rings of the tree and how widely spaced or close together they are and scientists study this fingerprint of the weather the tree endured within its life. Elevation changes how trees grow as well and they are smaller and smaller with higher elevations in some regions. Interacting with the world around them determines what strong chemical constituents a tree will make. We make medicine from the plants, or in this case the trees, that make chemical compounds to ward off insects, disease, sun damage, and other elemental and environmental exposures. Their protective medicine made for their health is what we take in and stimulate within our bodies. It's so simple but still full of such magic for me in that we can literally be this connected to the plants and trees. Many forget. But many are remembering too. Trees are part of a network system within a forest and so they’re very design includes interacting within community as a way to thrive and protect themselves and make strong compounds along the way. Bark contains the growing cells of the tree, as well as the cells required to transport water and sugar for photosynthesis on a cellular level. Bark is always interacting with the rest of the tree, the surrounding trees, the mycorrhizae in the soil, and is constantly reading and responding to any changes in its surroundings. Demystifying plant magic with the science surfacing today that proves these connections to be true does not remove the magic for me. I hope this is true for you. It is still truly amazing how trees, plants, people and all living things create form from water, sun, air and earth. So just under the thick outer bark is the layer we seek for medicine making. The outer bark is not the place to harvest for this is a hardened protective coat. We are seeking the cambium layer that is the alive and actively responding part of the tree. It can be white, green, yellow, even pink, and is generally smooth, moist, and clearly alive as a thin layer of active cells that surrounds the entire tree just under the tougher outer bark. 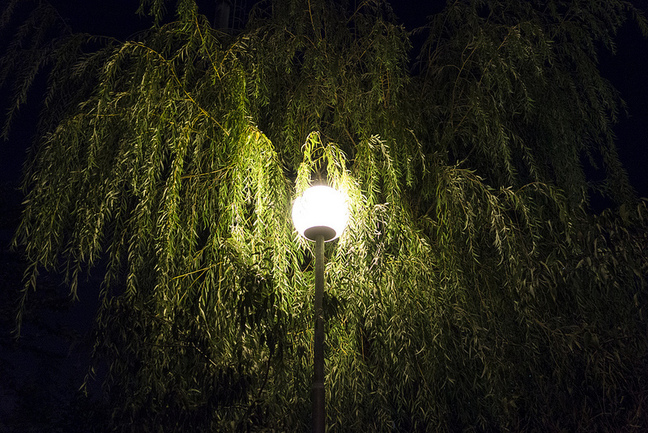 White Willow - Salix alba What is Ethical Wildcrafting? "Ethical Wildcrafting' was a term coined decades ago in the herbal medicine world and is the practice of harvesting plants and trees conscientiously, to avoid damaging the health of the population or the overall ecological system they thrive in. It’s especially important here because if you don’t harvest bark properly, you will literally kill the tree. The basic principles of harvesting are simple:
This issue is close to my heart, as I’ve watched plant populations decline as people violate the sanctity of the natural world in the name of fear and greed. Ignorance is no excuse either. Honoring the basic principles of land stewardship means simply being a human who acknowledges the interconnection of all things in the natural world. Every action we take on a piece of land requires the natural world to respond to it. So we would be kind and wise to ask ourselves how our choice affects the whole. Harvest intentionally and teach the people around you to do the same so our natural world stays abundant, potent, and thriving. Follow United Plant Savers as a great resource for staying aware of at risk and endangered plant and tree species. 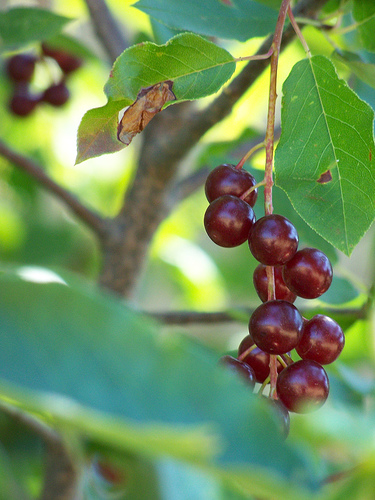 Wild Cherry Bark is a traditional lung remedy (Prunus virginiana) The Unintentional Death of a Tree Maybe you can imagine the impact of removing one tree because of poor or unintentional reasons. The most common way to kill a tree fast and efficiently is by ‘girdling the tree’, or removing a section of bark around the entire circumference of the trunk of the tree. Please do NOT remove bark all the way around the base of the tree like this. Girdling kills the tree because the leaves and roots can no longer connect and transport water, nutrients and sugar between the tree top and roots. This leaves the tree to starve to death. Girdling is one thing if you’re carving a homestead out of the wilderness for it’s a time-honored way of clearing forest, but it’s something entirely different if you’re just doing it because you don’t know any better or are filled with greed or have blatant disrespect. And all of this affects the medicine. We're being asked to think in terms of the ecology of restoration instead of consuming and taking. 'Having enough' is built into the restoration way of being. How to Harvest Bark Tools & Timing:
Harvest bark when the nights become cool, the days are warm and crisp, and the leaves are changing color and just starting to fall. You want the tree’s energy to be focused on shunting all of its activity down to the Earth for winter. This concentrates the medicine into the moving part of the bark we spoke of called the cambium layer. What Tree is Calling You Common species that make great medicine include White Willow, Wild Cherry, Witch Hazel, White Oak, Sassafras, Black or Silver Birch, Black Haw, White Pine, Cedar, Juniper, Hemlocks, Spruce and more depending on the part of the world one lives in. It’s wise to also find the trees you are seeking medicine from in the early fall so you can positively identify them when they still have leaves. As you spend more and more time with the trees, you will know them from the bark which is always quite unique. Once your tree is located, simply return when the time for harvesting arrives. Choose a smaller tree so you can reach the branches or get a pole pruner. These scouting trips are part of your connection, relationship, and honoring of the medicine within the bark of the tree that calls. Be aware to never harvest on state lands at all or other's property without permission. While scouting and finding your tree, do taste the tree. Cut or pinch off a little twig, after intuiting a sense of permission and affirming this is ‘the tree’ I seek. Chew on it until you get a good sense of the flavor. Then spit it out if need be. With a little experience, you’ll be able to tell how strong the medicine will be from this tree. Even if you’ve never tasted this medicine before, know that strongly medicinal barks will affect your mouth almost immediately. Willow and Witch Hazel suck up all the spit in your mouth (astringent), sassafras makes your mouth feel watery and slippery,(demulcent), black birch tastes like root beer or wintergreen for some (aromatic), Wild Cherry tastes a bit nasty but is identifiable as such, Pines taste just like the sap smells (aromatic) and these essential oils travel quickly up through your sinuses and down to your lungs. If you don’t notice anything, even if you don’t know what it should taste like, move on and be sure to only make medicine from a tree you absolutely know. If you’re not routinely tasting the plants you harvest, i suggest getting into the habit. This is one of the skills of an herbalist for testing quality, just as you would use all your senses to choose vegetables or fruits. The medicine person does the same for evaluating the medicine. Medicinal content changes throughout the season and from year to year, based on where each tree is in its growing and reproductive cycle, and what its life has been like this year. This is true for smaller herbaceous plants too. If a particular tree isn’t strong enough this year, come back next year and see what it says to you. 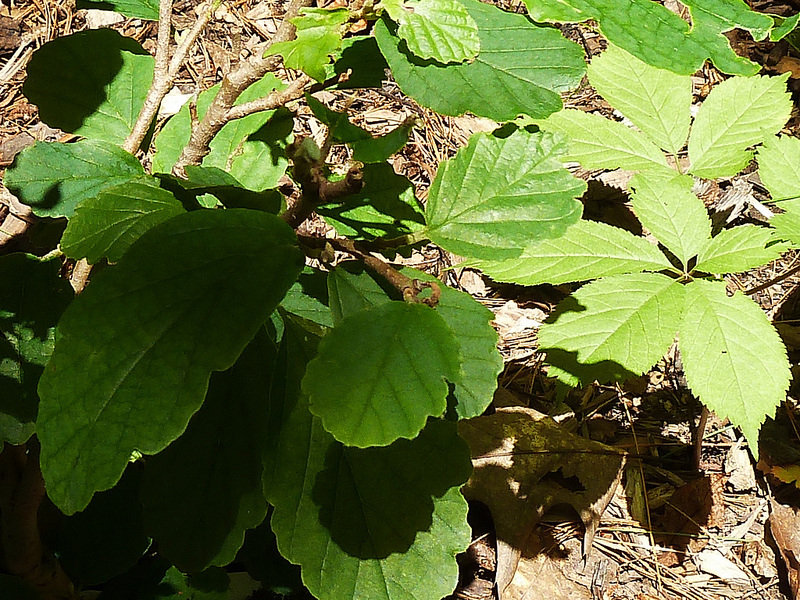 Witch Hazel - Hamamelis virginiana Time to HarvestSo now you’re sure you’ve got the right tree, and it tastes great (or terrible) so you know it’s got some magic and good medicine in it. Next I offer a gift to the tree. This a traditional way of working and you can decide what works for you. A moment of silence, a song, a prayer, some of your lunch or water, or a handmade something that honors the tree you are taking medicine from. The next step is to harvest the bark. Choose a small branch, maybe the size of your wrist or smaller. Find a place where the branch branches, then identify the collar, or the fatter part at the base of the branch. Use your pruners or saw to cut the branch just beyond the collar; if you cut into the collar itself, the tree won’t heal well and could rot from microbial invasions at the site. Make your cut parallel with the collar, so water won’t collect in the cut. Don’t let the wood split or crack, cut it cleanly so you don’t hurt the part of the branch you’re leaving behind; if necessary, cut part of the way through from the bottom up, then finish by cutting from the top down. Remember that the priority is to not hurt the tree: don’t take more than the tree can spare, don’t take more than you can use, and don’t make cuts that will hurt the tree long term. For smaller quantities needed because you know a large branch is too much, I cut thumb-sized branches and estimate how many to fulfill my needs. You get better at this estimating with time and practice. Time to Whittle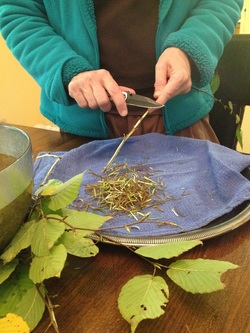 Whittling Black Birch Bark Whittling Black Birch Bark Bring the branches to your place in the sun, like me here, bring inside by the fire if it's too cold out for you. Look them over carefully and wipe off any dirt, lichen, insects etc. Use the pruners to remove tiny twigs and pile them up for they’re medicinal but you don’t need to save them unless you have a use for them. I often add pine needles to my bark preparations, just for the record. So now you can cut the branches into smaller pieces at this point to make them more manageable, 1-2 foot sections work well. When you’re ready to whittle the bark, sit with one end of a branch in your non-dominant hand, and the other over your lap in front of you. Use your knife to whittle down the length of the branch, always working the knife away from you so there are not accidents, removing long strips of bark. You want to make sure you get the cambium layer, the inner bark that contains all the good medicine, but not the wood. Remember, the cambium can be white, green, yellow, or pink, and is generally smooth, moist, and clearly alive. If you’re shaving off wood, make your cuts shallower; if you’re leaving the cambium on the wood, go back and shave it again. If you’re struggling to shave the bark, try switching knives because sometimes a different size, shape, or well sharpened blade does the trick. When you’re done, the branch should be all wood with no bark visible. Unneeded parts make good kindling for the fire. Making the Medicine To make bark medicine, you can tincture it fresh in alcohol or vinegar, infuse it in olive oil for topical uses, or dry it for later uses of bathing, teas and decoctions, or syrup making. Drying Bark: Spread the bark in a single layer on a drying rack in a cool, dark place, and stir regularly until dry, a few days to no more than a week. Even better is a dehydrator. Once it’s dry, store in jars, or bags away from light and well labeled. Dried bark is useful for teas and decoctions, ground into poultices. Fresh Bark Tincture or Vinegar: Bark, because it is so fibrous and dense, needs more liquid to extract all the medicine so fill your jar with the fresh whittled bark and don’t pack it too tight. Most barks prefer lower alcohol content, too, so use 40%-50% alcohol (vodka or brandy work well). Next fill the jar with the alcohol or vinegar and cap tight and shake. Label well with the common name, latin name and date. Shake a few times per week, store away from direct light and you can strain and use after two months. It will keep for more than 10 years. Dried Bark Tincture: I fill my jar 1/2 full with dried bark if you have or needed to buy it already harvested. Then fill with your vodka or brandy or warmed vinegar, cap and shake a few times per week for 2 months, labeled well. Strain, re-bottle and label for use. I hope you decide to give this a try! It’s so easy and satisfying, especially in the dead of winter when you clear up that cough with your own White Pine Bark vinegar or tincture, or help a brutal headache with White Willow Bark you made yourself with the tree right outside your window that you love deeply, or eased postpartum swelling or hemrroids with a Witch Hazel Bark sitz bath. I love hearing your successes and failures with medicine making as we all learn equally from both. Do let me know how it goes! My recipe for Root Beer Syrup is always better with fresh whittled Black Birch Bark. Enjoy. xo-Jen
Herbal Courses On-Line and LIVE at ElderMoon School |
Jennifer Costa, Herbalist-RN, Teacher, Botanist BS, EM-CST, and Founder of ElderMoon School of Herbs & Earth MedicineCategories
All
Archives
January 2023
|
 RSS Feed