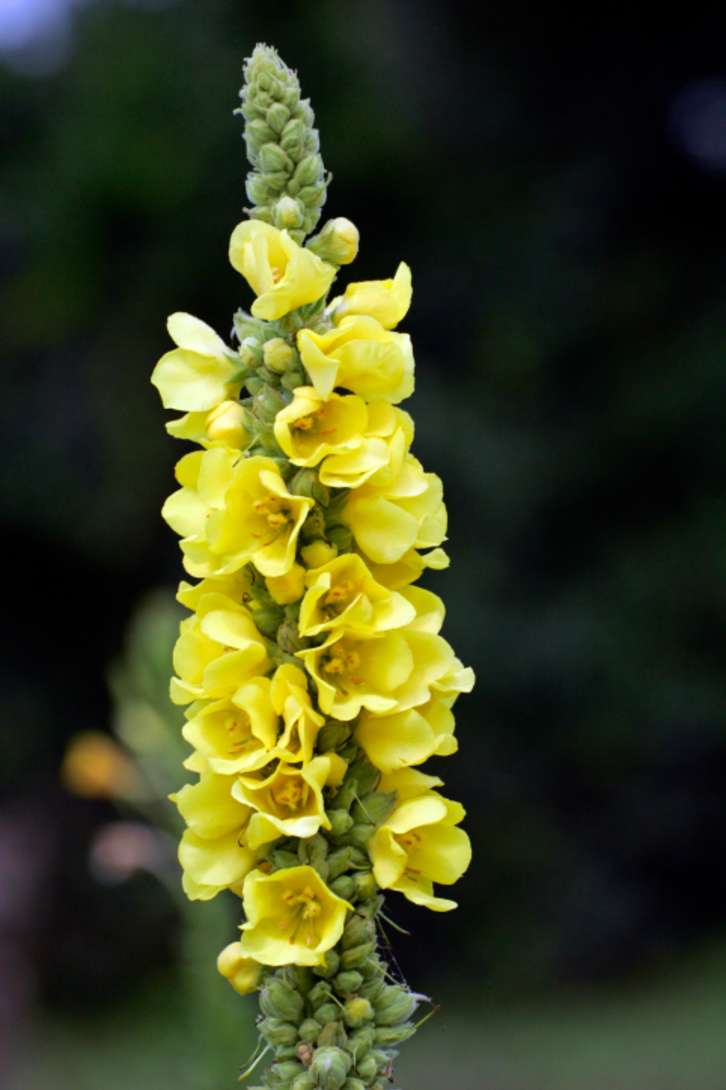
 Mullein ~ Verbascum thapsusMedicinal Plant Part: Leaf, Flower Medicinal Actions: Demulcent, emollient, astringent, antimicrobial, antispasmodic, pectoralis, expectorant, and relaxant properties, which makes it beautifully helpful in pectoral/respiratory complaints and bleeding of the lungs and bowels. The whole plant seems to possess slightly sedative, mild narcotic properties. Common Names: White Mullein. Torches. Mullein Dock. Our Lady's Flannel. Velvet Dock. Blanket Herb. Velvet Plant. Woollen. Rag Paper. Candlewick Plant. Habitat, Description, Harvest: Mullein is a widely distributed plant, being found all over Europe and in temperate Asia as far as the Himalayas, and in North America is exceedingly abundant as a naturalized weed in the eastern States. This plant is biennial and there are many species too. I stay with the ones that have a white mid vein and white hairs along the flower stalk. The leave can get huge, up to 2 feet long when happy, but the plant starts as a small and fuzzy rosette each spring that grows larger and larger the first year. The second year rosette emerges large and the flower stalk quickly rises from the center by late spring of the second year. Leaves are harvest through the summer of the first year to spring of the second. Flowers are harvest in the summer of the second and final year. Herbalists seek these easily found abundant medicine plants for they provide through efficiency and potency for the relevant conditions of our times, and also provide teachings of the power of simplicity and ease through their actions. Traditional Medicine Preparations: For year I’ve harvested fresh Mullein leaf for tincture, dried Mullein leaves for infusions, teas and for smoke blends, freshly wilted flowers (leave out on a towel for a day so some of the water evaporates off) for Mullein Flower Infused Olive Oil. 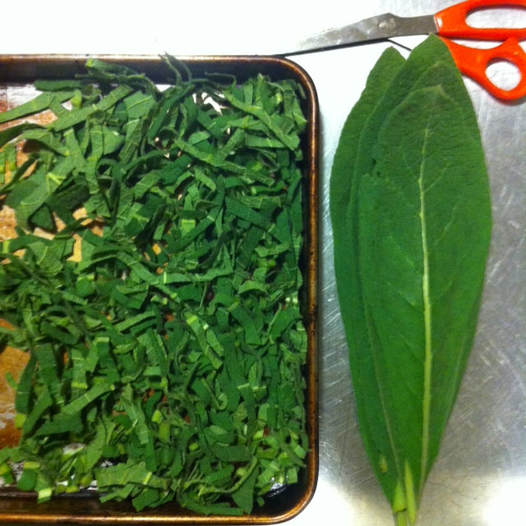 Mullein Leaves for Respiratory and GI ComplaintsCarefully examine each leaf to check for mold or decay on the leaf undersides as these should not be harvested for medicine making. Once harvested, I either dry them whole in bundles of 4-6 stalks, or I cut the leaves cross-wise and dry in 3-5 days and store away from moisture and light. When harvesting both first and second year mullein leaves. The hairs are prominent so have a good straining method before ingesting to prevent irritation in the throat. Mullein is found in all formulas addressing the lungs for any respiratory ailments from coughs due to colds and flus to management of asthma. Less often noted but just as potent are the GI Tract benefits of toning and supporting digestion while soothing irritation to mucous lining. Taken as infusion, homemade syrup, or tincture, many feel the expansion of the entire chest cavity and a lengthening of the spine as breathing muscles of the diaphragm and between the ribs are relaxed so they can work more efficiently in a regular healing breath rhythm that improves air flow, oxygenation, and expectoration of excessive mucous and/or infection lodged and festering in our lung tissue. Coughing is good. But we want efficient deep coughs to clear the lungs well. The calming and expansiveness of these actions is specific for easing the spasms associated with asthma. Mullein is safe for long term dosing for such chronic conditions as this. Recover from irritated and inflamed GI tract conditions is hastened in the presence of the demulcent and astringent properties of Mullein that encourage toned well-functioning mucosa to get back on tract. 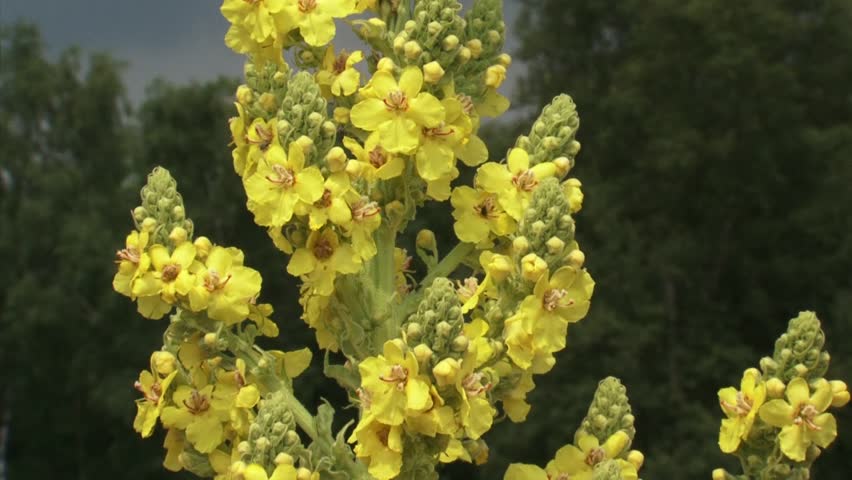 Mullein Flowers for the EarsThese delicate yet potent flowers are harvested for making oil for the ears for impacted ear wax mobilization and for inflammation and infection, though I tend to combine with garlic to enhance the antiseptic properties. I suggest just Mullein flower oil for impacted ear wax, any visible lesions, or abscesses in the ear canal. Please drop NOTHING in the ear canal if the ear drum is ruptured, draining mucous with a bit of blood, and already in a healing process. Before rupture, the pain is of course excruciating, but is relieved instantly with the pressure release of rupturing. The ear drum is designed to do this, and quickly, and needs no help other than keeping the outer ear clean and dry with warm soapy cloth as it drains. I encourage the person to lay affected ear down and allow the ear to naturally drain with the help of gravity onto a towel. It looks much like blowing your nose through your ear with a little blood show. Nasty, yes… but so good it’s draining away and they have found comfort from the pain! You will do more harm than good putting anything into the ear at this time. Treat the immune system internally instead, along with rest, ample hydration, and simple nourishing soups. It is easy to find traveling otoscopes (to look inside the ear canal) for less than 15$ today and it’s a great simple tool for the practice of visualizing the ear canal when healthy and sick. It’s the only way to truly learn what an infection looks like. We must know the tissue when well for comparison so I encourage regular peeks inside the ear canal to learn. It's not hard and one can get quite good at it quickly with a little practice. Inner ear infections versus outer ear infections of the canal are easily discerned as well, though treatment is the same with localized instilling of an oil, pain management, and immune support with herbs, rest hydration and simple nourishing soups. Pain is managed best with nervine herbs such as Chamomile, Skullcap, or Valerian root (there are others too), and hot salt packs I learned years ago from Rosemary Gladstar. Simply warm 2 cups of dry salt in a dry pan until warm to the wrist, but not too hot to touch. Pour into a bowl lined with a clean hand towel, gather up the corners and tie closed and place over the infected painful ear. Sometimes I add a few drops of Eucalyptus or Lavender essential oil. This stops pain almost instantly while other therapies are kicking in, increases circulation to the area and speeds drainage of the infection through opening the Eustachian tubes and sinuses. So simple and works great. 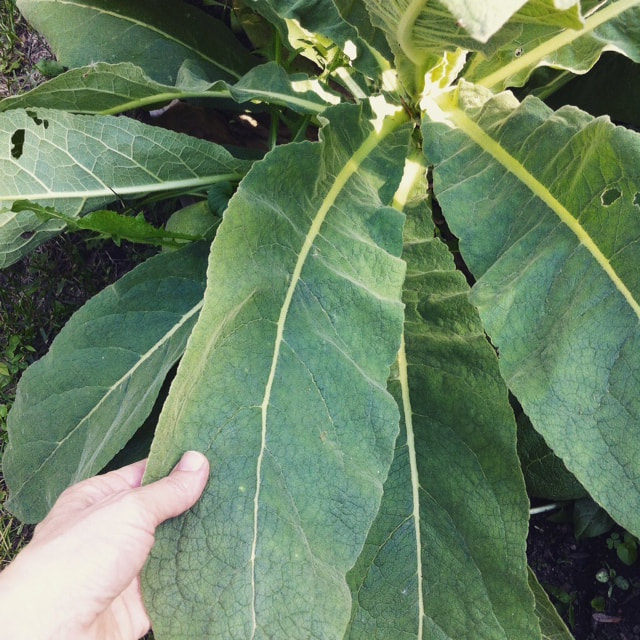 Interesting Historical Notes:"The flower stalk oozes a brown protective, self-healing resin for the plant that was once used in baking like Vanilla is today for it has a faint vanilla aroma and has also a great history in fermentation of stouts and liqueurs. Rotenone is a fish poison and very effective insecticide originally of plant origin but now synthetically produced by our government. It occurs in mullein seeds and seed capsules, and leaves. Mullein seeds and seed capsules have been used as fish poison in the past. Mullein seeds and flowering stalks were also used to get rid of lice and scabies. Rotenone is water insoluble, but readily soluble in ethanol, acetone, and other organic solvents such as olive oil. Fatal rotenone poisoning causes respiratory failure, ironic, huh? Mild rotenone poisoning from inhaled mullein smoke may be spasmolytic (reduces spasms) for asthmatics and chronic bronchitis. It may suppress the cough reflex, and, act as a local anodyne (pain killer) for inflamed ear canals. Rotenone is more toxic when inhaled than when ingested. Once again, the poisonous substances of plants in low doses produce some of our strongest medicines." – Thank you to Ryan Drum. 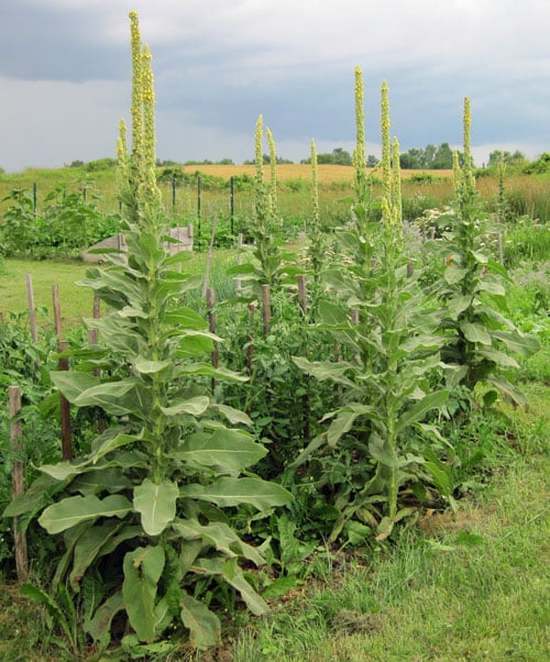 Personal Journeys with MulleinMy first year in herbal school I received visions from Mullein as the tall flower stalk superimposed as the spine within our human form. Mullein had me see and feel this in my body so I could truly know this expansion and lengthening as my cells, tissues, and bones as they made more space within my body for movement both physical and energetic. Grief work, which was in my lap back then, I learned would be a healer and teacher who would be present all through life, not just for me, but we all have this work in our lap. While I sat with these gentle giants, I learned how Mullein deeply assists us with re-patterning our stance in the presence of the grief we attempt to carry. It allows the protective heart posture of collapsing our shoulders forward with a rounded back as we pull our heart away from the world to open, to expand. Mullein supports movement, flow, and the release of the tears behind the rage, which is often one of the many masks of grief, as we re-learn a new posture, a new stance, in the presence of our grief as teacher. Solidified and held grief makes us sick. It must move. Mullein is often communal in how it grows and this mirrors the medicine of grief that also needs community. We are learning still. Asthma, respiratory, ear and GI tract lessons have all been learned on the job as a mom of three sons who each gave me the lessons I needed on how to assess and treat such conditions as I nudged their bodies back to health. And yes, our children carry their own grief too, sometimes lineage, personal, or collectively rooted. Mullein has always been in my home apothecary since my very first creation of an apothecary. It’s easily found in herb and health food stores for reasonable prices due to abundance and ease of harvest, or found when away from home in wild places where newly disturbed soil encourages the seeds to germinate as one of the first plants to do so in such places. Each mother plant in seed makes thousands of tiny black round seed on the huge stalks that can get up to 10 feet tall. If you find yourself on new land without Mullein there are two ways I love to entice Mullein closer. One is to call to Mullein deep within. Make an offering too. It will always come to those who wait and our work is to remain poised and ready to receive. Many are surprised at how Mullein shows up too. The other way is to find stalks in seed and carefully transport to your land in some creative way. Then wave and whack these as massive wands over areas you think Mullein will love, partly to full sun is preferred. I sing softly and speak praise to this beauty too. I imagine I’m quite a sight and it makes for great conversation from non-gardening or non-herbalist neighbor folk! Thank you for wandering through here. Much love, Jen
0 Comments
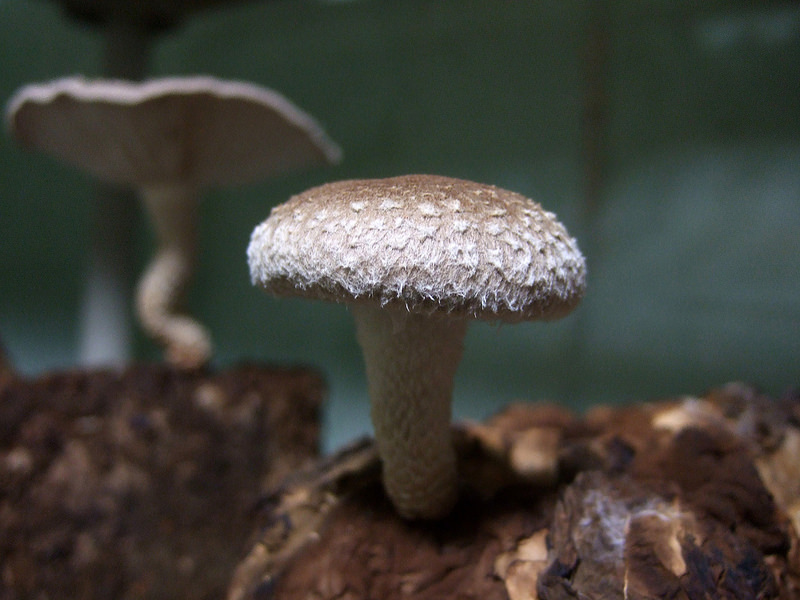
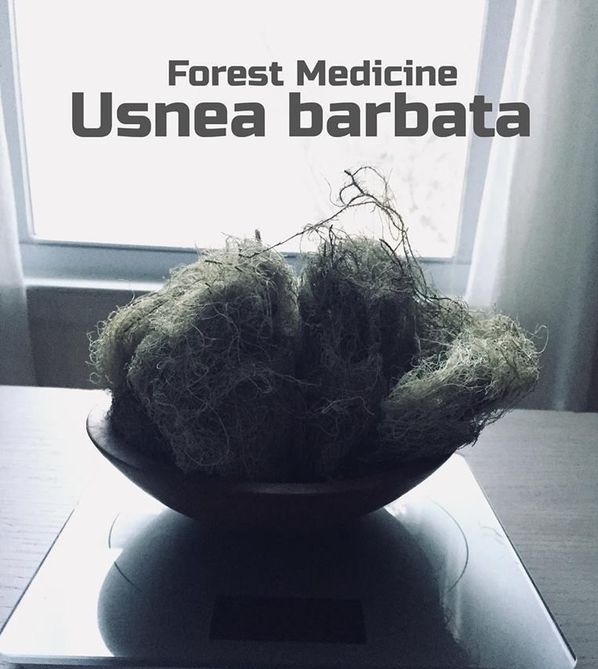 COMMON NAME: Usnea Other Names: usnea lichen, old man's beard BOTANICAL NAME: Usnea barbata, Usnea longissima, Usnea hirta. Usnea plicata, Usnea fillipendula, (there are 600 known species but these are the most commonly studied and utilized species for medicine). Plant Family: Usneaceae CONSTITUENTS: Usnic acid, essential fatty acids, mucilage, sterols, and many more not being listed here at this time. PARTS USED: dried thallus, also called lichen strands. PREPARATIONS: Tincture, liniment, compress/fomentation, poultice, cough syrups, cold lozenges, decoctions, wound washes, wound packing & powder, douches, sitz baths. Taken internally and applied externally. Tincture can be applied as liniment to skin full strength or added to mister bottles with water and essential oils for skin fungus and infections. To bathe sinuses add 2-3 drops of tincture to netty pot washes. MEDICINAL ACTIONS: Analgesic, Antimicrobial, (Antifungal, Antibacterial, Antiviral, Antiparasitic, Antiprotozoan), Antiseptic, Antiproliferative (cancer), Immunostimmulant, Anti-inflammatory, Antineoplastic (cancer), Antioxidant PRECAUTIONS: Not for use during pregnancy is often reported by many. No other known precautions exist. I will share that with flu and pregnant, I did enlist the support of Usnea with great results. My rule with plants where we just don't know the effects during pregnancy and yet there seems to be good reason for it to be fine is to take 1/4 the dose to start. The pregnant body is very sensitive and requires very small doses and can work with this well because of the heightened state we are in when pregnant. You get to decide for you and your baby. This is not based in any research nor is it a suggestion. I only share what I've experienced. 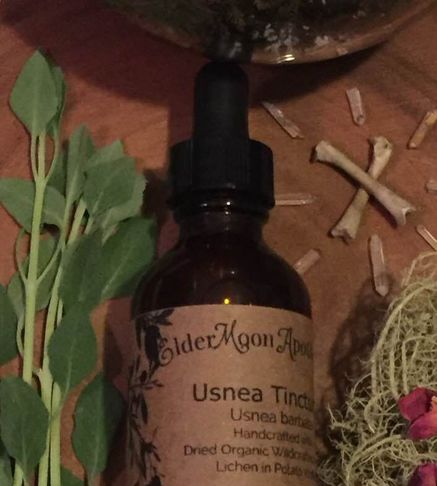 THE MEDICINE: Walking through the forest is where one will encounter Usnea. Did you know know that the inconspicuous gray-green fuzzy plant covering many of the trees is one of the gentlest yet strongest immune tonics and antimicrobials in the herb world? Usnea is a lichen; a combination of an algae and a fungi growing together symbiotically on the surface of the tree. Also known as Old Man's beard, it grows in little hair-like tufts, with the green algae covering the white string like fungi. The best way to identify Usnea is to pull a string apart and look for this white thread. No white thread means it's not Usnea. I do recommend showing a sample to a knowledgeable person to confirm you've got the right plant. Some people say that the Usnea lichen likes to grow in old growth forests. It must be true but I've seen it on younger trees too. Stephen Buhner has suggested that Usnea serves as the lungs of the forests they grow within, and in some way supports the overall health of the ecosystem. I believe this to be true. It carries the energy of a wise elder, maybe a grandfather for me. This plant grows profusely in wet climates, like the Pacific Northwest, where tufts can be up to a foot long. The species that grow here in the northeast tend to be smaller, which can make gathering it a tedious task. I find gathering after a big wind storm good because the wind will blow down the Usnea from the higher branches. I grew up in orchards and the old abandoned apple trees had lots of Usnea growing on them. Usnea is an immune system tonic that can be used in acute situations as well as for long term immune enhancement and general prevention. It has no side effects or contraindications, and is safe for children and animals. It can be taken along with or instead of Echinacea. Usnea is more specific for strep and staph infections than Echinacea, and the antibiotic properties are most specific to the respiratory and urinary systems. We take to help heal respiratory and sinus infections, bronchitis, pneumonia, strep throat, colds, flus, as well as urinary tract, kidney, and bladder infections. Usnea is also beneficial for women with yeast infections, trichonomosas, bacterial vaginosis, and chlamydia. It can be helpful as part of the plant-based remedies taken for people with chronic fatigue, HIV, herpes, and other chronic conditions related to depressed immunity, especially when taken in a pulsed fashion for acute flare-ups within the chronic condition expression. Usnea can also be used externally for outbreaks of staph, cellulitis, or infected wounds. I generally use the powdered herb, strong decoctions applied with a cloth, or the diluted tincture for open skin and straight tincture for closed skin. The moistened herb also makes an excellent bandage to be used directly on the wound or affected area. Should you have the great fortune of being near this one fresh when an injury happens, packing the wound with fresh plants after bleeding has been addressed is perfect for keeping the wound tended until you can get to a better situation for cleaning the wound. This tough yet delicate looking little plant (not plant, lichen) doesn't make much of a tea due to having so little water soluble properties, so I recommend using it as a tincture. The heat required to make many medicines will however take the place of the alcohol so you may stay water-based in your preparation if alcohol is a concern. Increase your dose by 1/4-1/2. I've made a throat spray by diluting the tincture with water, Essential Oil of Eucalyptus, and Honey. It was a spontaneous creation that works great and seems to have the ability to kill microbes on contact. I also, as stated above, place 2 drops of tincture into a full netty pot for sinus irrigation. I do this when I know I've been around the flu or have started active symptoms. I also take it internally 30 drops 3-5x/day and add to cough syrups too. I've found it to be quite effective with serious cases of bronchitis and pneumonia. Dosing will be increases from 2-3x/day to every 4 hours 30-60 drops to 1/2 teaspoon of tincture with convalescence and bone or medicinal mushroom broth based soups for a few days. Let’s be wise my friends. If someone can no longer walk well or maintain their oxygen levels so they look pale and grey (awful), seek medical attention. These are advanced distress signs of a very weak system so unless you are comfortable with what this looks like and what to do, seek help and learn. Watch closely so you can learn well from the experience. And yes, one can treat with plant medicines and modern medicines together. Seek guidance on how if you are inexperienced. Herbalists were ordered with threats to be silent by the FDA during the Anthrax scare. This was the first plant turned to for protection from inhaled life threatening situations; second to quarantine. Hypothetically speaking, dilute the tincture in a spray bottle with Eucalyptus essential oil and mist in front of the face for inhaling. I add 60 drops of Usnea tincture to 2oz. of water with 20 drops of the Eucalyptus essential oil. It could be called, hypothetically speaking, an "air purifying spray". Also use the netty pot with 2-3 drops of tincture only (more than this burns the sinuses). For Weight Loss? NO. It was reported to help with this by isolating Usnic acid and concentrating it and people were hurt most likely due to toxicity from receiving the plant in compound isolated form. Work with the full spectrum of whole plant preparations for safety reasons. The FDA was considering banning the plant due to this but it has fallen away a bit thankfully. Do educate that this is not a way to work with Usnea. 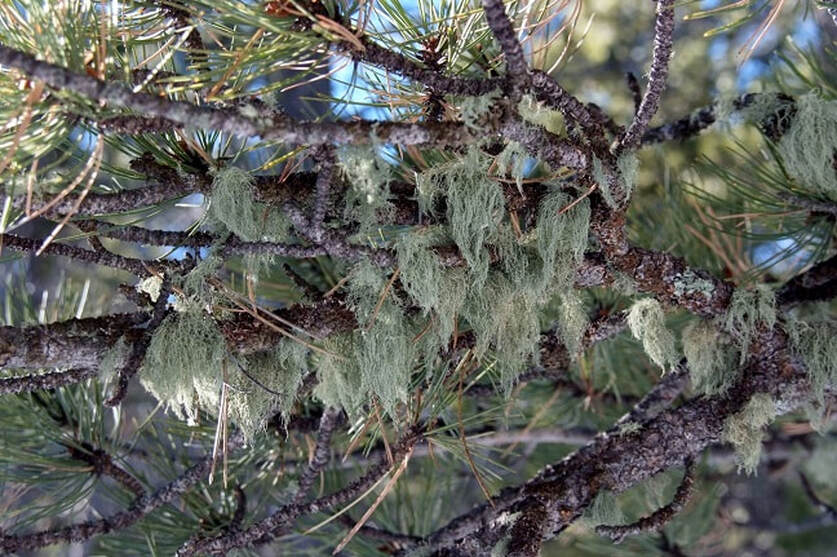 TINCTURE MAKING CONSIDERATIONSUsnea has water soluble and non-water soluble compounds and so there are suggestions by herbalists to provide a two part preparation for making the tincture in order to extract the full spectrum of the medicine offered. For alcohol sensitive people, a syrup or glycerite made with heat will provide a good option but I would suggest larger dosing (double the dose). The polysaccharides are found in the fungi portion of Usnea (white inner core) and are part of the water soluble medicine. The alkaloids and acids found in the outer green algae part of Usnea are extractable in 90-95% alcohol, this being the non-water soluble parts. There are other compounds identified and unidentified but by making your tincture in this two part process you will be getting the full spectrum of what Usnea has to offer for healing. Making Usnea barbata Tincture – A Two Part Extraction Process Usnea Tincture at 1:5 dried 45% alcohol – Adult Suggested Dose: 1-2 dropperfuls 1-4x/day depending on the health condition and presenting symptoms. PART 1: You’ll need 3-4 oz dried usnea, Everclear 90-95% Alcohol + 1 quart jar
CONGRATS! You now have a dual-extracted, highest potency Usnea tincture made by you! 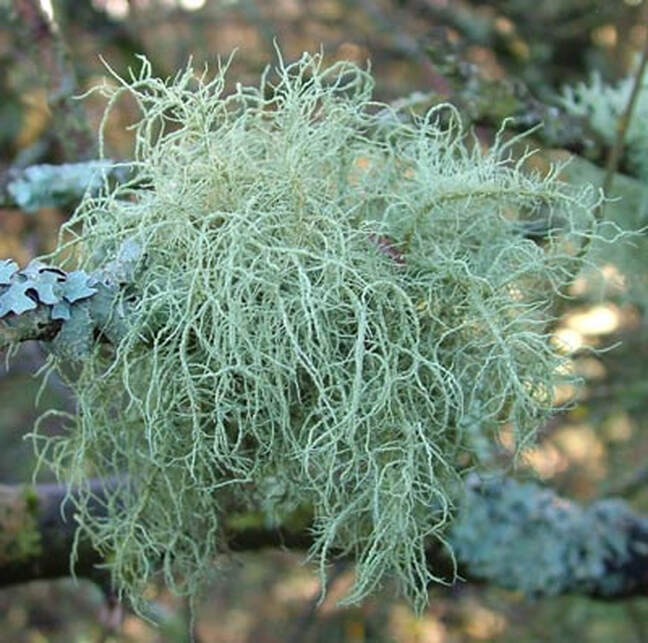 I also do this cook process for other healing herbs such as Astragalus root, all medicinal mushrooms, Ginger root, and a few other tinctures to honor their water soluble compounds as well as their converted-by-heat compounds they have. Cannabis is proving to fit into this category of healing plants/lichens/fungi as well with it's need for decarboxylation to potentize certain compounds. Some herbalists now do this two-part extraction with all dried roots and barks to be tinctured. I’m grateful to Stephen Buhner, Ryan Drum, and Christopher Hobbs for pioneering the simple techniques of a two part process to make a more potent tincture.
Usnea is also an indicator plant to the health of an area as far as pollutants are concerned. Christopher Hobbs has shared many a time on how Usnea will recede from highly contaminated places because it absorbs such toxins easily due to the nature of it's growth pattern. We would not want to make medicine from this and this wise medicine lichen will not allow it either. This is surely another way the wise protection held in the medicine reaches through. And so to find it is a great reason for ceremony and rejoicing for me. Processing Usnea for External Use Usnea has very tough cell walls! Therefore, you need to break up its surface area— by grinding, mashing, or chopping to make its medicine more bioavailable. For an herbal powder which can be used to clean and treat wounds, simply air dry the Usnea (it dried so fast and often in a few days just sitting around in basket), and then grind it into a fine consistency using a mortar and pestle or an electric grinder. This powder can be sprinkled directly into wounds, or you can simmer for 30 minutes, and add other antimicrobial plants (love rosemary, plantain, yarrow, calendula to name a few), steep, strain, and wash wounds or apply compresses with the warm to cool tea. Harvesting Usnea Usnea takes a long time to grow. Therefore, I only harvest it from dead fallen branches rather than from living trees. Make sure you’re harvesting the right lichen! One distinguishing feature of Usnea is the presence of a thin, thread-like, white central “cord” that is revealed when you pull apart the outer sheath of the thicker main strands of the lichen. These cords have an elastic consistency to them, so when you pull them apart, they should be rather springy/snappy. When harvesting Usnea, look for the vibrant, brighter colored specimens as opposed to those that have been hanging out on the ground for a long time and look semi-decayed and brownish. I like to harvest Usnea using a knife or clippers, that way I can easily separate the lichen from the branches that they’re growing on and leave any bark or other debris behind. This also leaves the “roots” of usnea embedded in the tree where it can continue with its own life process. Make sure you harvest away from roadsides or developed areas as Usnea can absorb toxins and heavy metals from the environment. When in Ecuador high in the Andes Mountains hiking in the forest, tufts of Usnea floated down into my hands one morning. It was one of those moments that stops you for it's undeniable how plants can come to us in seen and unseen ways, calling our attention deep in our heart and soul to connect. To make and honor that bond deeper than before. Thank you so much for wandering through here with me. Much Love, Jen  We take Cacao together as a family. My son Cyrus holding his Ceremonial Cacao. I've been working with Cacao in a new way of late and wanted to share what Cacao is teaching me to support your discovery of Cacao as a healing addition to your world in a ceremonial way that can remain among your more private practices. Yes, Cacao supports bonding in groups. While there are many heading to Cacao Ceremonies these days, and I for one have hosted them and attended them too, I find the deepest and most meaningful way for me to work with a plant closely is to bring this work to the personal and intimate level by inviting ceremonial work through out my life in increments of dedicated time that are so very private. Let me explain. Where and When Did Cacao Ceremonies Start? It’s thought cacao was first taken as a health elixir and ceremonial medicine as far back as 1900 BC by the ancestors of Central America, the Olmec people, before becoming a ritualistic medicine used by the Aztec and Mayan cultures. Signifying both life and fertility, it was ingested by Royalty in ceremonial God worship and in sacrificial ritual. Of course it depends on where you go in Central and South America for the true beginning stories change from place to place (wink wink).  Ceremonial Cacao in the morning. Cacao Ceremony in PracticeAs with many things that involve practice, we only get better with time. I suggest enjoying opening to this practice by choosing a week and drinking it daily to start. Some are drinking it daily and I do hope with much intention for something that requires such tending. For me I feel seasonal changes are a good time to engage cacao's healing for a week, or more if called, within the container of being a dedicated practice. Your experience of cacao in ceremony will likely evolve over time as you do. This is a natural and integral part of the process. The important thing is to make sure you set enough time aside to really allow yourself to dive in. I suggest anywhere from 30 minutes to 2 hours each day. But only you will know what time frame works best for you. Here's the rhythm that unfolded organically for me with Ceremonial Cacao in my everyday. My commitment is often for one week and Cacao teaches me to visit each chakra each day for this practice. I drink my Ceremonial Cacao Dose (we'll cover this below) first thing in the morning on an empty stomach. This is traditional with Cacao, first thing in the morning with an empty belly. I love the seasonal pulsing to help me shift more smoothly. For me it's likened to meeting an honest lover for a beautiful romp from time to time (wink wink). So once taken in slowly, then I sit quiet for 20-30 minutes and just allow my feelings and mind to wander to see where I'm taken along with checking in with my physical state of being. Review of the previous day can filter in since I take for many days in a row. Spontaneous knowings come up usually within two hours. Visions and dreams through awake and asleep time drift in as the cumulative effect takes hold, and this begins usually by day three. I journal cryptically when taking my morning dose for the in-the-moment feelings but also for a review of the unfolding of the previous day and night that have happened. It's like reviewing a movie with a deeper seeing clearer lens. Here's the honest part. The first two to three days can, but NOT always, be really hard to bordering on down right sucking sometimes. But if you stay with the practice it shifts. Our sequestered residual emotional debris can be unearthed. But only if we want this and are willing to work with it. Pull up, and dust off if need be, your self care skills here too. I retreat to paint, drum, go to Nature, build altars and work them, medicine make, adjust my diet and sleeping, spiritual bathe, yoni steam, sauna, take other plants in as directed intuitively, and basically follow Cacao's inspiration through this process. Are you following me on this? I hope so. It's a personal and intimate quest of sorts. Do send me questions if they arise. 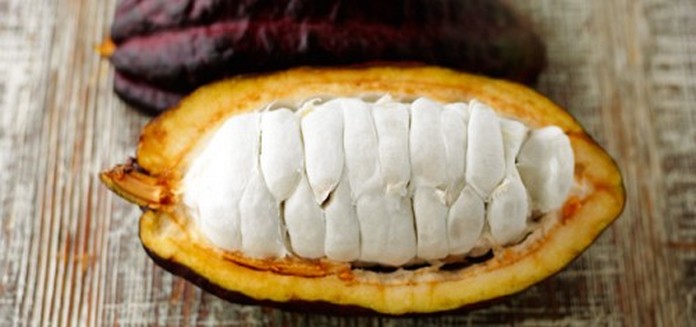 These are the seeds within the Cacao pod and the white covering is a sweet delicious protective coating that entices seed dispersal by other animals and birds, supports the fermentation process among humans, and more. A Heart-Opening ExperienceOh I laugh my friend. It IS this and more. This is so individual based on right where we are. Ceremonial cacao works almost magically at opening up the heart. For some people this will mean FEELING YOUR FEELS. So this looks different for each of us depending on where we are. Maybe what surfaces is your deep and intimate connection to Mother Earth, your guides, or what you hold as Divine. The Spirit of Cacao may present strongly from the plant world. For others, it may mean connecting with your inner-child, or with sabotaging archetypes you've created for survival that need integration, or for grief work around loss of beloveds or more, and feeling emotions that have been suppressed, avoided, or misunderstood for years. And still for others, this may mean tapping into a level of gratitude and abundance beyond that which you have ever experience before. You may make sudden decisions and abrupt life changes with precision and clarity too. This Cacao Ceremony round that I'm just completing has brought up some of the deepest grief around the death of sweet and dear sister, more than 20 years ago, and Cacao is sweeping the cracks from that time in my life when the perceived loss of her stimulated a tsunami that changed the course of my life and all my relations on every level. Cacao is our ally for deep transformation core work. Calling in the medicine for support is our natural course of action. Cacao is there whenever I ask. We need only ask. Whatever comes up for you to feel during your time with cacao, it's important to remember that the Spirit of Cacao is your personal partner on this journey, and being your partner, Cacao will assist you in processing your emotions when and where you invite this. Bliss can happen. And it does. But sometimes painful growth comes too in the form of grief work, release work, and expansion of our understanding. Then the bliss can rise. I have to be straight with you on this. Cacao meets us where we are and supports growth. Know you are supported even if it might seem hard at first. 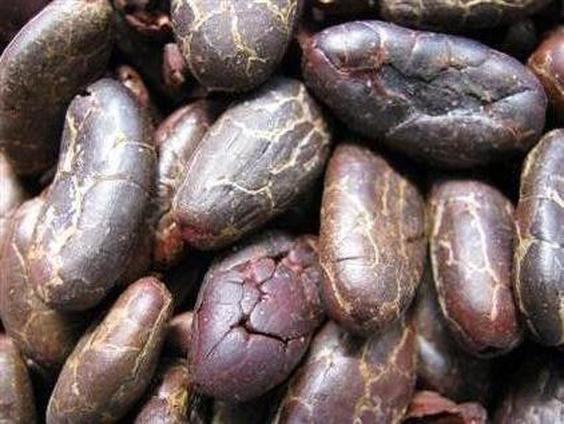 These are the fermented, dried,, roasted, and peeled Cacao seeds ready for grinding into the Cacao paste we ingest for ceremony. The cacao nibs you see in health food stores are this stage and are quite therapeutic as well to nibble on. These retain all of the cacao butter (fat) and the resulting paste is better for ceremony than using cacao powder where the cacao butter is removed and sold separately. We need the full spectrum of what is offered from intact, less processed seeds for ceremonial experiences. It matters. Setting Intentions - The Nuts & BoltsSometimes we do need the sort-of mundane, practical side of things spelled out for us. Drinking cacao for ceremonial purposes invites us to slow down and to intentionally set time aside for ourselves. This means stepping out of the daily 'to do' as much as you can and stepping into our self in a more expansive way. So often we rush from one experience to the next without even understanding why we're doing what we're doing. Cacao ceremony invites us to tune in to our inner-knowing, our inner-self, our inner-guidance system, and to take action from a place of inspiration rather than by habit or unconscious, even manic 'doing' places we all can fall into. Set your intentions and begin with baby steps. Choose the number of days you'll drink your Cacao (I like 7 days). Source good Cacao paste, which means you'll want 7-14oz. of cacao paste to cover this time for yourself. Make sure you have a scale to weigh your paste, a natural sweetener, and spices that resonate with you. Consider why you're wanting to do this. Make an altar dedicated to this practice, even if just a tiny one near your bed. Engage determination no matter what to see it through. Have a journal ready too and just a little retreat space of 30 minutes to two hours is good per day. Closely watch or observe yourself throughout your day to see what comes up and what needs attention. Trust Cacao has a process for you that is uniquely yours and within your own personal synchronous healing. Watch for magic to jump up too. So amazing how it truly does. For the scope of this article I'm avoiding analyzing the individual chemicals in detail that we know of in Cacao. It's fascinating! It's well-studied thus far too and continuing to be further studied as well. Do follow this research if you're intrigued. But reducing Cacao to chemical parts is not my favorite way to introduce or speak of a beloved. Plant or human. Cacao contains a whole host of natural "feel good" chemicals known to influence the body and brain in subtle ways, so don't be surprised if you start to feel the effects of this too. You may notice feelings of warmth rise up the trunk of your body, and have feelings of calm, tranquility, peace, bliss, or others rise up. Maybe your face is hot, you feel flushed, your heart flutters a little. Relax into this. Find comfort in your body through moving to positions of comfort. Twinges and such happen. Trust and move to comfort and breathe deeply. Cacao is a great partner for journey and meditation practice too.  Here's a one pound (gorgeous hunk) of raw cacao paste I brought back from Ecuador that was made by the gorgeous, powerful Indigenous Women of the Amazon region near Coco City. Sometimes it's coined 'Ceremonial Cacao Paste' and I break this up into chunks that are kept in a jar and weighed out for dosing in ceremonial preparations. The Recipe - Ceremonial Cacao PreparationThere are many sources for organic cacao paste so do your homework and feel into the integrity of the company. Central and South America have many beautiful suppliers and then some who are questionable but you will see this with a few questions. One good question is where are the trees from and are the people passionate about their cacao and forthcoming on how they work and tend the land around the trees? If not, move on. A Ceremonial Cacao Dose is 1oz. per person per day. No more than 2oz. per day if you're moved to have more but do space the doses out a bit until you understand how Cacao works with you and your body. These are adult doses so offering to children means smaller amounts please. Sometimes just a spoonful is plenty. INGREDIENTS:
DIRECTIONS:
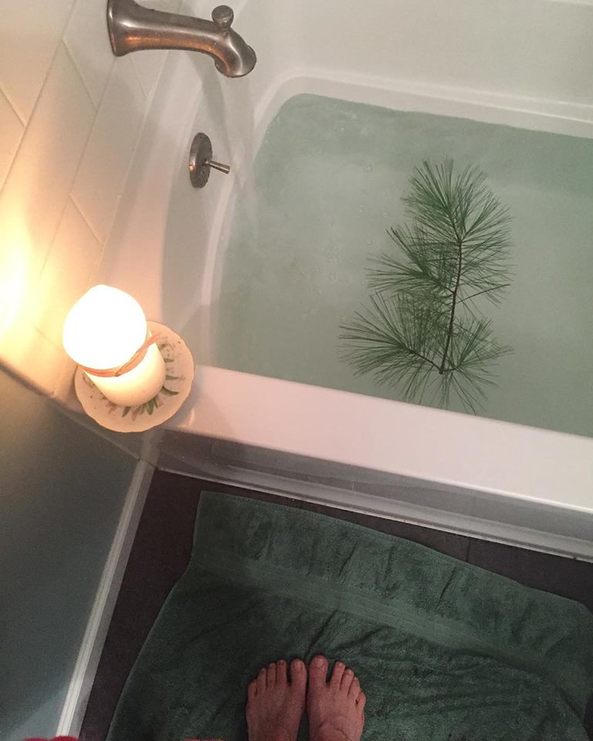
How do you know if you're too sensitive, at least for today, and need to slow your dose down? Simple. Read the language of your body. I am super sensitive to meds, herbs and just about anything. It's just how I am. Know you and adjust accordingly. This is not a competition and has nothing to do with body size either. Besides, isn't it fabulous to get there with less?! I find the overdose symptom picture looks like this: shaky, sweaty, antisocial, racing pulse, racing thoughts, disconnected feeling (we are), slow moving, heart palpitations, anxious, nauseated to mild and intense vomiting. Not fun! If these symptoms begin to appear during drinking your first dose slowly, then stop for now, drink plenty of water, and lay down. I keep stronger sedating nervine plants as companions on hand such as Skullcap, Chamomile, or Kava Kava root to sip as a tea or take in tincture doses of 10-20 drops with plenty of water and rest. I've not felt these effects with 1oz. but I have with a second 1oz. dose close to the first. And this can happen to anyone and anytime for it's dependent on you and Cacao and the work together in the time you are together. One session can have you feeling this come on half way through your first dose and another session you drink the whole dose with no symptoms at all. Listen to your body as it speaks and adjust your practice. Start low and go slow is my take for safety as these compounds in Cacao are quite powerful, stimulating, bitter, and have potent detoxifying compounds. These symptoms are a strong liver and heart response and we can work with this gently, with care and awareness. Contraindications to Consider If you take anti-depressant medications or cardiac medications of any kind, are pregnant or breast feeding then I ask that you prepare 1/4 of the dose 1/4 oz in 2oz. or more of water will do). Take with extra water and no more Cacao for the day. Some say none at all. I have seen this very low dose to be very safe time and again. The connection is made with a very small amount to none at all and just holding the seeds will do. You decide. Pure cacao can be fatal to dogs, and possibly horses and parrots, so be sure to keep it away from all pets to be safe. 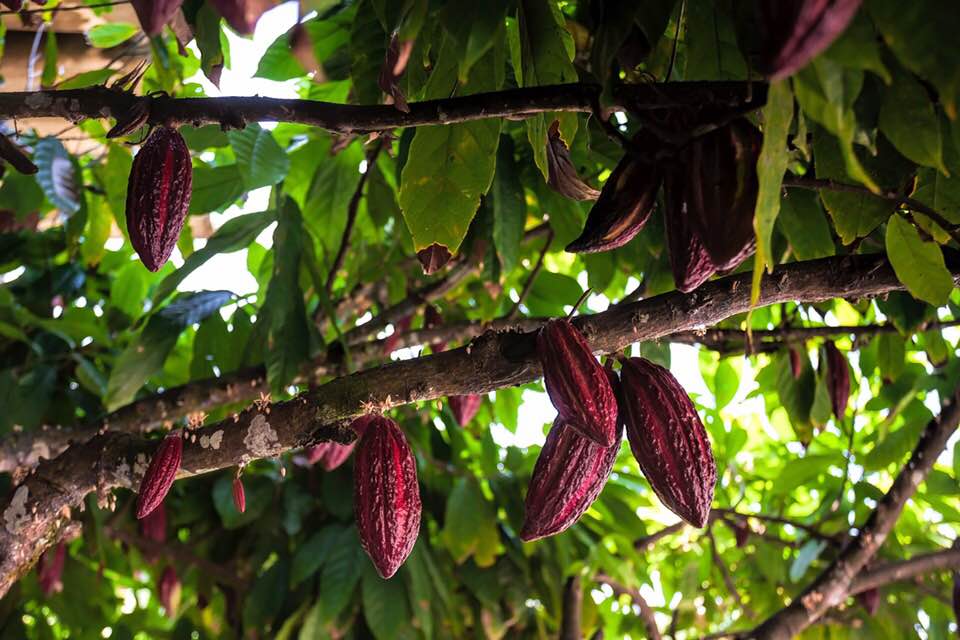 Pods on the tree come off the larger limbs and trunks instead of smaller branches. The flowers are there to the lower left and look like little pink-ish stars the size of your pinky finger nail. Cacao is a powerful heart-opener, increasing blood flow significantly with these small ceremonial doses. It increases focus so that meditation, yoga, and therapeutic work are more accessible. It’s gentle, supportive energy allows me to expand and experience heightened states as well as drop safely into the shadows to clear out some murky heaviness my soul just does not want to carry any longer. We always smile after some good tears fall. Thank you for witnessing what I'm exploring which is a deeper, private, ceremonial way with Cacao. I hope this inspires you to weave Cacao medicine into your medicine bag and apothecary as a healer of self who continues to be medicine for Earth too. So much love to you, Jen  Jen with 'Bliss Face' and Cacao in Ceremony. So much LOVE to you, xo-Jen  This batch is thicker because I love it this way too. I add less water for this texture or more water for a more soupy traditional texture. This has carrots, broccoli and kale added for the vegetable additions. So good! Decisions are Beginnings.Self-observation and self-reflection are definitely forms of self care that I'm finding absolutely require we keep our humor about us. For one, it's not as painful as the self-judgments we toss around so easily. I often laugh more these days as I catch myself in any form of sabotage mode. Then I adopt a third person conversation which delivers quite the therapeutic effects of kind self-talk, even if stern, that has that element of humor. "Oh, look what you're doing now, Jen!", is my chat with a curious and inquisitive laugh. With Valentine's Day here and all the social media and commercialization that surfaces, it's easy to get lost or lulled to sleep in the lousy chocolate, mass produced over priced roses that die in days, moving blood diamonds around more, and yeah, some seriously bad cards with ridiculous prices. I walked away years ago from this. Sorry but it's true. Now visiting flowers and trees wherever they're alive, visiting sacred waters of the Earth and other landscapes that heal us, making handmade gifts, and sourcing cacao from kind stewards of the land, plus other ways that really feel true, well that's another story all together (smile). The truth is this time of year is triggering for many. Many struggle this month around the heart. What's heavy in the heart for you? Are tears trying to move in that self-cleansing way? Is there a struggle to find the space or language to actually feel into it all and therapeutically convey in some creative way what is happening on the inside? Addictions of all sorts are included in a mass of coping skills we've masterfully honed over the years as avoidance tactics and they rear their head often this time of year in place of embracing dropping deeper into the heart to do some dusting and cleaning. Growth hurts. But the truth is holding on takes far more energy than letting go of heart pain. As spring walks closer and stirs our subtler bodies, I know for me I feel this as either as a scattered way or a sluggish can't get focused way. Obsessive behaviors, irritation, anxiety, and poor timing crop up among my people too. Complaining and whining are at an all time high. So how do you clock this unique way in yourself and own that there's some simple good medicine for this? The number one medicine for this for me is to get outside, anyway, no matter what the weather is doing to re-calibrate with the natural forces. Bundling up for us cold weather dwellers means pulling out the hardy weather garb, again, but let's face it, 40 degrees feels like spring after this much winter and most of us don a thick sweater instead! "Go to the Water" is the mantra of my ancestors and I seek this inside and out with hikes to natural water places and also through more spiritual bathing in the tub, and sauna. I also sit with my drum and rattle more, journey and make sounds that carry what I cannot find words for. And I paint for visual release and inquiry. Of late I've turn to our food choices too for my body is giving subtle clues to lighten it up. Salads, raw foods, and fruit look more appealing now. Here's another way that I like to re-calibrate on the inside. Jay and I are starting a Kitchari Cleanse this week, Cyrus is not so game for this yet but he's watching as we prepare for a short 3-4 day one to start. We'll go longer if we want to at the end. This simple, soupy Ayurvedic cleansing dish is made primarily of rice, split mung beans, seasonal veggies and spices. Sometimes I have to start at the physical and walk step by step. This satisfies that in me. It changed my whole outlook on cleansing and transformed my relationship with food and my body. Instead of feeling deprived, it made me feel nourished. Instead of frazzled and delirious with a headache or nausea, I felt grounded, safe, and secure. Coming off it I feel clear and connected. The idea is to stimulate your natural cleansing processes in a slow, sub-radar like cleanse that doesn't stimulate chelation toxicity (releasing too much too fast for our elimination systems). This is hard for the body and a stress that is not good for us. Seasoned fasting lovers know that this is a muscle that must be exercised slowly or one pays dearly. The beauty of this dish and cleanse is that you can eat. You can eat Kitchari for a single meal to give your digestion a break or do a full cleanse of 3-7 days where you really begin to release stored toxins and accumulation for safe release from the body. It’s a great introductory or seasonal cleanse because you still get to eat something throughout the day but at the same time it's the most effective tool I've found for healing and soothing the digestive system, increasing digestive fire, reducing bloating, clearing the mind, healing attachments to food, sleeping deeper, and kick starting the body’s natural ability to heal itself. While weight lose is not the goal, that just might happen too. I follow this cleansing diet for days before the plant diet initiations I go to with my teacher where we sustain ourselves on a few ounces of a single plant elixir every four hours for three days and vision quest with one plant. Eating kitchari from one pot prepared each morning reduces our focus and energy demands on food. Think about how much time we spend on food alone from making the money to getting it or growing it, to planning meals, preparing, eating, and cleaning up. It's all good and communal supporting, yes, but a break to focus elsewhere is also so good for us. This eliminates much and frees up so much time. This is also a great diet for a day or two upon returning from questing or fasting of any kind to support integration and landing back in well. 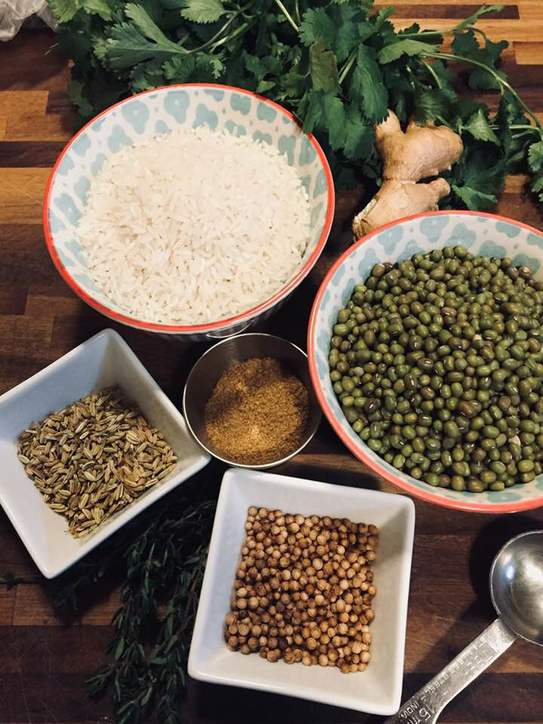 Creating Your Kitchari Cleanse - Keeping It Simple Is The MedicineDetermine the number of days you will cleanse for with 3-7 days being a good place to start. You can always go longer if you feel you want to. Trust yourself on this.
I love adding the ghee and salt later in the process because it makes the flavor jump up more for me. I do this with simple tomato sauce too by infusing olive oil with garlic, basil, salt and pepper, and pinch of rosemary and stir in just before serving. It's amazing how these late additions retain and pull forth the essential oils in the dish. This makes about 4-6 servings. Double it if there's more people in your home joining you or to eat throughout the week, though I do recommend making it daily if that's a possibility for you. To accommodate my work schedule I I make enough for 2 days at a time. 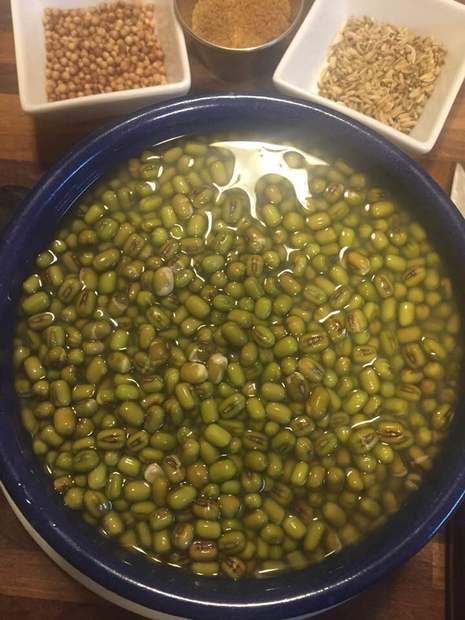 If you have trouble finding split mung beans then just soak your whole beans for a few hours to over night. These are 4 hours and look good for us to start cooking. My Favorite Kitchari RecipeINGREDIENTS
INSTRUCTIONS
Enjoy! Thank you for coming in for a read and may your day be blessed and your re-calibration plans be underway as Spring approaches. Much Love, Jen  Are you ready to gently infuse your heathcare with simple green plants for healing? It truly is easier than many think because we hold this knowing through our ancestral lines. Beginning anyway is a beautiful way. xo-Jen 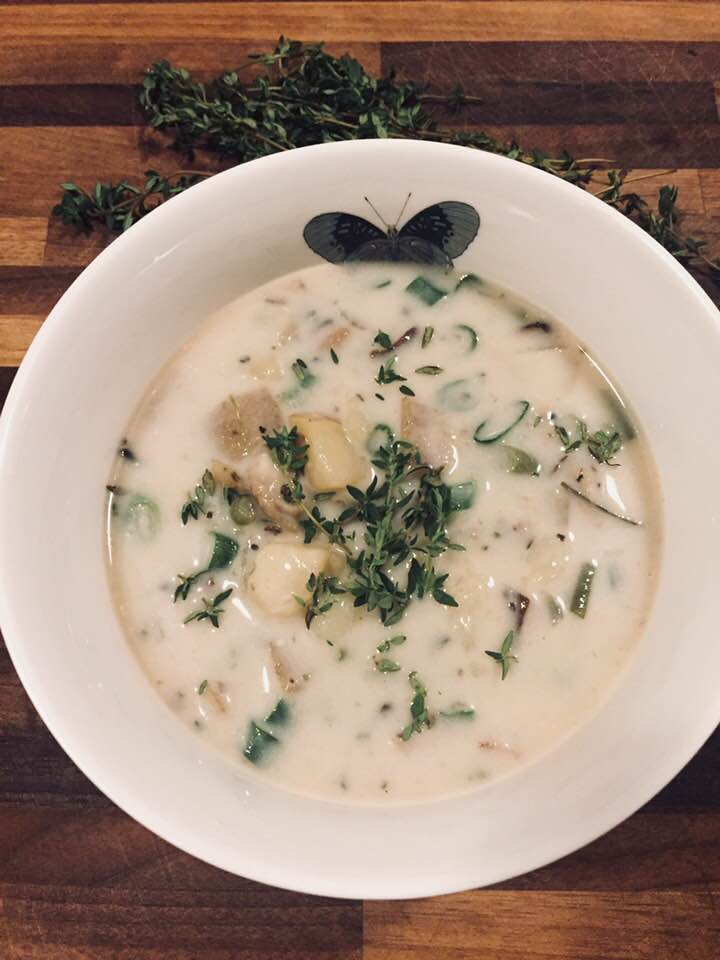 Making good food as our medicine is often a big hit when it comes out of our kitchen. Years of playing and experimenting in the kitchen make it all happen. We took up our best knives and chopped, stirred, consulted knowledge, experience, and the intuitive forces present and came up with this simple yet potent, satisfying soup for deep winter support. after many requests, we thought we'd give it a proper write-up. Enjoy from our kitchen to yours. Shiitake Mushroom Bisque with Thyme & Nettles |

| | |
#2 Recipe Share: HOMEMADE TOOTHPASTE
You can search the web for other recipes too. Find one you love and make it yours with a bit of tweaking. This the one I work with at the moment. This recipe will last a family of 4 for about 1 month.
INGREDIENTS:
1. Melt coconut oil over a very low heat until completely melted. DO NOT overheat.
2. Add clay, salt, baking soda, powdered herbs in a small wide mouth glass jar that your tooth paste will be stored in.
3. When the coconut oil is melted, add it to the jar with the rest of the ingredients; mix well, cap quick to keep your essential oils in there, and let cool completely before using.
4. To use: do NOT put your tooth brush in this jar or you will introduce bacteria and it will be most counterproductive! Instead keep a small spoon handy or a wooden popsicle stick in there so you can scoop a small amount out to your hand and then wipe your moist toothbrush into this and brush gently as usual.
INGREDIENTS:
- 4 tablespoons bentonite clay; I’ve used white clay too but you can experiment
- ½ teaspoon unrefined powdered sea salt, or fine grain such as Celtic, Himalayan, or any other natural sea salt (grind in mortar & pestle or dedicated coffee grinder for herbs).
- ½ teaspoon baking soda
- 4 – 6 tablespoons extra virgin coconut oil, melted; more or less depending on desired consistency
- you may also want to add some powdered herbs/spices such as clove, in that case use 1/8 tsp. and add it with the clay.
- Sweetener Options: I don’t sweeten ours and have spent years deprograming my tribe from oral care having to be sweet. You get to decide. Simply drizzle of a small amount of vegetable glycerin (1/8-1/4 teaspoon if you need a measurement) – OR add a very small sprinkle of stevia powder (it’s 40x sweeter than sugar so be careful or it will taste awful! Try 5-10 drops of tincture) – OR - ½ – 1 teaspoon raw honey
- Flavors: 10 drops of any of the following: peppermint essential oil, wintergreen essential oil, sweet orange essential oil, tea tree oil (Avoid swallowing. Leave out if a small child might swallow.)
1. Melt coconut oil over a very low heat until completely melted. DO NOT overheat.
2. Add clay, salt, baking soda, powdered herbs in a small wide mouth glass jar that your tooth paste will be stored in.
3. When the coconut oil is melted, add it to the jar with the rest of the ingredients; mix well, cap quick to keep your essential oils in there, and let cool completely before using.
4. To use: do NOT put your tooth brush in this jar or you will introduce bacteria and it will be most counterproductive! Instead keep a small spoon handy or a wooden popsicle stick in there so you can scoop a small amount out to your hand and then wipe your moist toothbrush into this and brush gently as usual.
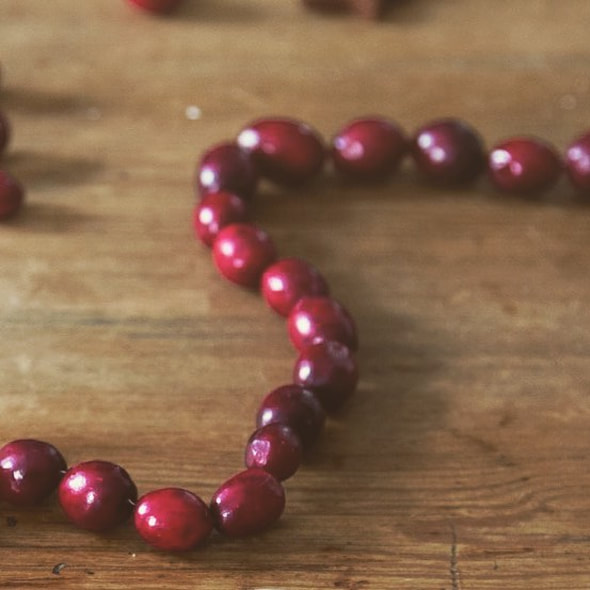
Little sour red shiny jewels that hold a promise for tomorrow...
Cranberries as Medicine
Today many people rely on cranberry’s antioxidant power, thanks to a high level of proanthocyanidins, a class of polyphenols that gives the berry it's red color and are also associated with helping to prevent just about every chronic disease we can think of. In fact, cranberry has one of the most powerful antioxidant loads of any food and our busy scientists are creating units of measure for such things: so "1750 ORAC units per 100 grams of cranberry" is considered "off the chart". The anticancer activities of cranberry proanthocyanidins are currently under study and recent reports suggest that apoptosis (programmed cell death) may play a key role in cranberry’s ability to limit tumor cell growth. This is so interesting to me because the 'programmed cell death' of apoptosis, which is in the functioning of all of our healthy cells, is often shifted in cancer cells so they don't die. Could it be that cranberries help our cells (yes even our cancer cells for they are 'ours' too) get back on line as part of the whole? Is it possible, and that simple, for plants to remind our cells of such things when things are going awry? I actually believe this to be true and that it happens all the time. And you?
Yes, it's also true that when you go to the ER or many doctor's offices today with a Urinary Tract Infection (UTI) it's becoming routine to be asked when you started taking cranberry. This is what progress looks like! However, they're usually unaware of the best ways to work this sour red jewel into our bladder healing dose wise and sweetener wise too. It has to be sour my friends, and this is not a favorite taste among many. Our kidneys love sour. The medicine travels to them via our blood stream through the sour components that are anti-inflammatory, astringent, and antimicrobial. This deters bacteria from staying attached to the mucous linings and making their way deeper up to the kidneys where we can court urosepsis (bacteria entering the blood through the urinary tract) if allowed to fester even further.
So in speaking to cranberry as a medicine, finding ways to get cranberry into the body in a sour form begins with dropping the need for comfort through taste as the top priority. Too much sugar or corn syrup is added to many cranberry products. Read labels. My children were schooled early on this over-rated flavor thing when it comes to 'medicine'. Chug it down with a water and grape juice chaser if need be. Capsules are an option but yes, it's expensive. You need at lease twelve 500mg caps per day for a week or more. They work. Tinctures are an option too but many nutrients do not translate through the extraction process like they do with apple cider vinegar, and I do believe this is part of the medicinal qualities.
The good news is cranberry doesn't always have to be taken in medicinal doses. Of course you already know this with all the ways it's woven into holiday seasonal foods. It all comes back to the beauty way of Nature here too. Intense antioxidant power offered ripe at a time of year when needed most. Perfect, eh? One year I made a cranberry gin, which is basically a cranberry tincture, and we enjoyed it with spicy ginger beer and fresh lime. So delicious! Period. Even gin haters tried it and loved this one.
So we created a holiday oxymel recipe (oxymels are apple cider vinegar and honey based herbal elixirs) this year that can be taken in small sips or diluted in sparking or warm water as a way to support restoration at the end of the year while we enter deeper hibernation ways of the mind, the body, and the soul. This is potent too in higher doses if needed for something like a UTI or adrenal and kidney fatigue. Yes, I know it's too late to drink this now if you haven't made it for the Solstice, but when you follow the old calendars set to Nature's rhythms, you celebrate a holiday every 6 weeks! It seems the soul needs this as a good medicine way to off set the harsh realities we weather in life and to stay entrained with the cycles of Nature. So the next holiday is Imbolc on February 1st or 2nd and this would be great for that night of true intention setting for the year. New Year's eve, and all of January for that matter, are to help us get clear on what we really want to say, create, and commit to at Imbolc. So I say start a batch of this as part of the Winter Solstice celebration and it will be ready for then at Imbolc. Just a thought on how to keep it simple. Drink a newly created one each holiday while putting up a fresh new one for the next holiday sounds good.
ground fresh cranberries
Cranberry & Juniper Oxymel - The Recipe
Intention: Restoration and rejuvenation of all adrenals and kidneys within our home this winter. Yes, we're more than these parts but we're honoring then upfront today by speaking kindly, honoring rest, adjusting what we 'do', and making medicine for them. It's been a busy, long, turbulent year here, and for many this calls for some good easy restorative medicine that can fall into 'tasting good' too.
Dosing:
Yield: Makes just shy of one quart and you can easily double it to get your whole household supported to spring time.
INGREDIENTS: (helpful properties)
DIRECTIONS:
So Easy! Takes 15 minutes to put together and most of that is some wait time. Read through before starting so it's super clear.
Enjoy! Our third son Cyrus was born today 14 years ago. Sweet memories with tangy sweet notes all along the way to now infuse this tribe with the real essence of who he is. We're sipping this one together like the good old times. I love him forever.
May your Solstice be tangy and sweet with a bit of something extra you love. xo-Jen
Dosing:
- 1-2 TB per day in food or drink per person for restoration/rejuvenation.
- This can be doubled for chronic adrenal and kidney fatigue.
- 2 TB every 3-4 hours in 1/2 cup of warm water while awake for acute UTI. There would be more suggestions too but for this article just know my next suggestion would be get in bed so your immune system can have some good energy to heal this.
- We add to warm water, cool water, and sparkling water.
Yield: Makes just shy of one quart and you can easily double it to get your whole household supported to spring time.
INGREDIENTS: (helpful properties)
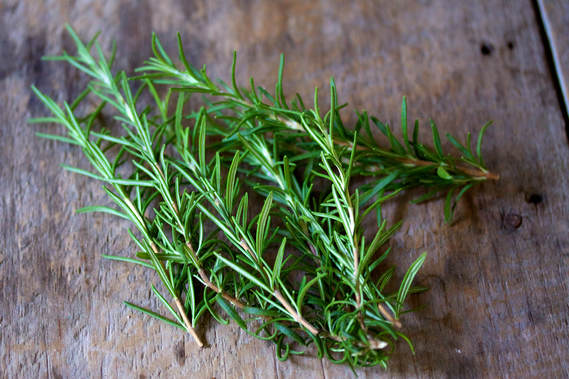
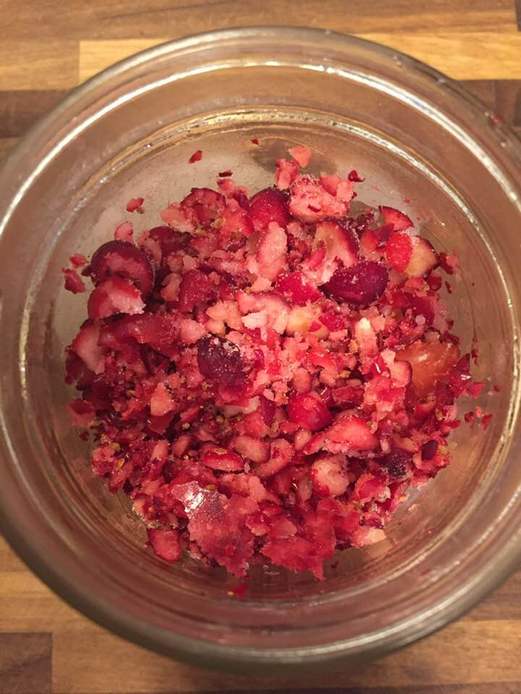
- 1/3 fill your jar with ground Cranberries - pulse in food processor or blender (urinary/renal tonic, astringent, antiseptic, sour, nutritive)
- 1 slice Astragalus root - dried - or 2 TB cut/sifted* (adaptogen, sweetness)
- 2 TB Juniper Berries - dried* or fresh (renal tonic, astringent)
- 1 TB Dandelion root - dried* (bitter, renal tonic, nutritive)
- 1 organic Orange* - zested and fruit chopped (bitter, tonic, sweetness, nutritive)
- Apple Cider Vinegar* (organic raw) to cover all herbs by 2 inches (tonic, sour, nutritive)
- Honey to taste (keep it with more of sour tang and learn to love sour) - support raw honey from local beekeepers you love* (tonic, nutritive)
DIRECTIONS:
So Easy! Takes 15 minutes to put together and most of that is some wait time. Read through before starting so it's super clear.
- Warm your vinegar on the stove (no microwaves) until you just see steam but can touch it without getting burned. Add dried herbs - astragalus, dandelion root, and juniper berries, cover the pot, and set aside off the heat. [Why do we do this? It's allowed as long as you don't over heat and kill your live vinegar to help the herbs open up from their dried state and release their medicine to the vinegar.]
- Allow to sit for 20 minutes to cool a bit while you fill a heat safe mason jar with the ground cranberries 1/3 full, plus your orange zest, and chopped up orange fruit.
- Pour your warmed-cooled herb infused vinegar plus all the herbs into your jar and make sure there's at lease 2-3 inches above the plant material. Get a larger jar if not and add more straight vinegar as needed so there's room in there.
- Cap with non-metal lid or use waxed paper to protect your liquid from a metal lid (will corrode and spoil all your good efforts). Shake daily or a few times a week. Store away from light in a cabinet.
- Decant after one month or so through a strainer or cheese cloth, squeeze gently, and discard solids.
- Stir raw honey in to taste keeping it tangy/sour/sweet. Label your jar and store away from direct sunlight.
Enjoy! Our third son Cyrus was born today 14 years ago. Sweet memories with tangy sweet notes all along the way to now infuse this tribe with the real essence of who he is. We're sipping this one together like the good old times. I love him forever.
May your Solstice be tangy and sweet with a bit of something extra you love. xo-Jen
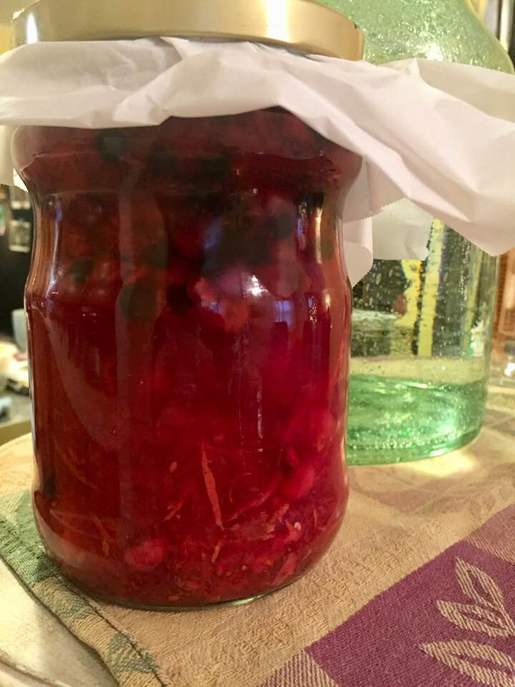
Our jar of marinating Cranberry & Juniper Oxymel
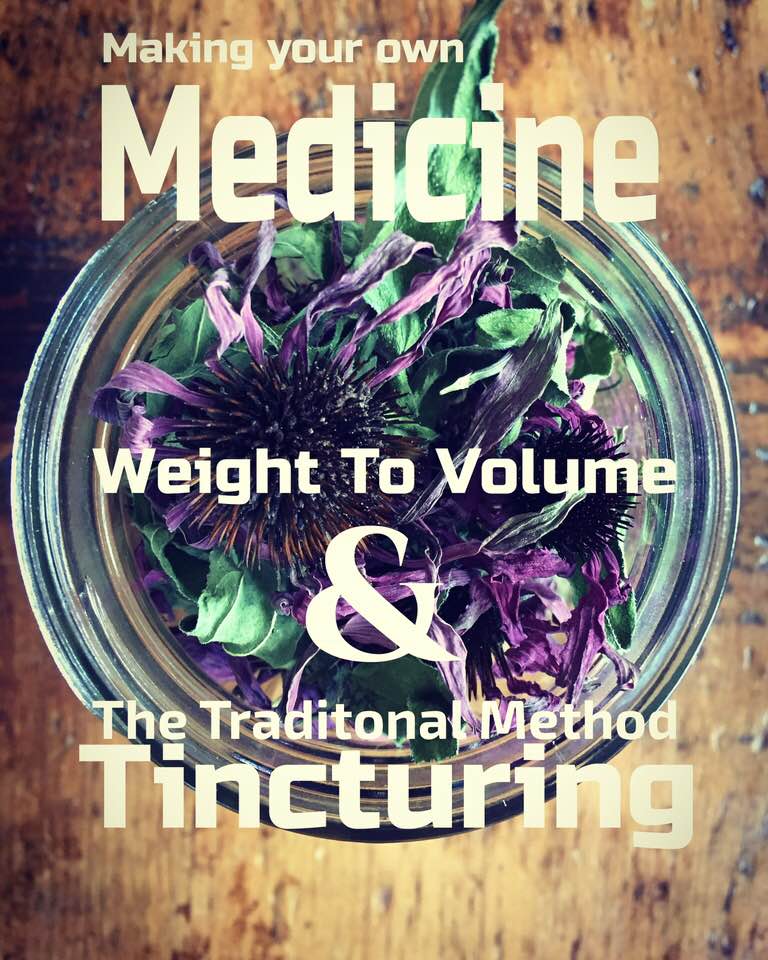
Making Your Own Medicine
With millions of articles and books on how to tincture and all the different nuances of this form of medicine making, I completely overlooked actually adding my two cents to this well covered topic. Seems fitting to have a post and an herbal council this month dedicated to keeping this kind of medicine making in the home apothecaries I so want to see all of you have at your fingertips. Thank you for venturing in for a bit to take in some medicine tending.
So, the oldest and best way in my experience to make medicine from plants is to add them to water. Yup. So gorgeously simple! And you already know some or all of this I bet. These would be called teas (steep 5-10 minutes), infusions (steeped 1-8 hours), and decoctions (simmered 20 minutes or more). Cooking the plants in water is my first and favorite way of medicine making and links me up to my ancestral path for we all have a great auntie or grandparent who knew the plants for medicine and were most likely a well known healer in their time. The smell and taste takes me there.
There are times, however, when a later form of medicine, called a tincture, or plant extract, really shines. These are concentrated plants extracts taken by the drop using a menstruum (vinegar, glycerin, or alcohol) to extract the medicine and sometimes some of the nutrients too, depending on the menstruum chosen. Here's why tincture making skills jumped into the healer's medicine bag as we traveled through time:
1- Longevity and Stability:
An herb, once tinctured, will retain its medicinal qualities far longer than in most other preparations. Alcohol tinctures will last for many years. I do make smaller batches and use them up, and make new. Plus they're heavy to move and we moved twice with a ridiculous number of jars! I suggest making small batches for home apothecary tending. This way you can increase your variety of plants at your finger tips.
2- Easy to Administer and Travel With:
Once prepared in tincture form, the herb is ready to administer with no further preparation. The tinctures are dispensed directly under the tongue or mixed with warm water, tea, or juice and can be tucked into travel bags easy. Just be sure you know the rules for flying with liquids or they'll confiscate your precious medicines.
3- Ease of Preparation:
Anyone is capable of making high quality tinctures. All one needs is good quality herbs, a high quality solvent or menstruum (your solvents are alcohol, vinegar, or glycerin), a measuring cup, jar, labels, a dark place to store them, and a little time with lots of love for the process. You're making medicine. It's truly amazing when you step back and look at it all.
4- Storage:
Easy if you contain your excitement and make small batches! Tinctures store compactly and conveniently in a small space, always ready to use. They're excellent for first aid kits too.
5- Cost Effective:
Tinctures are becoming extremely expensive to purchase today making it prohibitive for people to afford their medicine. This is “the people's medicine" – our original medicine and is a birthright to have access to it. So I teach how. Period. It's not hard and so much better to make yourself if you can. What you're paying for is more about the person’s time to make it for you. If this may be what you need, I make for people too. But know you can do it too anytime you want to.
6- Personalized Formulas:
As you learn to work with various herbs, you'll develop favorite ones that just call to you. Your needs will change over time and making your own gives you the creative freedom to design tincture combinations and formulas from your home apothecary.
7- Selecting the Herbs:
Almost all herbs tincture well with the correct solvent. Herbs can be tinctured as a ready-made formula or tinctured as single herbs and combined later into formulas. Most herbalists prefer to tincture herbs as single extracts. This gives them greater control of the water/alcohol ratio for individual herbs and their constituents. It also allows greater flexibility and creativity when crafting formulas. I do make formulas this way professionally but for my family I make smaller jars of the herbs mixed together fresh and they tincture all together. It’s easier and keeps me humbly rooted in tending to my loved ones. I love, love, love the way they turn out. You get to decide what works for you.
8- Selecting the Menstruum:
The menstruum is the solvent used to extract the biochemical constituents (yes, fancy lingo for the medicine and nutrients) of the plant, and to preserve the resulting solution. There are basically three menstruums used in tincture preparations: alcohol, vinegar, and glycerin. Like anything, there are pros and cons to each (more below on this); and like anything, everyone has their personal favorite and considers it the best. There are some intricate things to consider for each. Alcohol sensitivity (means vinegar and glycerin options only), after the nutritional properties (these extract better in vinegar and glycerin), when to utilize heat for better extraction (I warm glycerites), longest shelf life and extraction stronger compounds without heat (alcohol shines here), and dosing considerations (I increase doses with vinegar and glycerin tinctures).
Formulation components can be tinctured separately or together. You get to decide.
Steps to Tincturing the Traditional Folk Medicine Way
- Use a clean glass jar. Start small too to you can increase your variety of plants you begin to tincture. Pint and half-pint Mason jars work great.
- Make sure your herbs are finely chopped or ground. Some traditions skip this and tincture in whole pieces. I do both at the moment.
- For dried herbs I fill 1/3 full and for fresh herbs I fill the jar loosely packed. Place your herbs in your jar and then cover with your alcohol until there is about 1 inch of liquid above the herbs. Remember that dried herbs will expand quite a bit as they have no water in them like fresh herbs do (that's why we use less when dried). Nope, not an exact science, but a rough guideline is 4 ounces of finely chopped or ground herbs to 1 pint of alcohol. If your herbs soak up all your menstruum then place it all in the blender and chop finer and add a bit more alcohol.
- Cover with a tight lid and label and date the jar. I store mine where it stays dark, as light will encourage oxidation and destroy the medicine faster.
- Shake the tincture every day for the first week or two. To help me remember this, I place them on a working altar I visit daily so they are energized and welcomed into transformation to another form of medicine. Then I let them sit, shaking occasionally, for 6-8 weeks in a darker space in my apothecary.
- Top off with more menstruum after 1-2 days to be sure the herbs are submerged.
- After at least 6 weeks, (i like more time though if possible), strain off the herbs. You can use a cloth lined strainer, cheesecloth, or even a very clean cut up cotton pillow case. That way you can really squeeze all of the tincture out of the herbs. I use a potato ricer for roots and barks or a wine press if you have works well.
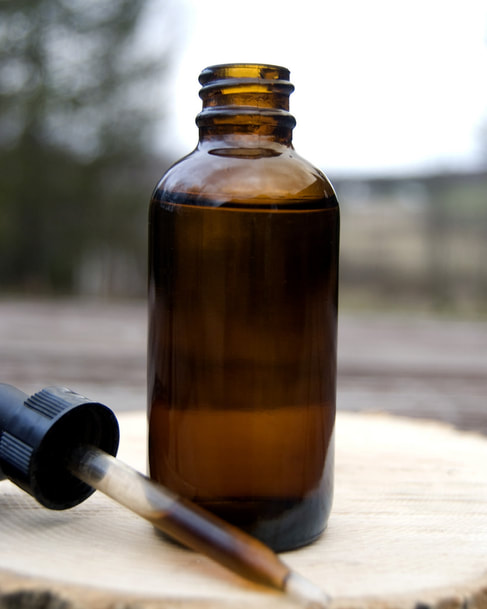
- Pour the tincture into your brown tincture bottles with the dropper tops (available in most health food stores or searched on line. Look for “Boston Round Bottles” in your on-line search). I love dark blue, green or amber glass, all of which helps keep the light out of the bottle and so protects your tincture from oxidation diminishing potency.
- Compost the spent herbs. Label your bottle and store in your budding or expanding apothecary for when needed.
Menstruum (Solvent) Choices
(Here's a little excerpt from "Birthing an Herbalist in 13 Moons" at ElderMoon School of Herbs on-line herbalist training journey with the medicine plants.)
The following is a list of the solvents (mentsruums) commonly utilized in making herbal tinctures and some guidelines for what plant constituents they most effectively dissolve:
1. ALCOHOL
Alcohol has both prolonged keeping power and serves as a powerful solvent or extractor. It has the ability to break down, absorb, and preserve much of the plant material. There are many varieties of alcohol used, though every herbalist has their favorite: brandy, rum, vodka, gin, Everclear, and 190 proof grain or potato. Alcohol that has a natural water constituent (such as those listed above) is called 'Aqueous Ethanol' and generally has a water to alcohol ratio of 40-95% alcohol. Aqueous Ethanol dissolves: alkaloids (limited), organic salts, organic acids, most glucosides, sugars, vitamins, minerals, enzymes, tannins, bitter compounds. Absolute Alcohol, or Pure Grain Alcohol, is more effective for dissolving resinous and waxy material. It is used to dissolve: wax, resin, fat, balsam, oleoresin, glycosides, some alkaloids, sugars, vitamins, volatile oils.
Easy Starting Point: Begin tincturing with 100 proof potato vodka. (50% alcohol and 50% water).
2. GLYCERIN
Glycerine is a chemical constituent of all the fatty oils from both animals and vegetables. An excellent nutritive solvent, glycerin does not have quite the versatility of either water or alcohol, but its advantages are that it tastes good because it’s sweet, is safe and effective for children, and is in and of itself very nourishing and soothing. It dissolves: sugars, enzymes (dilute), glucosides, bitter compounds, saponins (dilute), tannins, minerals, vitamins. Glycerine also has excellent preservative qualities. It’s great for children’s preparations and for those refraining from alcohol where the use of alcohol in tinctures would be prohibitive. Be sure to request Vegetable Glycerin when buying; it is of a much higher quality. Vegetable Glycerin is available at many natural food stores and herb stores. These tinctures require a period of warming and a slight dilution with water in making them. Quick note for the curious: we dilute 4:1 with distilled (mineral hungry) water, chop herbs small using the same proportions given above, and warm the closed jar in a water bath for a few days at the start and again at the finish (we use a crock pot on lowest setting) with a total of 6-8 weeks of sitting and shaking occasionally. These are also light sensitive so tend well to preserve the medicine.
3. VINEGAR
I used to teach a FOUR hour class on vinegar and herbs! Water is the first and made by the Divine which is why it's the best solvent to start with as a budding herbalist. Vinegar, especially apple cider vinegar, is one of the oldest solvents used. However, it's not highly regarded today by many herbalists or medicine making companies and is considered secondary to alcohol as a solvent due to the greater strength of and shelf life of alcohol. Though not as strong as alcohol, it has other definite advantages and should not be ignored. Apple Cider Vinegar contains minute quantities of trace minerals our bodies crave and has a mild acidity that balances and aids digestion. The acetic acid and potassium content help to activate the friendly bacteria in the digestive track. I highly recommend Vinegar as a solvent for tonifying/nutritious herbs and for preparations that are taken over a long period of time for health maintenance, such as in high vitamin mineral formulas and tonic formulas. Vinegar is an excellent solvent for children’s formulas and for alcohol sensitive folks too. Vinegar tinctures are excellent for extracting some plant alkaloids (such as lobeline from Lobelia), but are not as good for extracting the more acidic biochemical ingredients and so doses are usually doubled as a general rule for making sure one gets the proper amount of the more medicinal compounds.
A commonly taught thing about Vinegar Tinctures is that they “will not last very long”. Most say 6 months. I disagree and have not had one spoil yet and many herbalists I know agree. What I teach is make enough to get to the next harvest (plus a little extra is my practice). When a vinegar tincture goes bad (and you WILL know) it's usually the quality of the vinegar and it will smell sour and have fermentation bubbles forming around the edges. Non-pasteurized live vinegar will sometimes form a mother and this is fine. It means it's alive, not spoiled, and you just have to remove “the mother” at the surface – which can be used to make more vinegar. Using the rule of one season to the next keeps your stock moving and freshness then remains at the top of your practice too.
Happy Tincturing and Apothecary Tending
This month we are deepening our tincturing skills at ElderMoon School in our Monthly Herbal Councils. We'll cover weight-to-volume tincturing as another step beyond this traditional way. While the traditional folk way is absolutely enough, some want to deepen their practice with medicine making. We'll cover the climate within the herbal circles as they attempt to justify and legitimize their existence by standardizing. There is a place for this as herbalism evolves. In the end we all usually come back around to water based preparations made from plants we tended and stored in our own apothecary (smile) but it's so good to travel the road anyway and come back to that and be in community too all along the way, eh? We'll speak to all of this in council.
Do check out the recorded and archived herbal councils each month (BTW free if you're already a student in other courses here at ElderMoon School). It's so worth the low commitment simple hour a month to plug in and enjoy 'talking plant' in community. Much Love, Jen
Do check out the recorded and archived herbal councils each month (BTW free if you're already a student in other courses here at ElderMoon School). It's so worth the low commitment simple hour a month to plug in and enjoy 'talking plant' in community. Much Love, Jen
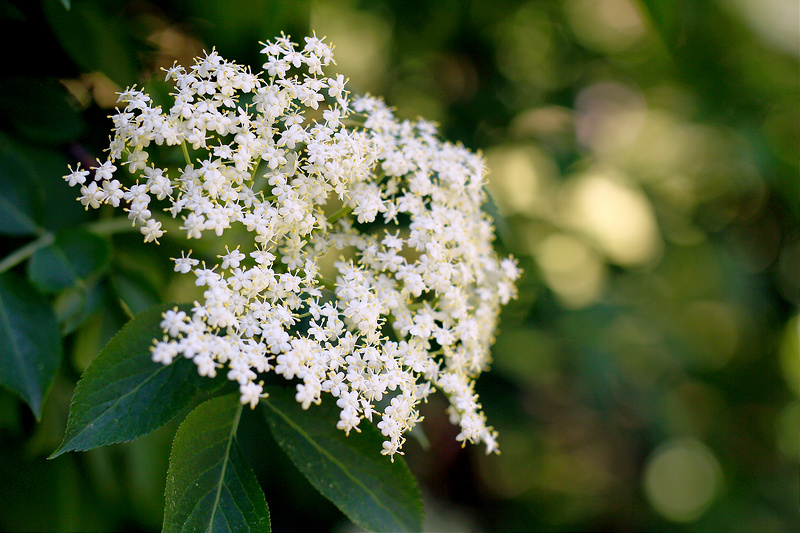
GIVE :
the gift of knowledge to yourself or a loved one.
ENJOY:
10% Discount through December 2017 on all Plant Journeys offered at
ElderMoon School of Herbs & Earth Medicine
USE COUPON CODE: plantjourney10 at checkout
the gift of knowledge to yourself or a loved one.
ENJOY:
10% Discount through December 2017 on all Plant Journeys offered at
ElderMoon School of Herbs & Earth Medicine
USE COUPON CODE: plantjourney10 at checkout
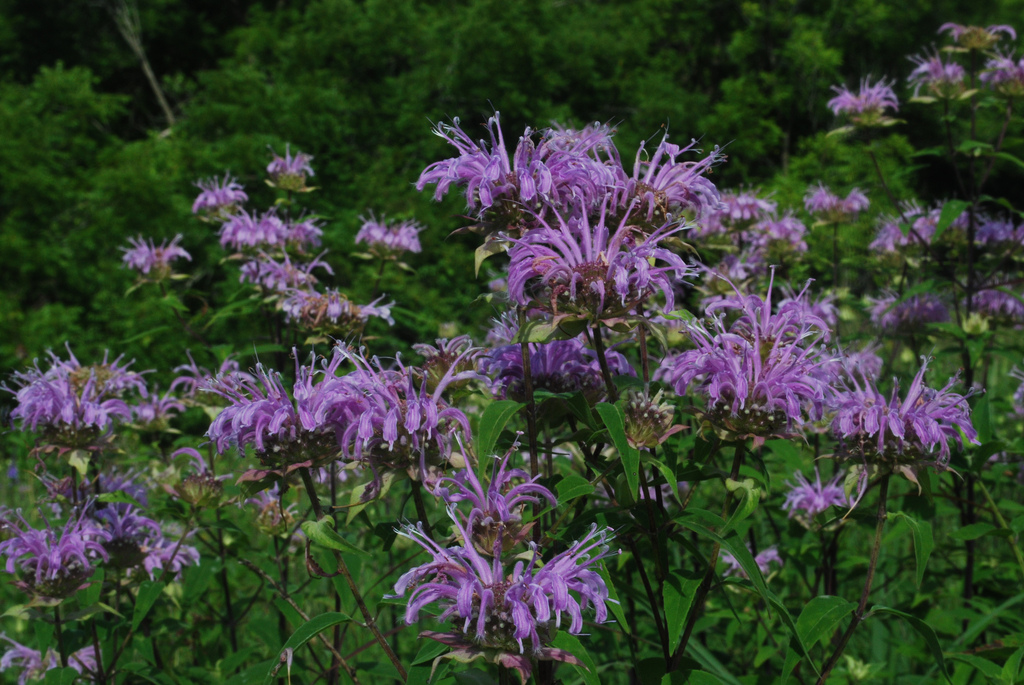
Wild Bee Balm ~ Monarda fistulosa
The time is now around here as Wild Bee Balm (Monarda fistulosa) waves in the heat of summer with full blooms and is beginning to initiate her petal fall season. This wild species continues to teach me after over 20 years of walking together, and even naming my first herbal business, Monarda Herbal Apothecary, in honor of the vast medicine that continues to be whispered from this beauty. In herbal school here we tease out the topic of 'What is medicine?' with those coming to learn in-person about our original plant medicine system. Often each student carries a vital piece to this complex topic and we all walk away deeper in thought and understanding of just exactly what medicine is. What might it be to you?
When it comes to Bee Balm, also called Monarda by many, the medicine is more than just physical. Yes this can be a challenging concept for some, but I know many of you comfortably speak this language with me and I'm grateful you're all here visiting my world a bit. May I explain a bit of what I've learned from Bee Balm in short form? Yes, a huge challenge for me, but I try anyway! I share the wild food recipe below for it's an outrageous meal changer every single time we whip some up.
When it comes to Bee Balm, also called Monarda by many, the medicine is more than just physical. Yes this can be a challenging concept for some, but I know many of you comfortably speak this language with me and I'm grateful you're all here visiting my world a bit. May I explain a bit of what I've learned from Bee Balm in short form? Yes, a huge challenge for me, but I try anyway! I share the wild food recipe below for it's an outrageous meal changer every single time we whip some up.
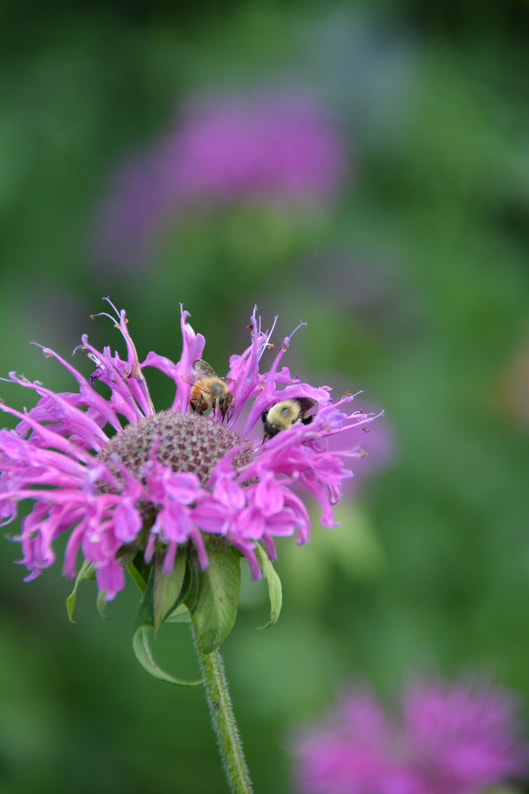
Wild Bee Balm Medicine
Boundary Support
Such a huge, gorgeous, and potent topic here and surely this was woven into the business aspect of my learning from Bee Balm, shared below. On the physical level Bee Balm is masterful with microbial boundaries. While not the first plant to think of for immune support, it is up there on the list for boosting the immune response while creating favorable internal environments for maintaining and repairing areas that have been hit hard. Bee Balm remains at the top of my list of plants to support recovery from surgeries and invasive medical procedures where tissues need antibiotic and anti-inflammatory actions to bring things back to our original or new baseline of function.
Honoring our unsaid 'NOs'
Here is where Bee Balm shines bright as a force to be reckoned with. Many who suffer from chronic candida often come around to the aspect of truth on harboring unsaid 'NO-s' somewhere in their life. It's a personal path to this negotiation table and one no healer can give or force on the one seeking healing. Each person gets there in their own time. Bee Balm often looks covered with a powdery mildew appearance late in the season that tells the story of it's medicine within the 'Doctrine of Signatures' to the strong anti-fungal properties it carries as well. Yes, consider Bee Balm if you are walking with chronic systemic or localized fungal recurrent candida infections. While not the total answer, Bee Balm supports all levels of walking towards re-calibration with this microbial imbalance.
Channeling Excess Fire
Have you ever felt the temple of a loved one who doesn't register a fever on a thermometer yet, but you instinctively know it's coming and can feel it brewing at the temples and see it in the eyes? We can hone these assessment skills with time while learning the fine art of managing fever. I LOVE teaching this topic to my herb students! So many people fear fever and the best way to quell the fear is to learn the art of managing and understanding it. Fever is such a masterful healing agent. Modern medicine is quite intent on squashing fever anytime it shows up though I have met a few docs that embrace the process as a healing phenomena and not a personal failure. Bee Balm helps to bring this fire to the surface and works so well for the person who even moves to high temperatures rapidly with reddened face and body, rigors (violent shaking to make temperatures rise high and fast), with no sweating. This internal heat or fire is looking for a way out and the body knows it will kill and drag the detritus with it. Bee Balm opens the channels, re-sets the person's thermostat to what I call a 'therapeutic bake', or supports a peak of high temperature for a few hours and then induces sweats for release, thus being called a diaphoretic. The general rule for fever is 'not too long and not too hot'.
Business Partner Plant Ally
The training of an Herbalist is different depending on where one studies. Partnering with one plant for an extended period is my training and while you learn of many plants, you go deep one plant at a time and sometimes for years with just one. Only then can one stand truly confident in the medicine the plant carries. Contrary to popular belief, it's not about knowing many with encyclopedic memory but knowing one's handful of plants deeply that makes one truly knowledgeable for each plant has so many areas of application for the artful practice of herbal healing.
I learned early to ask for an ally plant, one that would guide my practice of business along with the art of healing for my budding first herbal business that went on to thrive for 15 years as a community apothecary. This is part of how I teach my students 'the business of herbs' still who choose to enter any business aspect of herbalism. It works. Not all great herbalists are great at business and not all herbalists who are great at business are great at herbalism either. We work on both aspects needed to thrive and while I do not have all the answers, I walk candidly with my students through the many facets that unfurl in both areas.
So Bee Balm/Monarda stepped up for me. The details of why and how are shared with my current herb students with the understanding that it's not Bee Balm for all who head into business. It's about each calling in support from a plant and that it's different for each of us. Any plant can and will present itself should one call for such a relationship and it's completely dependent on the situation. What I can share is that each 5 year business plan manifested in 4 years and when a fork in the growth appeared which can present in many ways, such as do I attract more wholesale or retail, teaching, or consulting business, why am I frustrated with how things are happening and what solutions are available, and even financial decisions such as paying myself more even when it looked non-logical and it created a sort of vacuum effect that pulled more income forth. These leaps of faith and logical next steps were navigated by regular check-ins (engage intuition with meditations, dream, and journey work tools) with Monarda and remained my first course of action always. Each fork was navigated well and I believe were based on my true gifts being part of the equation versus molding a business from some outside force of what one thinks should happen. I believe it's coined today as 'creative, intuitive entrepreneurialism'. I would say for me that Bee Balm supported my walk to self-reliance through respectful partnering with many forces.
Wild Food for the Soul
Yes, and to support this I share the recipe below with you. Bringing wild foods to the table is such a loving act of kindness through supporting every level of who we are. Foraging feeds the ancient soul knowing in our bones as we travel to patches we know our ancestors or the ancestors of this land traveled to for nourishment. We all have a wild side that needs to be nourished and this is one way to coax it forth. Nutritionally packed with goodness means we don't need much in volume to bring the nourishment deep into the body. These are original foods and the body remembers, processes and assimilates these foods quickly and efficiently to build our multi-leveled strength. So yes, invite Bee Balm to your table.
Connection to the Ancestors of this Land
Being of Native decent is by no means a prerequisite to knowing the plants native to this land. While many of us are, knowing the native plants where you live is truly a key to connecting to Nature. Matt Woods, Herbalist, shares a beautiful teaching he received from his Native American teacher about how there are actually four sub species of Wild Bee Balm that they distinguish between depending on the medicine needed. Each is identifiable by taste differences that scientists still refuse to acknowledge and document as such. Listen closely to these teachings. They came about from a medicine person listening closely to Bee Balm and observing keenly how it works in the body (psst... scientists do this intuitive, 'I had a hunch' work too but many choose to take all the credit personally). Remember that the plants are evolving and changing just as we are and so it still remains our unfolding joy to step into this responsibility within the work to listen deeply. In deed it is how we've learn everything about these magnificent beings who walk along with us through time.
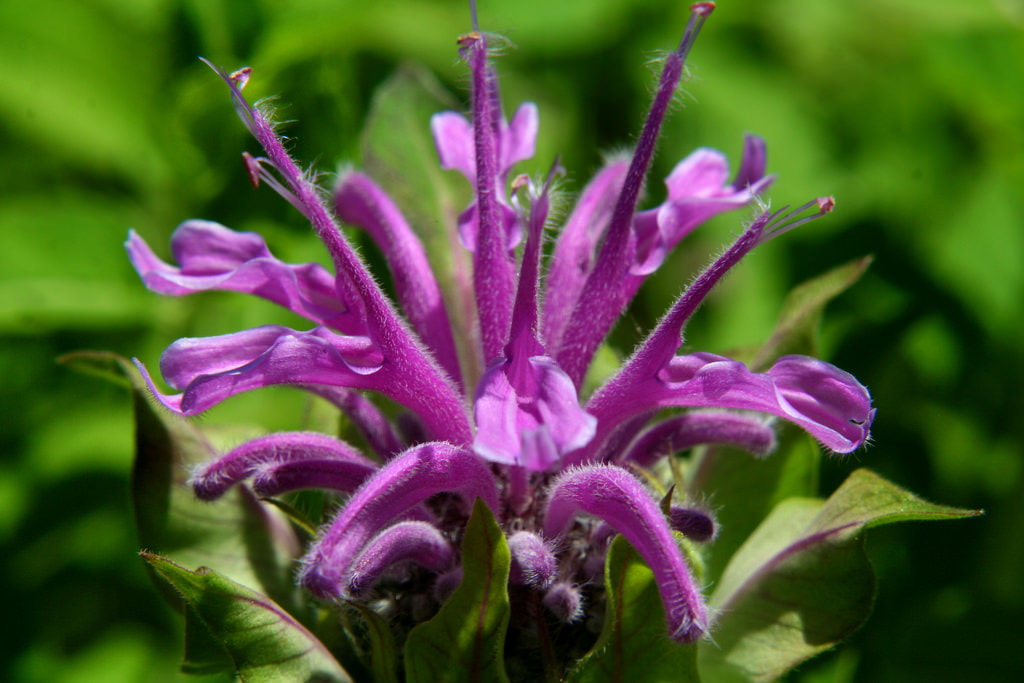
How about some Wild Bee Balm in your belly...
Chimichurri is the classic Argentinian condiment for grilled meat, but I serve with vegetables, on bread, or stirred into rice dishes, soups and stews too. It's typically made with parsley, oregano, garlic, oil, chili, vinegar, and a few other additions depending on who you ask. Being deeply partnered with Wild Bee Balm for years, I was playing one day with new ways to get my plant ally into my body and so added it to a favorite chimichurri recipe with a handful of onion grass leaves and loved it! It has oregano-ish hints to it's taste and is a wild edible too so the leap was easy.
‘Wild-ing’ your recipes as Nature provides is an ebb and flow practice. It’s a dance with the plants as they jump up and are with us. So if I want chimichurri sauce in winter I still make this but with available fresh or dried ingredients, and work with dried Wild Bee Balm (crumble and remove any stems). It freezes decently if you add a little lemon juice to help hold the color but it's always best made fresh and eaten straight away.
Seeing Wild Bee Balm waving on the breeze always inspires me to make a batch (or three). Condiments like this within a meal bring vital nutrients into the body and intense flavor bursts that not only spice up a simple meal but also stimulate our digestive enzyme production which begins in the mouth. Immune responses become sharp and efficient with this chimichurri in the belly too! Remember the immune system does our daily house cleaning of maintenance and repair, but also steps up fast for the intense calls to make deep or swift changes, some of which can take time. We choose our medicine in support of what the body is already trying to do. We just nursed grandpa back from a serious viral invasion by feeding him this each day once he arrived and near collapsed all pale, dizzy, coughing, and nauseated. First we put him to bed early with a healthy dose of homemade bitters and then started feeding him this in the morning with fresh bread, greens and eggs. He loved it, rallied fast, and went home well as if nothing happened.
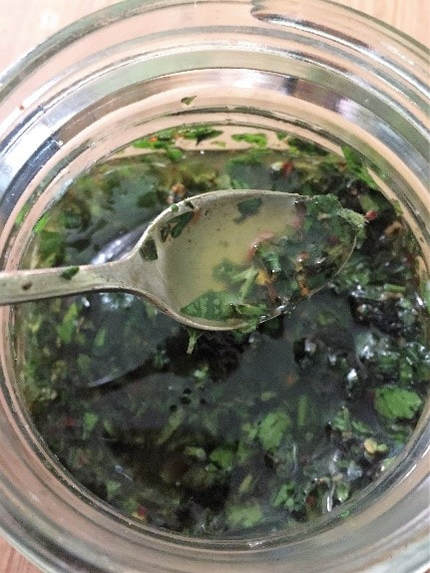
THE RECIPE: Wild Bee Balm & Onion Chimichurri Sauce
INGREDIENTS:
INSTRUCTIONS:
Optional Additions: Sprinkle in the bee balm flower petals if available with the last stir and serve with fresh ones on top. Yes, Wild Bee Balm flowers are edible, easy to eat right in the field, and gorgeous in salads or as edible garnish.
Enjoy xo-Jen
- 1 bunch or fresh picked Italian flat leaf parsley to yield roughly 2 lightly packed cups
- Small handful of onion grass leaves, chives, garlic chives, or scallions with bulbs (2-3)
- 1/4 cup fresh wild bee balm leaves and flower petals (young tips are the best) OR 1 tablespoon dried bee balm, crumbled, stems removed.
- I/4 cup fresh oregano leaves - just double if you don't have Bee Balm
- 1 teaspoon crushed red pepper flakes, or more to your taste
- 2-3 cloves garlic pressed or finely minced
- 1/2 teaspoon sea salt, or more to taste
- 1/8 teaspoon black pepper, or more to taste
- 1/2 cup extra virgin olive oil (you can substitute another oil if you like)
- 3 tablespoons apple cider or balsamic vinegar
- 1 teaspoon finely grated lemon or lime zest
INSTRUCTIONS:
- Mound the parsley, bee balm, scallion / onion grass, garlic, and red pepper flakes on a cutting board, and mince together with a large chopping knife. Keep chopping in all direction, gathering it up as it spreads out and work to a minced consistency. (Yes, you can toss it all in the food processor and pulse while scraping down the sides intermittently.)
- In a bowl, combine the minced mixture with the salt, black pepper, zest, vinegar and oil and mix to combine.
- Let sit for 20 minutes to allow the flavors to blend and then taste and adjust seasonings if needed. Transfer to a container with a tight fitting lid and refrigerate until needed.
- The sauce tastes best the day it’s made so make small batches and use up. Bring to room temperature for serving as the oil solidifies when in the refrigerator.
Optional Additions: Sprinkle in the bee balm flower petals if available with the last stir and serve with fresh ones on top. Yes, Wild Bee Balm flowers are edible, easy to eat right in the field, and gorgeous in salads or as edible garnish.
Enjoy xo-Jen
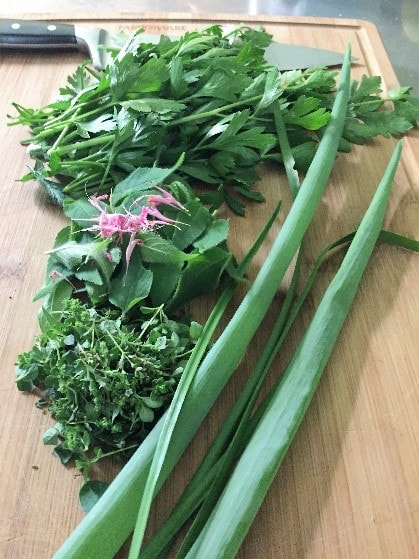
Jennifer Costa, Herbalist-RN, Teacher, Botanist BS, EM-CST, and Founder of ElderMoon School of Herbs & Earth Medicine
Categories
All
Classes
Decoctions
Food As Medicine
Healing Broths
Herbal Vinegars
Herbal-vinegars
Holidays And Festivals
Infusions
Medicine Making
Plant Profiles
SCIENCE!
Skin Care
Syrups
Teas
Tinctures
 RSS Feed
Archives
January 2023
September 2020
February 2020
September 2019
April 2019
January 2019
July 2018
June 2018
May 2018
April 2018
March 2018
February 2018
January 2018
December 2017
November 2017
August 2017
July 2017
April 2017
March 2017
January 2017
December 2016
November 2016
October 2016
September 2016
August 2016
July 2016
June 2016
April 2016
March 2016
January 2016
December 2015
November 2015
October 2015
August 2015
July 2015
May 2015
March 2015
January 2015
December 2014
November 2014
October 2014
September 2014